Your kitchen backsplash is a great area in your home to showcase your style and personality. Use the links below to learn more about kitchen backsplashes!
What Is a Kitchen Backsplash?
A kitchen backsplash is designed to protect your kitchen walls from common kitchen liquid and food splatter. They also allow homeowners to add some style and personality to their kitchen.
A backsplash is typically installed directly behind the countertop and stove, where splashes are common. The height and length of your kitchen backsplash will depend on your budget, design, and overall look you want in the kitchen. Some backsplashes will only be four inches high, which protects the wall behind the countertops from water when something spills. Most backsplashes rise up to where the end of the cabinet. Others can go all the way to the ceiling for the full “tiled look” effect.
How to Tile a Kitchen Backsplash
- Measure the backsplash area and select your tile: Designate exactly where you will be installing your backsplash and measure the area. Select your backsplash tile style based on your measurements and purchase the correct amount to cover the area measured. We recommend purchasing extra tile, as you may need additional pieces for gaps.
- Prepare to install: Remove all items from your countertops and protect your countertops with a plastic covering or cardboard. Make sure to unplug all countertop appliances and turn off the electricity that goes to the area you will be working on. Remove all the outlet covers and clean the walls with a mild soap.
- Mark where you will be placing the tile: Make sure the tile is level and even. Depending on where you are starting, you may need to cut the tile to make it fit.
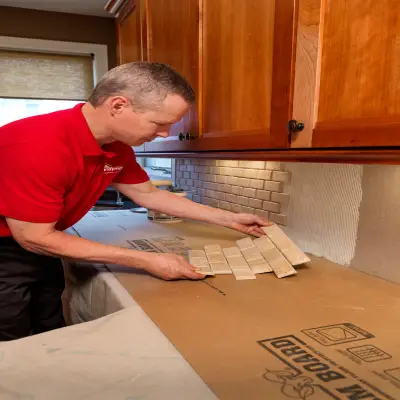
- Apply the backsplash mortar and install the tile: Mix your mortar in a bucket based on the directions and apply a thin layer to the wall(s). After you mix the mortar, you will have a limited time (approximately four hours) before it hardens. Apply and press the tile to the surface. Don’t apply mortar to the entire wall; work in small sections to prevent it from drying out before the tile is installed.
- Dry and pre-seal the tile: After successfully placing all of the tile, let it dry completely over 24 hours. Once it has dried, to prevent staining, apply a tile sealer if the manufacturer requires it. Let it dry and wipe it down with water and a sponge a few hours before grouting.
How to Grout a Kitchen Backsplash
After the tile has been prepared, laid, cleaned, sealed, and wiped down, the next step is to grout the kitchen backsplash:
- Mix the grout: After one last clean of the tile with a sponge, you will need to prepare your grout. There are a few varieties of grout you can select. For thicker tile, consider a sanded grout; for thin tile, consider a non-sanded grout. Follow the directions to mix your grout; however, most mixes are blended with water and then need 10 or so minutes to thicken.
- Grout the tile: Use a grout float to apply the grout to the tile, wiping off any excess grout that didn’t fill the grout lines as you go; work in smaller sections like you did with the mortar. Apply it at a 45-degree angle with the float. Since grout cure times vary by manufacturer, always refer to their instructions. Generally. wait a few hours after application and wipe off any grout that got on the tile with a wet sponge. This gives the grout between the tiles time to dry. Make sure to constantly re-wet and wash the cloth to get rid of excess grout that has gathered on the sponge.
- Seal and clean the tile: Once the grout has dried (drying time varies on the type of grout and tile used and will take 24 hours minimum), apply a sealant to the grout to protect it from future staining. Give the tile one last clean with a non-acidic cleaner. Put your appliances and outlet covers back and turn the electricity back on.
Backsplash Repair or Replacement
If your backsplash is chipped or needs to be replaced, our experienced handymen can help. Depending on the damage, we’ll make an evaluation and help you decide the next best step. If that means repairs, we’ll make it look like nothing ever happened. If you need your backsplash replaced, we’ll take care of the entire process from start to finish.
Professional Backsplash Installation
As America’s most trusted handymen, you can count on us to do the job right – and do it right the first time. Our residential handyman services are designed to take items off your to-do list so that you can sit back and enjoy your home. Just give our professionals a call to discuss your ideas for your kitchen.
 Click to call