Installing and Painting Crown Molding Tips and Techniques

Crown Molding Tips & Techniques
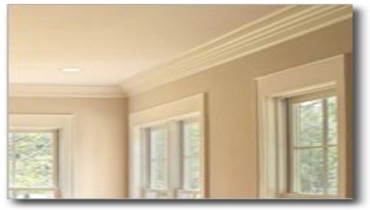
Crown Molding enhances the character of any room.I'd like to try installing some crown molding in my bedroom. I've never done anything like that before, but I'm ambitious! Can you offer some tips?
A beginner should start with a nice square room; a room with a lot of angles can make the job complicated. There's a lot to learn, but I can give you some basic information.
First, decide what type of molding you want. For a more formal room, two-piece molding looks especially nice. However, one-piece crown molding should be ample for a bedroom and give it a nice finished look. Your local home improvement store will carry a variety of moldings. Choose carefully to avoid warped or damaged pieces. A pre-primed molding will save you painting time. If you want stained (not painted) molding, a (more expensive) stainable molding is available.
You can find crown molding in 8', 12' and 16' lengths. When possible, you want one piece to run the entire length of the room. Trying to save money by piecing together short lengths is not a good idea, as it can be difficult to hide the joints. To make things easier, you can buy decorative corner pieces to minimize the angled cuts you would otherwise need to make. Guests will think that you went with the corner pieces because they look fancy, but you will know the truth.
Before installing the molding, apply a couple of coats of semi-gloss paint that matches the rest of the room's trim. If you aren't using pre-primed molding, apply the primer first. It's not fun to paint molding once it is hung high on a wall, so you will want to minimize the amount of painting to be done at that time.
You'll need a power miter saw to cut the correct angles. Don't try to struggle with a handsaw or a wooden miter box. It will be too aggravating. It's relatively inexpensive to rent power equipment-your cuts will be smoother, too.
Use finish nails (such as 2" 8d nails) to secure the molding to the wall. Install them about 1/2" from the edges, through the molding and into an existing wall stud. For the ends of the molding, drill pilot holes before nailing in order to reduce the likelihood of the wood splitting. You can buy a small tool that allows you to sink the nails below the surface. Fill the holes carefully and apply a final coat of paint. You will probably also need to caulk in various spots because walls are seldom completely flat or perfectly angled. Later, as the house settles with the change in seasons, you may need to caulk again.
Contact Mr. Handyman
To learn more or schedule one of our professional handyman services, contact Mr. Handyman today!
 Click to call


