Mr. Handyman explains how to repair and refinish laminate cabinets for a refreshed look.
|
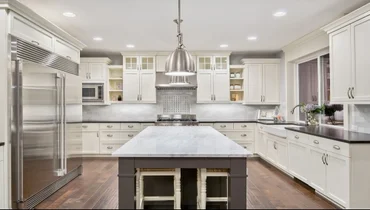
Painting Laminate Cabinets to Look Like New
A common misconception is that your laminate cabinets are stuck looking outdated, only to be solved by purchasing expensive new cabinets. Not true! With some paint, sandpaper, and maybe some trendy pulls, your tired old cabinets can look stylish and new.
What You'll Need
- Sandpaper (240 and 150 grit)
- Disinfectant spray (Clorox Antibacterial, Ajax, 409 or equivalent)
- Drop cloths or old sheets
- Microfiber cloth and a clean rag
- Water-based primer
- Water-based paint
- Two foam rollers and rolling pans
- Masking/painter's tape
- Permanent marker
- Optional: New handles and hardware for an updated look
Don't think you have the time to refinish your cabinets on your own? Before you begin, make sure your cabinets aren't peeling or cracked. If you find some cracked laminate, you'll want to replace the laminate (if not the entire cabinet face). If an area is only peeling, sand behind the exposed corner and reattach it with waterproof adhesive, using masking tape to hold it in place until dry.
Step-by-Step Guide to Refinishing Your Laminate Cabinets
- Remove the cabinet faces from the base and any exposed hardware, using your permanent marker and masking tape to label the hardware's location.
- Lay the cabinets on a level surface with the edges accessible and cover your surroundings with drop cloths or old rags.
- Use your painter's tape or masking tape to line the inside edges of the cabinets to prevent paint from dripping.
- With your clean rag and cleaner, scrub down the paintable areas of your cabinets with warm water. Clean surfaces promote stronger primer adhesion for a more consistent finish.
- After your cabinets have dried, sand them with 240-grit sandpaper and wipe them down with your microfiber cloth to remove as much dust as possible.
- Apply a water-based primer with your foam roller.
- After the first primer coat has dried, sand with 150-grit sandpaper.
- Apply a second coat of primer and sand again with the 150-grit paper, making sure to wipe away any debris.
- Grabbing a water-based paint of your choice, use your foam roller to paint the cabinet faces in a V-pattern.
- Let the first coat dry and repeat. Wait three days before reattaching the cabinets to ensure the paint hardens.
Pro-tip: Consider replacing the handles for an updated look. To minimize costs, visit your local resale furniture store, many of which have large selections of hardware.
Contact Mr. Handyman
Let your local Mr. Handyman lend a hand - from cabinet repair to cabinet installation, we do it all! Contact your local Mr. Handyman today for an estimate on your next home improvement project.
