Mr. Handyman explains how to replace standard light switches with rocker panel switches for a modern look.
|
Replacing toggle switches with rocker-panel switches is an easy and inexpensive visual upgrade with an added benefit. Rocker switches are much easier to use for people who suffer from arthritis. In this blog, we will show provide some DIY tips on how to replace light switches and do a rocker switch upgrade.
Step 1
Turn off the power to the switch by going to your fuse box and either removing the fuse or turning off the circuit breaker feeding power to the switch. (After this has been done, we highly recommend that you try flipping the switch to ensure the electricity has been turned off.)
Step 2
After removing the exterior screws on your old cover plate, use a flathead screwdriver to remove it from the wall. You may see a paint ring after removal, which isn’t uncommon. Be careful when removing the cover plate to prevent damage to the wall itself. Once the outlet cover has been removed, remove the screws at the top and bottom of the switch that holds the switch to the electrical box. (Side note: Keep all of your screws in one place. You do not want to lose screws during this process!)
Step 3
After setting your screws to the side, carefully pull the switch out from the electrical box. Once you’ve pulled out the switch from the box, check the wiring for condition and proper markings. Single pole switches are always connected to two hot (black-colored) wires. In some instances, you might find a white wire with the end taped black. This indicates that it is serving as a hot wire. If you find a white wire connected to the switch, chances are the previous electrician didn’t mark the wire and it should be marked as a black wire.
Step 4
The easiest way to disconnect the old switch is to cut the old wires. Be careful when doing this as you have to leave yourself enough wire to attach the new switch. Once the old switch is disconnected, make sure to strip about 3/4" of insulation away from the black wires. Make sure the switch is aligned to the top. Switches are typically marked "TOP" or it will have a brass plate or some type of noticeable marking. (In the event the switch box wiring has a bare ground wire, connect it to the green terminal screw on the switch.)
Step 5
After connecting the two hot (black) wires to the two brass terminals on the new switch, install it back into the electrical box. Once this is completed, attach the switch to the box with the two long screws at the top and bottom of the switch.
Step 6
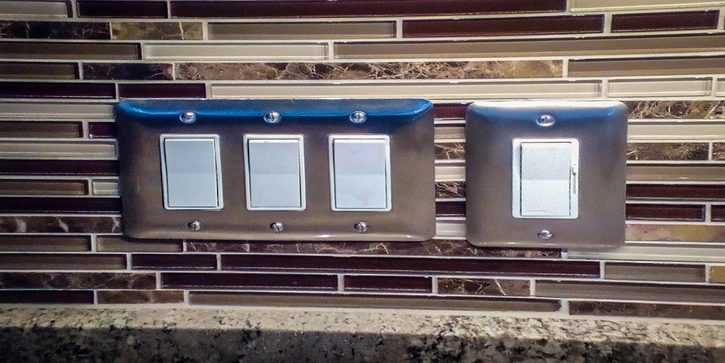
After the new switch has been installed, test fit the new cover plate. The new plate may not completely cover gaps in the wall or existing paint ring marks. If that is the case, you can go to your local hardware store to get either a “preferred” or “oversized” outlet cover plate.
Do you think replacing your light switches is too tall of a task? Contact your local Mr. Handyman by calling or request service in your Remember, DIY doesn't mean you have to do it all by yourself!
