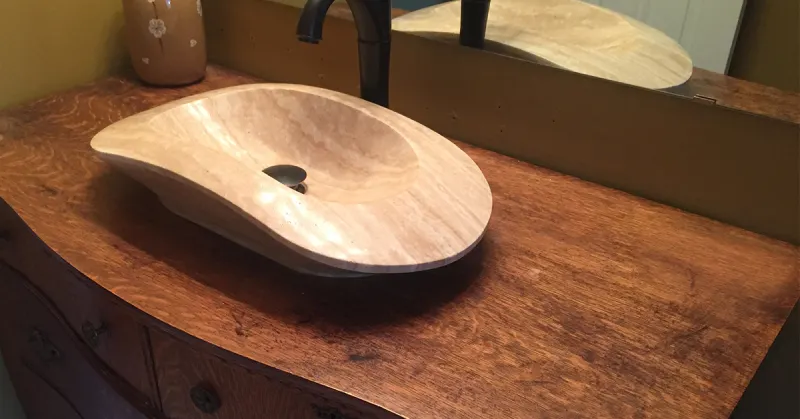
Turn a Dresser Into a Handsome Bathroom Vanity

Big box home improvement stores carry a number of bathroom vanities which are perfectly functional, come in a wide variety of colors and sizes, and can be found in nearly every home across the nation. What they lack, is style. Whether you're looking for something more than just function, are wanting to showcase your personal style, or prefer to think outside the big box, a dresser vanity may be the perfect solution for your bathroom remodel. Here are some great tips on how to turn a dresser in to the vanity of your dreams, that you can enjoy for years to come.
Tools You'll Need:
- Handsaw or trim saw.
- Saw or tool with a flush cutting blade.
- Jigsaw.
- Straight edge or square
- Wood glue
- Strong adhesive
- Silicone adhesive
- Silicone caulking
Step 1: Find a dresser you love.
If you don't already have a cool vintage dresser, scour garage sales, second hand, or antique stores, or flea markets until you find one that fits the dimensions of your space, is the right height, and will provide enough storage and counter space for your needs.
Step 2: Choose your counter top, sink, and fixtures.
A solid wood top which has been heavily oiled, waxed, or painted, can work in low traffic bathrooms, but consider installing a more water resistant top such as marble, quartz, or granite for all other bathrooms.
Step 3: Cut the sink hole.
Have the new dresser vanity top professionally cut to fit the dimensions of your dresser, with a cutout for the sink, and use it as a template to trace a hole in the wood top. Remove your new top, along with the drawers and set aside. Use your jigsaw to cut a hole in the top of the dresser.
Step 4: Modify the drawers.
Remove the top drawer, and use a hand, or trim saw to cut off the sides and bottom, leaving only the drawer front. For the lower drawer(s) choose from the following options, both of which will provide storage:
- Measure, and make a cutout in the lower drawer to further accommodate plumbing and the sink basin, and cut and fit new internal sides.
- Remove the back panel of the drawer, and bring it forward, shortening the width of the drawer. Trim the base as needed to accommodate plumbing.
Step 5: Reattach the top drawer face.
Using L-shaped braces, permanently attach the top drawer with wood screws, and insert the lower drawer back in to the dresser.
Step 6: Install your counter top.
Use a strong adhesive suitable for your counter top material, and align in place.
Step 7: Install the sink.
Dry fit the sink before applying a bead of silicone adhesive on the perimeter of the underside, and pressing in to place. Apply caulking along the outer edge to seal.
Step 8: Attach the plumbing.
Set the vanity in place, and attach and connect the plumbing, or call your local Mr. Handyman for assistance.
If you love the look and feel of a dresser vanity, but lack the tools, or the time to complete the project, call your local Mr. Handyman. Our skilled, experienced team of professionals can perform a wide range of home maintenance and repairs, and all work is backed by our exclusive Neighborly Done Right Promise™.
 Click to call


