Mr. Handyman explains when to recaulk your bathroom for optimal maintenance.
|
Depending on your personal preferences, your bathroom may be designated as a solely utilitarian space, or a relaxing oasis filled with scented candles and fluffy towels. Regardless of how you use this space, there are many elements that need to be maintained to ensure the proper safety and function of the room, including bathroom caulking. The question is: How do you know when it's time to recaulk your bathroom?
What Is Caulk?
Caulk is a thick, flexible, adhesive material that acts as both a glue and sealant. It is applied along exposed joints, using a caulking gun and cures as it dries. Caulk can be used in many ways throughout the bathroom, such as:
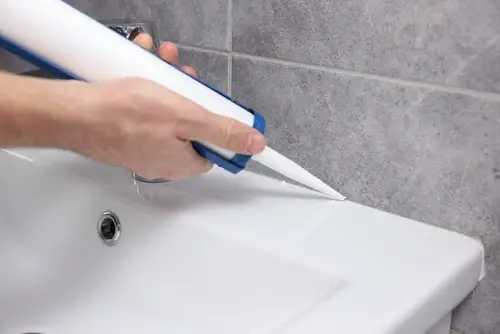
- Around sinks and faucets
- Along the top of the tub where it meets the tile/tub surround
- Where tile meets the ceiling
- Along the top of a tub surround
- Along the joints of a tub surround
- Around shower heads and bathtub faucets
- Along the bottom of the tub where it meets the floor
- Along the top of the vanity where it meets the backsplash
- Where the top of the backsplash meets the wall
There are multiple types of caulk available, though not all kinds are suitable for use in the bathroom. Mr. Handyman recommends one that is mold and mildew resistant and designed for use with the materials in a bathroom such as ceramic tile, or a fiberglass tub or enclosure.
How Long Does Caulk Last?
As a general rule, caulk should last approximately five years. There are a number of variables that will determine the actual length of time between replacement, including:
- Type and quality of caulk used
- Application process
- The condition of the surface when it was applied
- Humidity levels
- Pre-existing mold or mildew
- Cleaning practices
Signs It's Time to Recaulk Your Bathroom
Regardless of the quality of materials you choose or how careful you are with your application, your caulking will eventually need to be replaced, but how do you know when it's time? Watch for these signs:
- Mold or mildew beneath the surface of the caulk, indicating water leakage
- Caulk is older than five years
- Dried out or cracked caulk
- Peeling or missing caulk
If caulking begins to peel or deteriorate within 12 months of applying it was likely not intended for use in the bathroom.
How to Replace Bathroom Caulking
- Gather your supplies:
- Razor scraper
- Single-edged razor blades
- Utility knife
- Paper towels
- Mineral spirits
- Caulk remover
- Kitchen and bathroom caulking
- Caulk gun
- Strip the old caulk using a utility knife being careful not to damage surrounding materials. Use caulk remover for stubborn areas, scrape, and wipe with a rag.
- Remove any loose grout, treat or remove visible mold, clean the finished area with mineral spirits, and let dry thoroughly.
- Insert caulk into the caulk gun and cut the tip according to package directions.
- Apply a thin bead of caulk.
- Use a wet finger, smooth the caulk as needed.
- Use a damp rag and wipe away any excess caulk.
- Allow the caulk to dry for 24 hours before bathing, showering or exposing caulk to wet conditions.
Many home projects can be completed by a homeowner, and some tasks should be heavily considered first if incorrect prep and application could cause issues. Caulk projects in a bathroom should be completed by someone experienced to prevent water damage and mold growth.
Looking for some help with repair, maintenance or improvement projects around your home? Contact your local Mr. Handyman to request service, or call today!
