Jul 06 2026
Your deck must be well-maintained and protected to withstand the harsh elements that Mother Nature throws at it.
Learn more
Your deck must be well-maintained and protected to withstand the harsh elements that Mother Nature throws at it.
Learn more
If you’re planning to replace just a few windows or want to do some maintenance on the ones you have, the window experts at Mr. Handyman® have some helpful window caulking advice.
Learn more
A fresh coat of paint can completely change how your home looks—and how it feels to live in it. In this guide, we’ll walk you through five clear signs
Learn more
Thinking about upgrading your kitchen cabinets? Smart move. A new set of cabinets doesn’t just change the look of your kitchen—it changes the energy of your home
Learn more
Screen doors have a way of taking life’s little hits—kids running through, pets pawing and clawing, and weather wearing down the mesh.
Learn more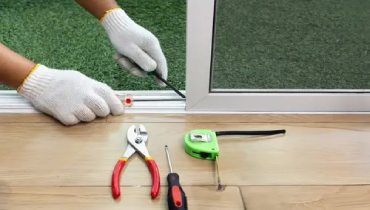
Prevent water damage by safely clearing downspouts. Mr. Handyman's creative tips will help unclog them before it's too late.
Learn more