Mr. Handyman explains how to build a floating deck with ease.
|
|
Build Time |
Build Complexity |
Build Cost |
||||||
|
1-2 days |
Intermediate |
~$1,500 for a 150-square-foot floating deck |
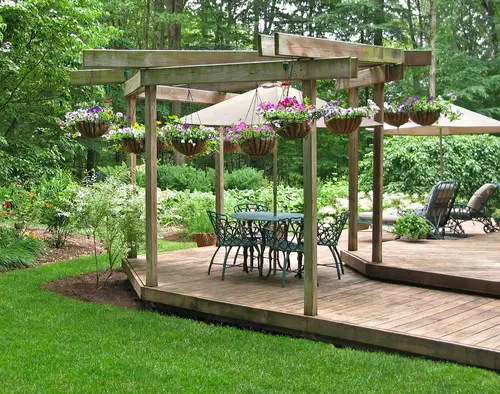
Building a floating deck is a great way to use your backyard, giving you and your family a space to kick back and relax. Unlike traditional decks, Floating decks are not attached to a building and instead "float" above the ground; people also refer to them as grade-level decks since they're built just above the grade (a technical word for the ground).
The simplicity of their design and construction makes building a floating deck possible for DIYers with the right tools and knowledge. We'll explore the advantages of building a floating deck and the codes and regulations you need to know. If you run into trouble or need assistance, a local deck and patio construction professional is only a call away.
Advantages of Building a Floating Deck
A floating deck offers numerous advantages compared to traditional pier-supported decks. Here's why building a freestanding deck is more straightforward to build and less expensive:
- Floating decks don't require frost-depth footings because the deck blocks sit on top of the soil.
- Deck blocks allow homeowners to build a floating deck on uneven ground.
- Because there is no digging or excavating, you'll spend less on materials and equipment, skipping the back-breaking work.
- You won't need to buy concrete, mix it, or clean up the mess after the build.
- You won't risk hitting a sewage pipe or service cable by digging holes for the piers.
- There's no need for handrails since the deck is close to the ground.
- Because a floating deck is ground level, repairing and maintaining it is convenient and relatively easy.
A floating deck is easy to build for DIYers with the right tools and knowledge. It's also easy to care for and has built-in mobility because it can be disassembled and hauled—try that with a conventional deck!
Pro Tip: If you have an existing deck in poor condition, you may not have to build a new deck from scratch—deck repair services may be a better option.
Floating Deck Codes and Regulations
Another benefit of a floating deck is that you might not need a permit to build it. You likely won’t need a permit for your floating deck if your project meets the following criteria:
- The deck takes up fewer than 200 square feet.
- The deck is not more than 30 inches above the ground.
- The deck is not attached to your house.
- The deck is not in front of an egress door.
However, always check your local building codes first to ensure compliance. You can also contact a service professional for information on whether you need a building permit and to ensure that your deck is constructed to code. You don’t want to risk putting up a deck only to have to dismantle it later and possibly even pay a fine.
What Do I Need To Build a Floating Deck?
Whether you're building a floating deck yourself or hiring professionals, most of the cost to build a deck lies with material prices. For those with the tools and knowledge to build a floating deck on their own, here is an essential list of building supplies to get started:
The base
You can use gravel, pavers, sand, and other materials to create a stable base for your deck blocks and deck. Ensure your base is installed with drainage in mind to prevent pooling, which can create significant problems.
Deck blocks
Deck blocks are preformed composite blocks that support the sub-frame. They fit the most common joist and post sizes and keep your new deck away from ground moisture.
Framing materials
The sub-frame for your deck requires framing lumber for moisture-resistant posts and joists. Even with the clearance of the deck blocks, the proximity to the ground calls for extra protection.
Decking materials
Your new deck will endure a lot over the years, so choose your decking material wisely. Don’t try to save a few pennies by using materials that won’t last, as you’ll need to replace those much sooner, and it will cost you more in the long run. Inexpensive materials can also break easily, leading to safety concerns for your family. Choose quality materials that last longer and provide better security against breakage.
Many kinds of lumber, such as redwood and cedar, are suitable for outdoor structures. You can also use pressure-treated lumber or Southern yellow pine for the decking. Composite decking material is also popular thanks to its durability and low maintenance. It won’t bend, crack, splinter, or warp, which are more reasons homeowners love it.
Always use pressure-treated lumber for building a floating deck frame. If you can find ground contact pressure-treated lumber, that’s even better. The extra processing these building materials undergo protects them from moisture deterioration, an additional threat because floating decks are so close to the ground.
Pro Tip: Consider installing a fence and gate around your property or deck to keep your backyard private and children and pets safe.
Fasteners
The size and construction of the deck screws will depend on the construction material of the deck boards, their thickness, and other factors. Always buy high-quality deck screws, or you could see all your hard work slowly unravel. You'll also need a box of galvanized nails for the joist hangers.
Joist hangers
Small but mighty joist hangers connect the deck joist to the rest of the sub-frame. They help the joists support the weight above and evenly distribute it for a robust and secure foundation.
Tools
Having all the correct materials will only help if you have the proper tools. You should have the following tools before you begin building a floating deck:
- Tape measure
- Circular saw
- Drill and drill bits
- Level
- Shovel
- Rake
- Safety glasses
How To Build a Floating Deck in 7 Steps
Building a floating deck can be difficult, but if you've got the tools and knowledge, it's possible to DIY the build. We'll walk you through the building steps, including clearing your deck area, laying out deck blocks, building and positioning your deck frame, leveling your deck, securing the boards, and weatherproofing your work.
1. Clear the deck area
You'll need to clear your new deck area of any existing debris to get started. You want the build surface to be flat and level so your brand-new deck isn’t out of kilter. We recommend using a rake to make the surface nice and flat, then laying down landscape fabric over the dirt to prevent future weed growth and allow for better rain drainage.
2. Lay out the deck blocks
Once your build surface is flat and level, you can begin laying out your deck blocks. Place a deck block at each corner of your new intended deck and around the edges for additional support. Remember to add a central deck block to prevent your deck from sagging over time and ruining your next deck party. Use a level to ensure each block is even.
3. Build the deck frame
Begin by cutting the wood boards (joists) using your circular saw; cut them each to the proper length based on the size of your deck. Lay out the wood and drill pilot holes at each corner—you'll connect the corners using deck screws at these locations. Once you have the surrounding frame constructed from four pieces of wood, add a couple of joists to the inside of your frame to keep it stable during the next steps.
4. Position and level the deck frame
If you were building the deck frame on the grass, move it over to your deck blocks; if you were already building it over the deck blocks, you’re ready to go. Double-check with your level that the entire deck is parallel to the ground.
5. Install the remaining joists
Once you’ve positioned and leveled your deck frame, it’s time to install the remaining joists. You should already have a couple of joists installed at this point, as they helped support the deck frame when you moved it. To ensure the surface of your deck is flat, confirm that the joists are installed flush with the tops of the surrounding frame joists.
6. Secure the deck boards
You've done some of the most challenging work so far; now it's time to secure the deck boards to your frame. With your frame finished, grab your deck board wood and your drill. Lay out your board wood on the deck, then drill pilot holes to prep them for permanent installation—we recommend installing them approximately 1/8 inch apart. Use deck screws to secure them into position, using one screw at the end of each board.
7. Weatherproof the deck
Once your deck is assembled, you'll want to use a protective deck stain or sealer on the wood. Coat the entire deck with the stain or sealer and let it dry completely before stepping on it. If you don't install a sealer, you'll likely find your wood breaking apart and changing color within months, so be sure to protect your hard work. You’ll also want to restain your deck at set intervals.
Pro Tip: If you have older individuals utilizing your floating deck, you may want to consider installing handrails and stairs for increased accessibility.
How Much Does It Cost To Build a Floating Deck?
You'll likely spend $20 to $60 per square foot building a floating deck if you hire a service professional. If you DIY a deck around 150 square feet, you'll probably spend closer to $10 per square foot. However, the cost to build a deck will vary depending on various factors, including where you live, the size of your floating deck, and what materials you use.
Pro Tip: Utilize our deck-building materials calculator to get a better estimate of the costs associated with building your new deck.
In particular, the lumber you use will significantly affect your cost. The price per square foot of composite wood is about a third of what you'll pay for redwood; pressure-treated lumber will cost much more. Redwood can cost up to $35 per square foot, while composite may only cost you around $10 per square foot.
5 Tips for Building a Floating Deck
Building a floating deck can be challenging, and we want to ensure everything goes smoothly. Here are a few tips to consider before constructing your new floating deck.
- Check your city’s building codes: While there are general building codes for construction across the United States, many local areas have specific building regulations. Be sure to check with your local municipality before beginning construction.
- Use proper ventilation: When building a floating deck for your home, be sure to allow for proper ventilation. Your new deck must be adequately elevated above the ground (at least a few inches) to prevent mold growth and keep your deck in top condition.
- Use landscape fabric: If you want to avoid weeds growing through the cracks of your new floating deck, use landscape fabric. This cloth laid over the dirt under your deck prevents weeds from growing and allows for proper drainage.
- Finish with a protective deck stain: Your floating deck may be beautiful when installed, but if you don't finish it off with a protective deck stain or seal, you'll see its shine fade over time. You’ll also want to winterize your deck during cold months for additional protection.
- Add center blocks: If you're building a floating deck, consider adding center blocks for additional stability. Without center blocks, your deck may sag over time.
Get Help Building a Floating Deck
Building a floating deck requires significant knowledge and the right tools, so you may get it wrong the first time around. Save time and money by looking to service professionals instead.
When you hire Mr. Handyman® for floating deck installation, you get a professional carpenter with an average of 10 years of experience. You also get the Neighborly Done Right Promise® for peace of mind and guaranteed professional results—find your local Mr. Handyman today.
This article is intended for general guidance only and is not applicable to every situation. You are responsible for determining the proper course of action for your property and situation. Mr. Handyman is not responsible for any damages that occur as a result of advice and/or guidance derived from its blog content. Some Mr. Handyman services vary by location. Contact your local Mr. Handyman franchise for more information.
FAQs About Building a Floating Deck
For over 25 years, Mr. Handyman professionals have been helping homeowners and businesses repair, maintain, and enhance their space. We are a one-stop solution for everything on your to-do list. This includes answering your questions about home repairs, maintenance, and improvements. Here are answers to some of your most frequently asked questions on how to build a floating deck.
What is a floating deck?
A floating deck is a freestanding platform that isn't attached to a structure or anchored below the frost line. It's called "floating" because it rests just above ground level, typically on concrete deck blocks. Floating decks are popular and relatively inexpensive options for adding a distinct space to backyards; they’re perfect for patios, barbecues, pool areas, and more. As non-permanent structures, floating decks offer a great deal of flexibility in placement, storage, and transportation (depending on the size and materials). Learning how to build a floating deck opens the door to a rewarding, DIY-friendly project that will greatly enhance your outdoor space.
Do I need a permit to build a floating deck?
Floating deck building codes vary by location. In many areas, decks under a certain height (typically 30 inches) don’t require a permit. However, if you're adding railings, roofs, or raising the height, local codes may apply.
Can you build a floating deck on uneven ground?
Yes, but you’ll need to level the base area before you begin. While learning how to build a floating deck, you'll quickly learn that stability is key. On rough but relatively even ground, add gravel to create a flat, supportive foundation. If the ground features a natural slope that can’t be smoothed away, you can adjust the deck block heights; however, building on a slope may introduce a safety risk and you should consider a professional assessment.
How long does it take to build a floating deck?
Handy homeowners may be able to build a DIY floating deck in 1–3 days, depending on size, materials, and experience level. Pros can usually complete builds faster, especially for larger or more complex layouts.
Are floating decks safe?
Yes—when built with quality materials and sound craftsmanship and in accordance with floating deck building codes, floating decks are generally safe and durable. However, certain considerations, like using pressure-treated wood, ensuring level placement, and following spacing guidelines, are essential for a secure build.
Can I attach a pergola or railing to a floating deck?
You can, but check your local floating deck building codes. Attaching heavy structures to a floating deck may require additional anchoring or permits, even if your deck is on ground level.
Is a floating deck cheaper than a traditional deck?
Your floating deck cost will almost certainly be lower than that of a traditional deck since floating decks don’t require footings or ledger boards. If you opt for a freestanding instead of an attached deck, you’ll likely save on materials, tools, and labor—especially if building it yourself.
What’s the tallest a floating deck can be?
In most areas, decks under 30 inches don’t require permits. Anything higher may trigger floating deck building codes involving railings, deeper supports, or inspections.
Can I build a floating deck myself, or do I need a pro?
Many homeowners do! If you know how to build a floating deck and are experienced with the tools, design, placement, and labor required, you can certainly DIY a floating deck. But, if you lack expertise, want a more complex layout, or just want additional peace of mind, a local professional with extensive experience can make the job much easier.
For more project tips, explore our home improvement blog.
