Mr. Handyman guides you on building an owl house to attract helpful birds to your yard.
|
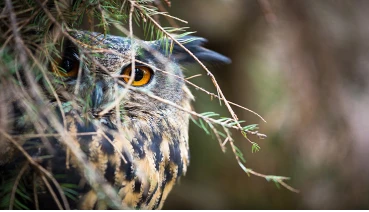
The owl, a subject of myth and legend since ancient times, remains a sage and majestic creature in our psyche. Its trilling hoot evokes moonlit summer nights and tranquil forests. Beyond its mystic image, though, the owl is a vital part of urban and suburban ecosystems.
Owls are prevalent across much of North America. Worldwide, there are more than 200 owl species, and the United States is home to 19 of them. According to the National Audubon Society, some owl populations have fallen or are at risk due to destroyed habitat. One way to reverse the trend is to create a safe place for owls to raise their young.
Learning how to build an owl house doesn’t just help owls. It’s a great project to do with kids that provides hands-on building experience and instills an appreciation for nature.
Do We Want to Attract Owls?
Owls directly benefit homeowners – especially farmers and gardeners – by reducing pest populations and repelling other animals. Their diet consists of insects, mice and other rodents. A pair of barn owls will eat four to eight rodents a night. Their presence is also a deterrent to skunks and rabbits, which often destroy garden plants and flower beds. (For double-duty pest services, learn how to build a bat house, too.)
Another reason to draw owls to your yard? They’re fun to watch! Although they are elusive and nocturnal, your night owl tenants can be seen in action with a strategically placed trail cam.
Basic Owl House Instructions
Learning how to build an owl house is not difficult. Before you begin, research what types of owls are common in your area and decide what type you hope to attract. One of the easiest owls to attract – and one of the smallest at 10 inches long – is the screech owl.
These instructions are geared toward screech owls, but you can adjust the size for larger species …
Tools and Materials:
- ¾-inch plywood sheet, (pine)
- Drill
- Hole saw
- Screwdriver
- 2-inch galvanized screws (24)
- Saw
- Chisel
- Tape measure
- Brass hinges with screws and washers (2)
- Bark mulch
- Water-based stain
Steps:
- Cut wood to use for the front, back, sides, roof, and floor of the owl house:
Front 7.75" W x 16.75" L
Back 7.75" W x 32" L
Sides 2 pieces, each cut to 8" W x 19.5" L
Roof 11.5" W x 12" L
Floor 7.75" W x 8.5" L - To ensure proper drainage, drill 6-8 holes, evenly spaced and ½-inch diameter, in the floor piece.
- Drill 2 ventilation holes, ½-inch diameter, about one inch from the top of each side piece.
- Use hole saw to create an entrance hole in the front piece. The rounded entrance should be approximately 3-4 inches in diameter, centered, and placed about 4 inches from the top.
- On the inside of the front piece, use a chisel or screwdriver to scrape 3-4 horizontal lines between entrance hole and bottom. This will make it easier for owlets to climb out and explore.
- Angle side pieces to create a sloped roof. Measure one inch down from the right corner and cut wood diagonally from that point to the left, top corner.
- Measure 7 inches from bottom of back piece. Using 3 screws per side, attach the long edges of the right and left sides to the back. (This should form a forward slope once the top is attached.)
- Screw the bottom piece to the right and left side pieces. Position about ½-inch above the bottom edge of side pieces and screw in place with 3 evenly placed screws.
- Screw front piece in place. It should be even with side pieces with entrance hole at the top. Use 3 screws on each side and 3 more on the bottom.
- Attach the top to the back piece with 2 brass hinges. Use the brass screw and washer to attach the top piece to the front piece.
- Add a ¾-inch layer of bark mulch to bottom of box. You may also want to apply a coat of non-toxic stain to provide weather protection.
How to Attract Owls to an Owl House
Just like in real estate and retail, it’s all about location. Knowing where to place an owl house improves the odds of success. Unlike birds who gather materials to build nests, owls seek hollowed-out places in trees or high crevices in buildings for shelter. Although there is no guarantee, with a little extra planning (and a lot of patience), you may find an owl family taking up residence in your sturdy, well-crafted owl house. When you see owl pellets (regurgitated skeletal remains of devoured rodents) and owl droppings near the owl house, you probably have occupancy.
Owl houses can be mounted on buildings, posts, or trees. To increase the likelihood of an owl choosing your creation as its home, follow these tips:
- Research owl habits in your region. Ideally, you’ll want to have your owl house in place a month or two before the season starts.
- Owls typically nest 10 to 20 feet high, so try hanging the nesting box where the entrance hole will be about 10 feet off the ground.
- Since owls prefer to glide directly to and from their nesting place, ensure a wide, unobstructed path to the entrance hole.
- Place the owl house away from busy roads, power lines and locations in close proximity to human activity.
- Look for places that provide ample hunting grounds and water close by. (If there’s no pond or lake, a large birdbath may suffice.) Open, grassy fields or meadows where rodents hide and sparsely wooded areas are good bets.
- Hang the owl house where there is mid-day shade. Direct sun for extended periods poses a risk for owlets. Face the entry opening away from prevailing winds and direct afternoon sunlight. Most experts recommend facing the opening northeast, southeast, or east.
- Avoid placing the owl house in locations where droppings or waste will be a problem.
- Choose a place within 100 yards of a tree line, but not directly within a densely wooded area. Owls seek nesting places where their young can safely perch but they also prefer space to glide low as they hunt.
- About once per year, between breeding seasons, the owl house will need to be cleared. Empty debris and add a fresh layer of mulch for a new season. (Gloves and dust masks are recommended for this step.)
Build the Best Owl House with Expert Help
If you want help building an owl house – or any other home repair or improvement project completed with guaranteed results – contact Mr. Handyman! Visit us online or call us today!
