Last Edited: 9/15/23
Mr. Handyman explains the plywood edge banding process to cover exposed plywood edges for a polished look.
|
Plywood is the perfect material for DIY projects. It’s accessible, inexpensive and easy to work with. The only problem is that those raw plywood edges can make your projects look unfinished. Luckily, plywood edge banding makes plywood look like real wood!
Keep reading to learn all about edge banding for plywood.
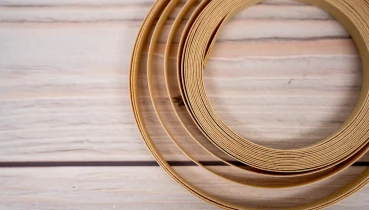
What Is Edge Banding for Plywood?
Edge banding is a thin strip of wood veneer that can be applied to the edges of plywood. Edge banding is made from real wood, so you can match it to the rest of the wood you’re finishing or even apply a stain. Once you apply edge banding, your plywood can look almost indistinguishable from real finished wood.
How to Choose Plywood Edge Banding
You can buy plywood edge banding at most lumberyards and hardware stores. It comes in a variety of wood types so you can buy a veneer for your desired look and color. Since edge banding is real wood, you can stain it to match the rest of your project.
Edge banding also comes in different widths for different plywood sizes. Since the banding will be slightly wider than the plywood, you will trim the excess off after application. Buy an edge trimmer to make this easier.
Tools and Supplies Needed to Apply Plywood Edge Banding
- Roll of plywood edge banding
- Clothing iron
- Utility knife
- Two C-clamps
- Wood block
- Edge trimmer tool
- 150-grit sandpaper
How to Apply Plywood Edge Banding
Edge banding typically comes with heat-sensitive adhesive on the back. Here’s how you can use some simple tools and a hot iron to apply plywood edge banding:
- Roll your edge banding along the length of the plywood edge you want to finish.
- Use scissors or a utility knife to cut the banding to the correct length, leaving about an inch of excess at the ends.
- If possible, clamp your plywood into a vertical position so that you can iron the edge banding on horizontally.
- Heat up your iron to the “cotton” setting.
- Holding the edge banding to your plywood edge with one hand, slowly smooth the iron down the length of the strip. Move about two inches per second – slowly enough to activate the adhesive but not so slowly that the veneer scorches.
- Use the wooden block to press the adhesive down as it cools.
- Once the edge banding is cool to the touch, use your edge trimmer to remove any excess along the length of the plywood.
- Use your utility knife to remove the excess length of banding at the end.
- Wrap sandpaper around your wood block and gently round off the edge banding.
Expert Carpenters When You Need Them
Excited to tackle your next DIY project? Learn how to make simple garage shelves with some two-by-fours with help from Mr. Handyman. For custom woodworking projects for your home, call us Mr. Handyman today or request an appointment online today.
