Mr. Handyman guides homeowners on creating accessible bathrooms for safety and comfort.
|
Did you know that more injuries occur in the bathroom than in any other part of the home? According to a study published by the National Library of Medicine, falls in bathrooms were nearly two and a half times more likely to result in injuries than other areas of a home.
Accidents have become increasingly common for people over 65 or those with disabilities, highlighting the importance of creating an accessible bathroom. This remodel not only provides independence and comfort but also acts as a preventative step against accidents.
In this post, we'll walk you through the process of designing an accessible bathroom that meets your specific needs, as well as 40 remodeling ideas and estimated costs.
Assessing Accessibility Needs for Your Bathroom Remodel
Creating a bathroom that meets accessibility needs is vital for a range of people, including wheelchair users, older individuals with limited mobility, and anyone with a disability. Before jumping into an accessible bathroom remodel, take a moment to understand your unique needs and figure out which features would best serve you or a loved one.
For instance, a roll-in shower may be best for wheelchair users, while older individuals prone to falls might prefer the convenience of a walk-in tub. And if you're thinking about aging in place, you’ll want to consider features that can adapt to your changing needs.
To help you narrow down which modifications would suit you best, consider the following questions:
- How much clearance space do I need to maneuver comfortably?
- Will I need the support of grab bars in the shower or on the toilet?
- Is a shower or bathtub more practical for my needs?
- Is the current lighting adequate for visibility and safety?
- Are there thresholds or uneven surfaces that could pose challenges?
- Are there future considerations, such as potential mobility changes, that should be factored in?
You may also want to consult your healthcare provider for personalized advice on the ideal bathroom modifications.
What are ADA bathroom requirements?
The Americans with Disabilities Act (ADA) lays out specific guidelines to ensure that public spaces are accessible to people with disabilities. While residential homes may not be obligated to comply with ADA accessibility requirements, these standards can serve as helpful guidelines for designing a more accessible home.
How To Make a Bathroom Accessible
Ensuring your bathroom is accessible is a transformative step toward creating an inclusive living space. In this section, we'll delve into key considerations and practical tips on how to make your bathroom more accessible for everyone.
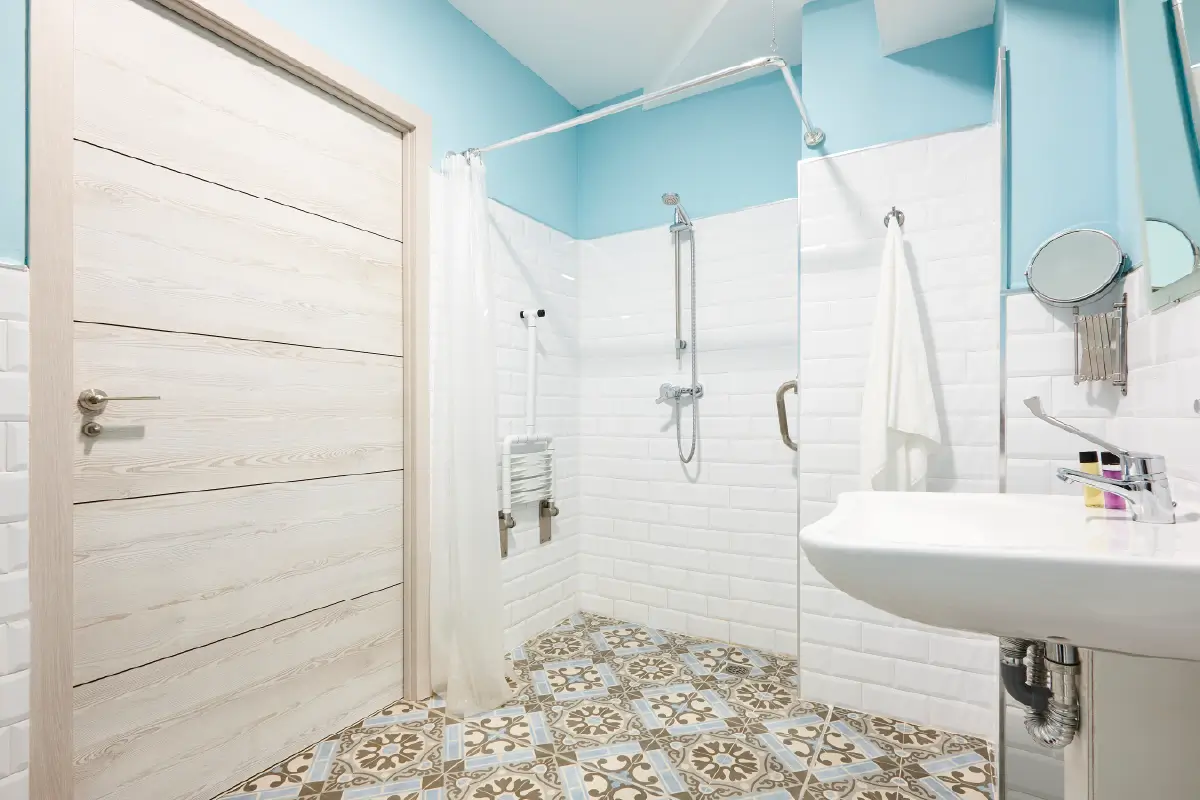
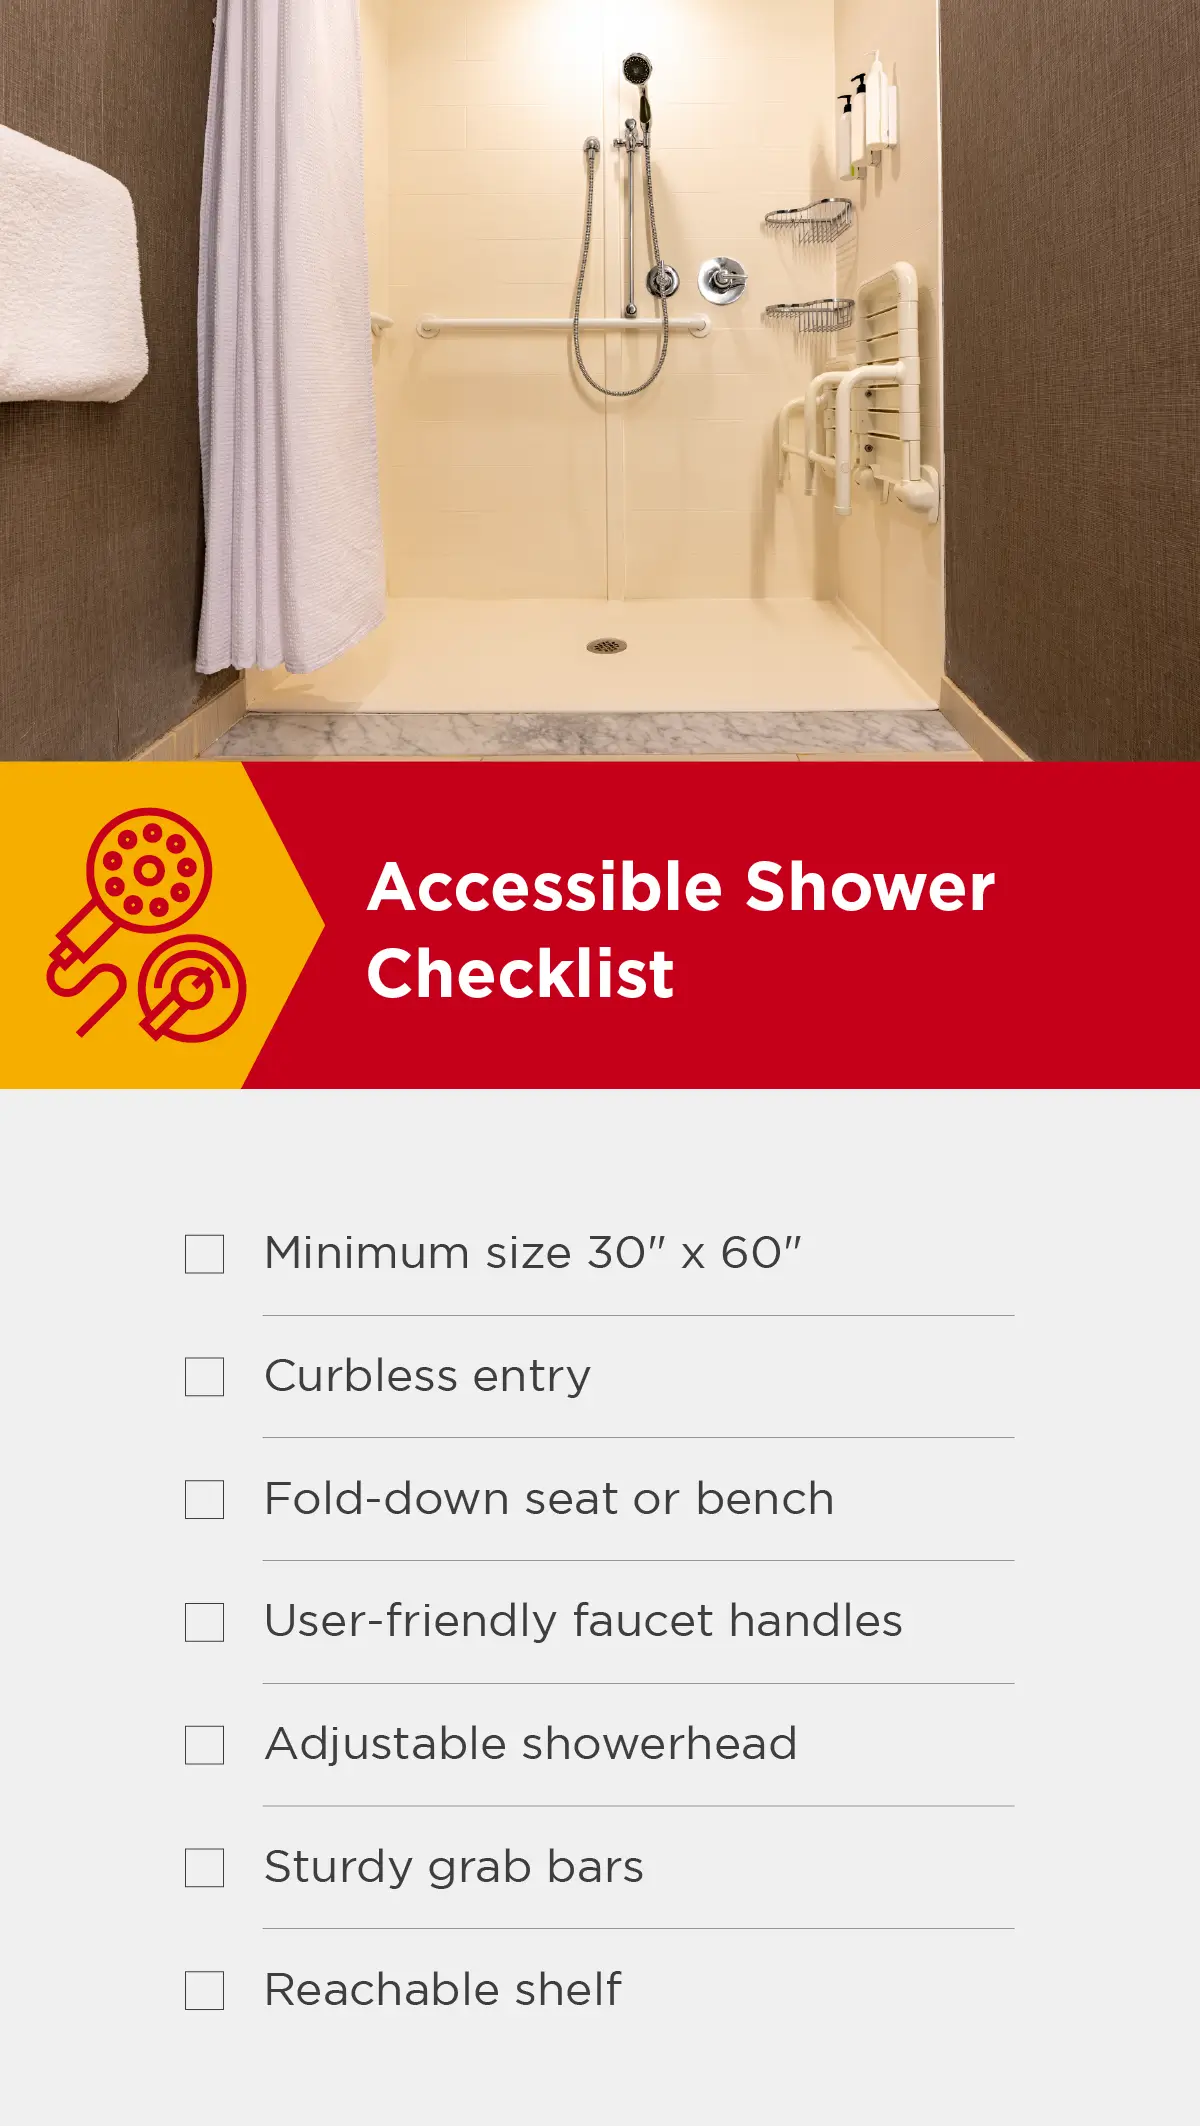
Shower
An accessible shower is important for enhancing the independence and comfort of people with disabilities. Showers are a common place for bathroom injuries, so careful planning and design are critical to avoid any accidents. Here are some accessible shower features to consider:
- Size: Create a roomy shower space with at least 30 inches by 60 inches of clear area, ensuring it's comfortable for wheelchair users.
- Curbless entry: Design an easy-to-enter space free of bumps or steps, making it effortless to get in and out—a thoughtful touch for everyone, especially those who use wheelchairs or have limited mobility.
- Seats and benches: Add a fold-down or built-in seat between 17 and 19 inches from the ground.
- Faucet handles: Pick user-friendly faucet handles and place them within reach of the seat—like easy-to-grab levers—so adjusting the temperature and pressure is easy.
- Showerheads: Choose a showerhead that adjusts from 4 feet to 6 feet high, accommodating people of all heights and mobility needs.
- Grab bars: Install sturdy grab bars to help prevent slippage while moving around in the shower.
- Shelf and rack: Create a reachable shelf for shower essentials and a towel rack within arm's reach. It's not just practical; it helps keep things safe and dry.
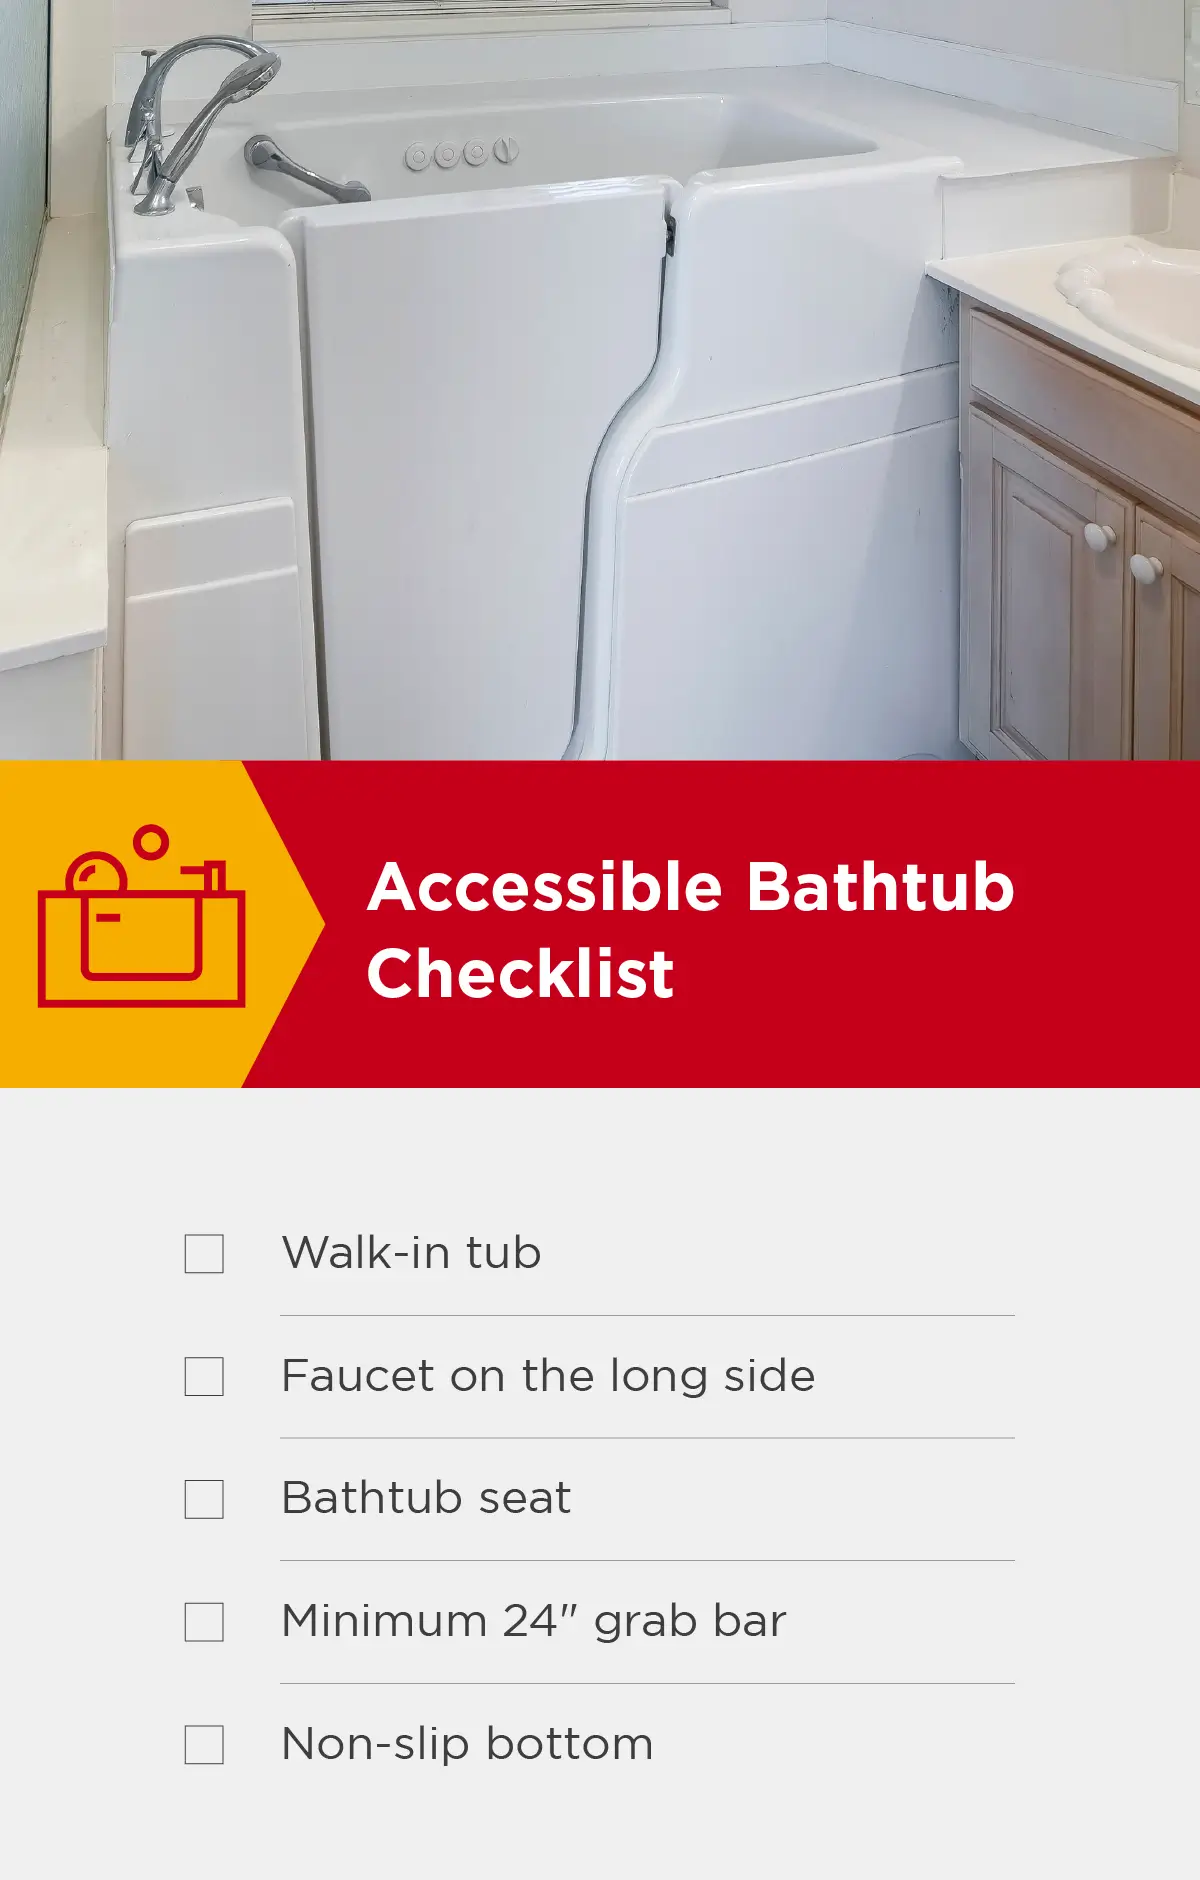
Bathtub
While bathtubs may not be necessary for every accessible bathroom, they’re a great option for older adults who may struggle with standing for extended periods or those with limited mobility and flexibility. Here are a few accessible bathtub features to consider:
- Walk-in tubs: Consider installing a walk-in bathtub with a low step or door for easy entry and exit.
- Accessible faucets: Choose faucets with lever handles and place them on the longest side of the bathtub to prevent excessive reaching.
- Bathtub seats: Explore options for built-in or portable seats within the bathtub to offer a comfortable spot for users to sit while bathing.
- Grab bars: Install horizontal grab bars on each side of the bathtub that are at least 24 inches long.
- Non-slip materials: Ensure the bathtub has non-slip material or a mat to prevent accidents.
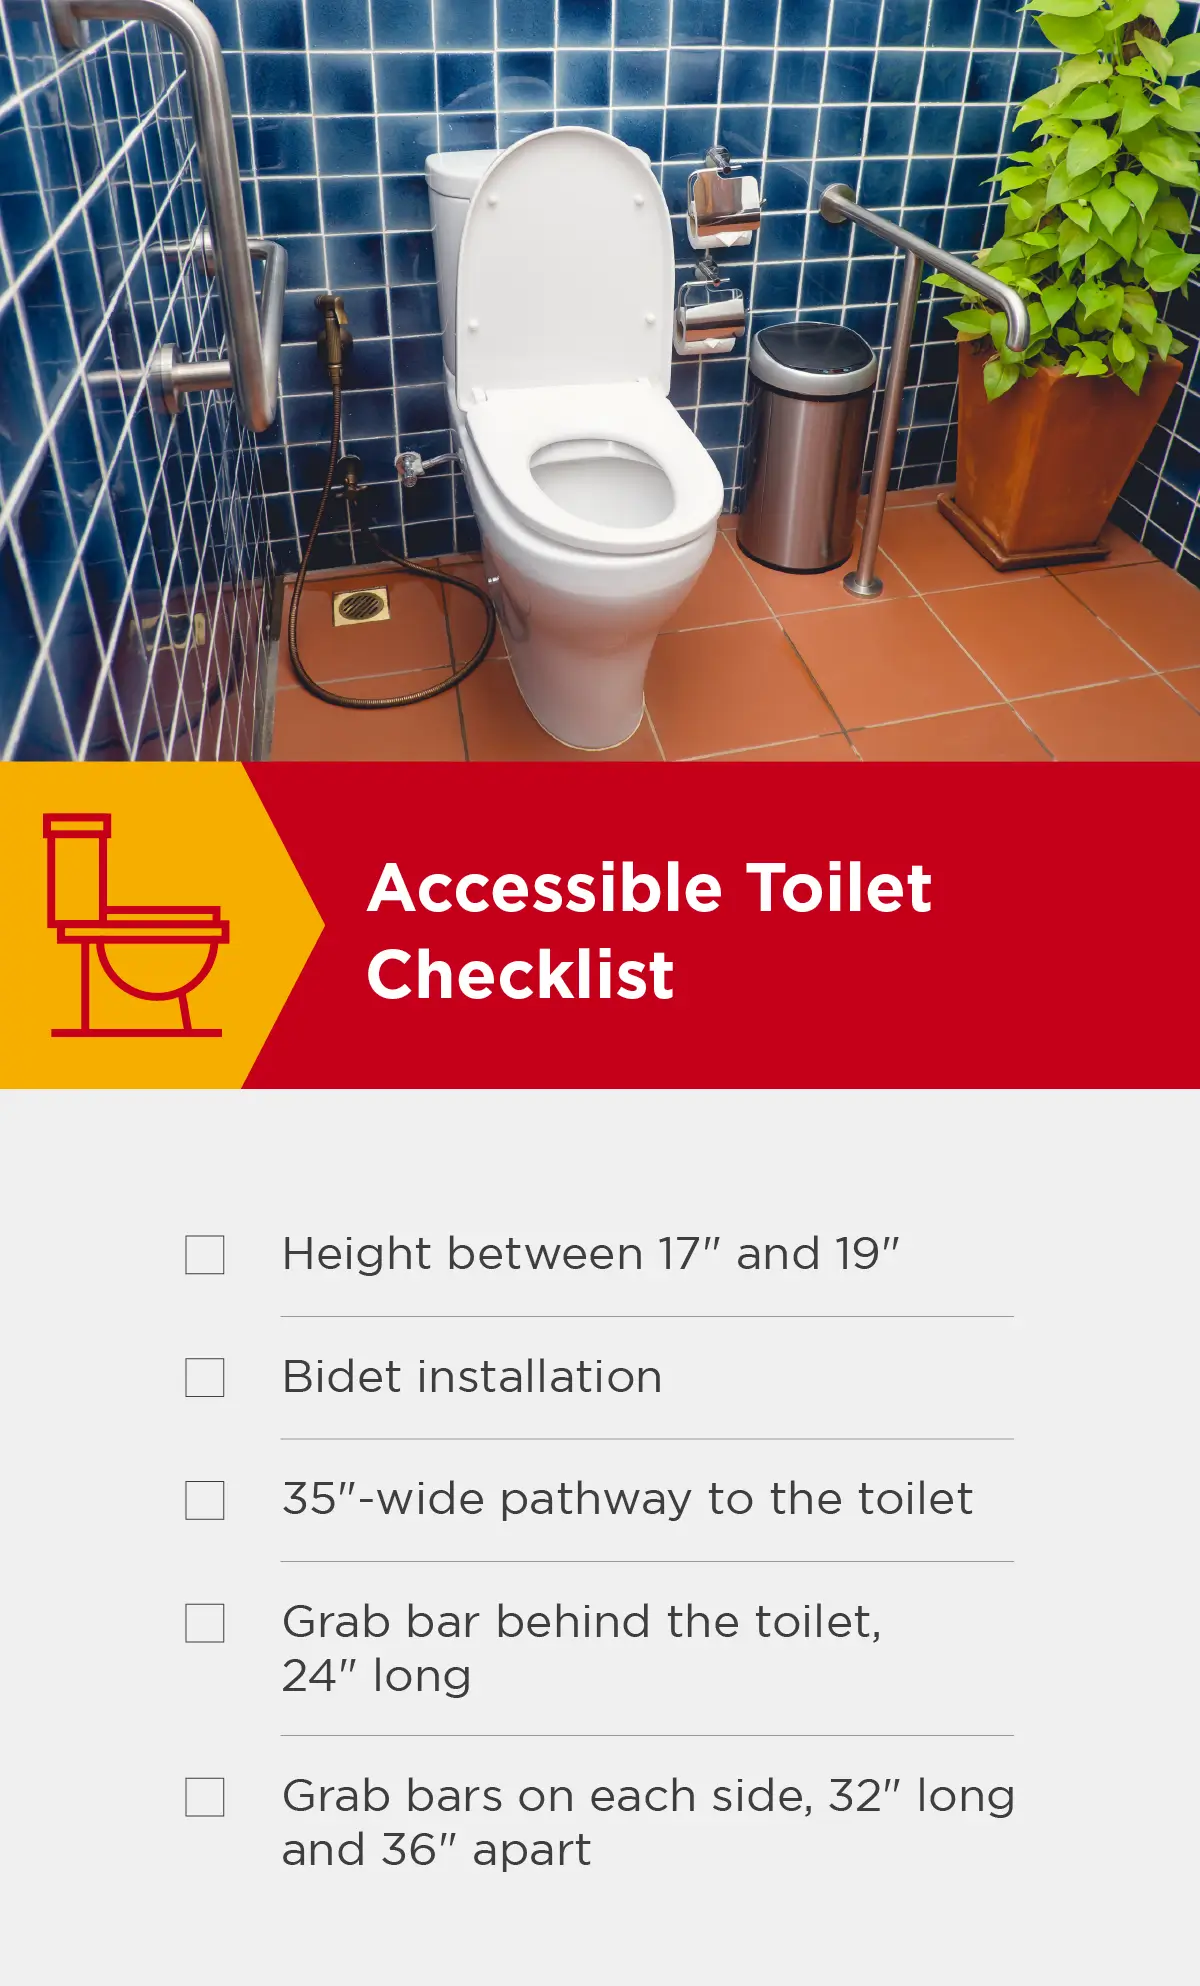
Toilet
Toilets can be another common site for accidents in the bathroom. To help prevent falls and enhance comfort, follow these accessible toilet guidelines:
- Height: Ensure the toilet is at a comfortable height, typically between 17 and 19 inches.
- Raised toilet seats: Install a raised toilet seat to make it easier for people with limited mobility to sit down and stand up.
- Grab bars: Install a 24-inch grab bar behind the toilet and grab bars on each side of the toilet that are 32 inches long and 36 inches apart.
- Bidets: Installing a bidet on your toilet may be a convenient option for those with low dexterity.
- Toilet area: Maintain a 36-inch-wide path to the toilet and allocate enough space around it for a more comfortable transfer process for wheelchair users.
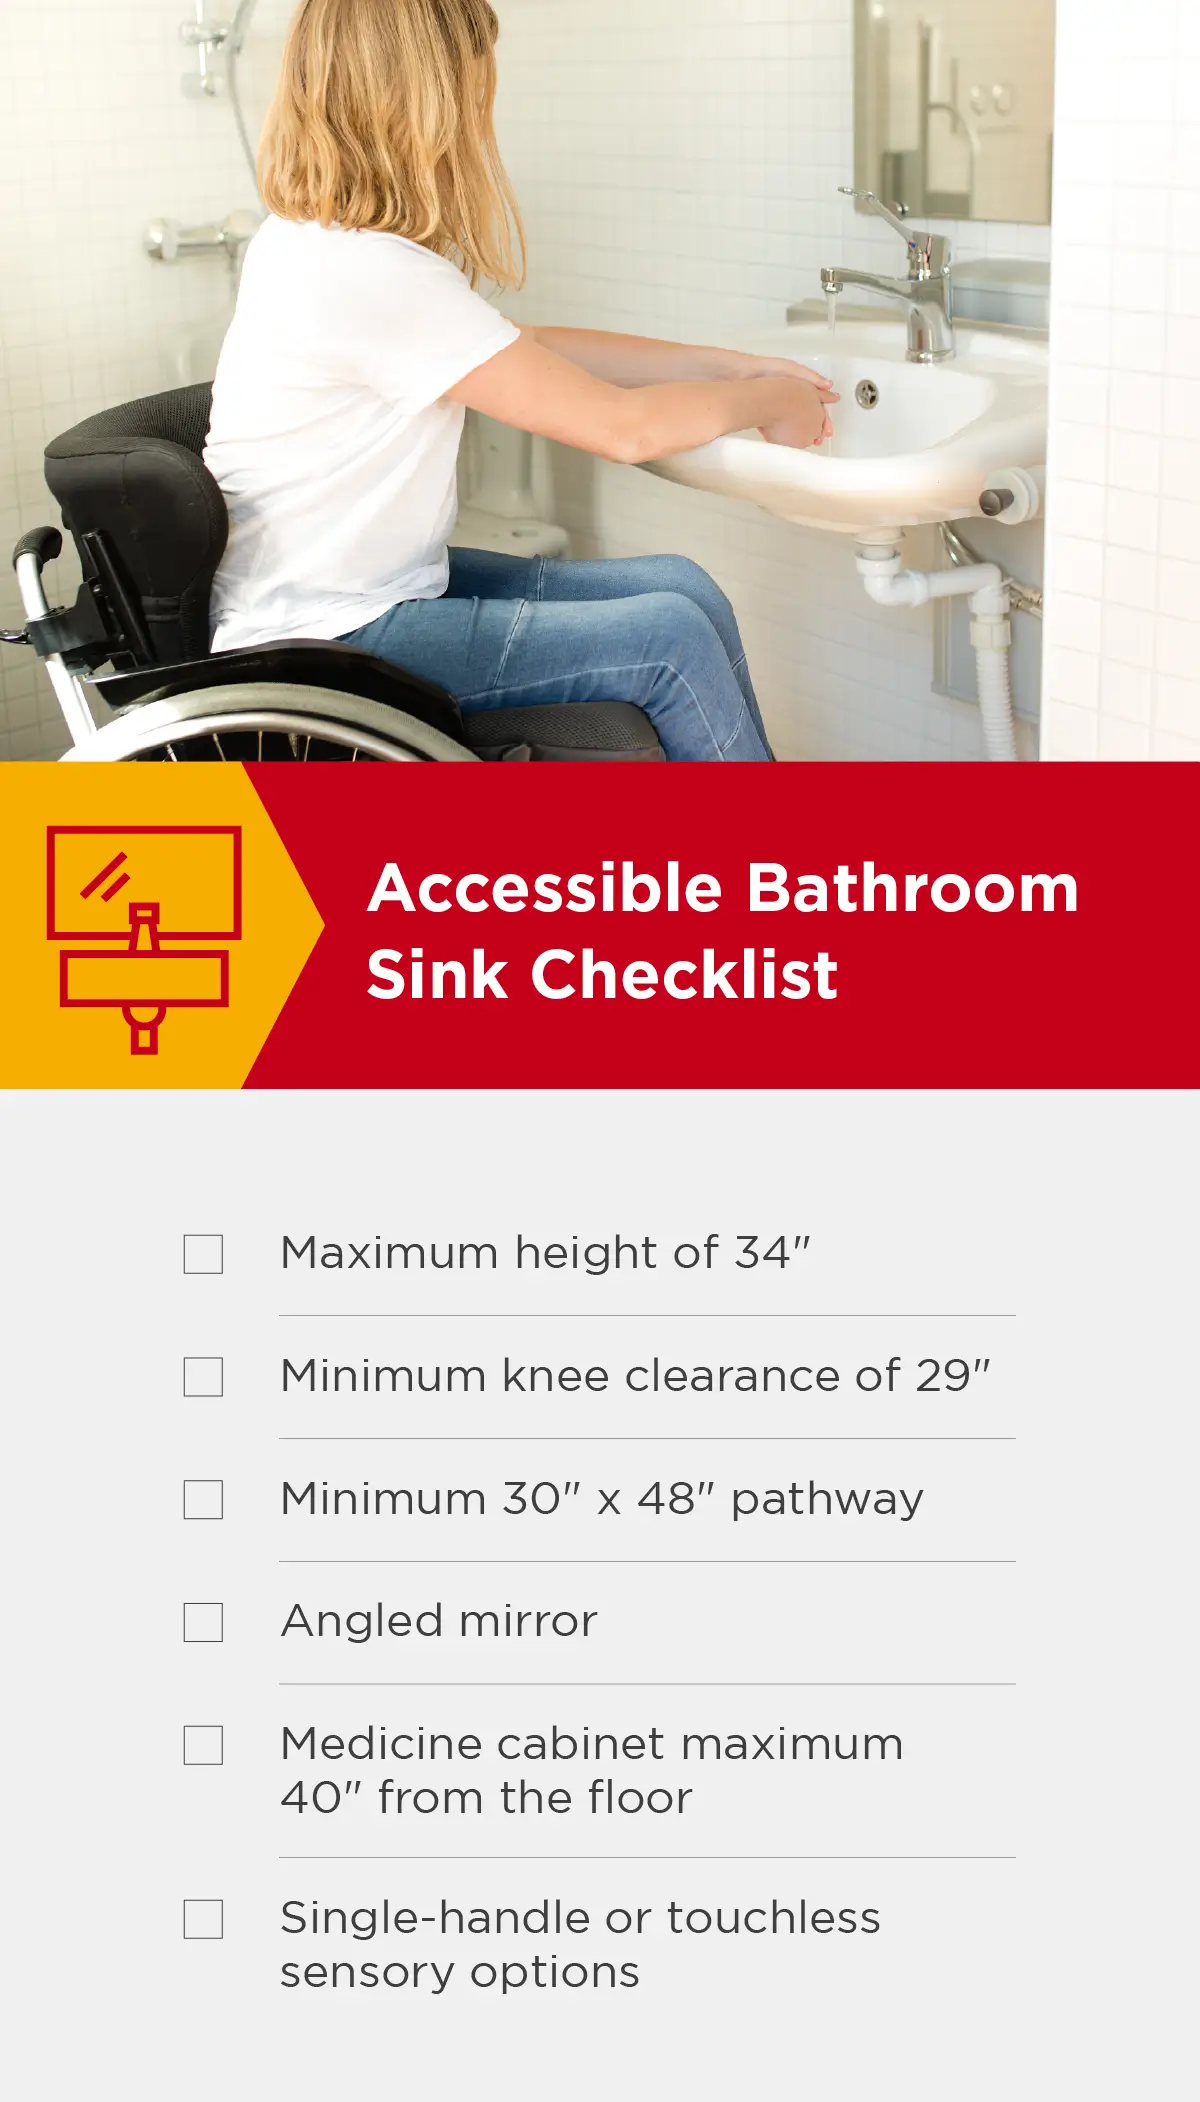
Sink
From washing your hands to brushing your teeth, the sink is a crucial part of your bathroom. Here are some accessible bathroom sink features to consider:
- Height: Keep the sink top no higher than 34 inches from the floor for comfortable accessibility from a seated position.
- Knee clearance: Allow a minimum knee clearance of 29 inches for wheelchair access.
- Pathway: Make sure there is at least 30 inches by 48 inches of space in front of the sink for wheelchair access.
- Angled mirror: Hang the bathroom mirror at a downward angle to give seated individuals a clear view of themselves.
- Storage: Position the bottom shelf of the medicine cabinet no higher than 40 inches from the floor, ensuring easy access for everyone.
- Faucets: Opt for user-friendly features by choosing single-handle faucets or touchless sensory options, promoting convenient usage for people with diverse needs.
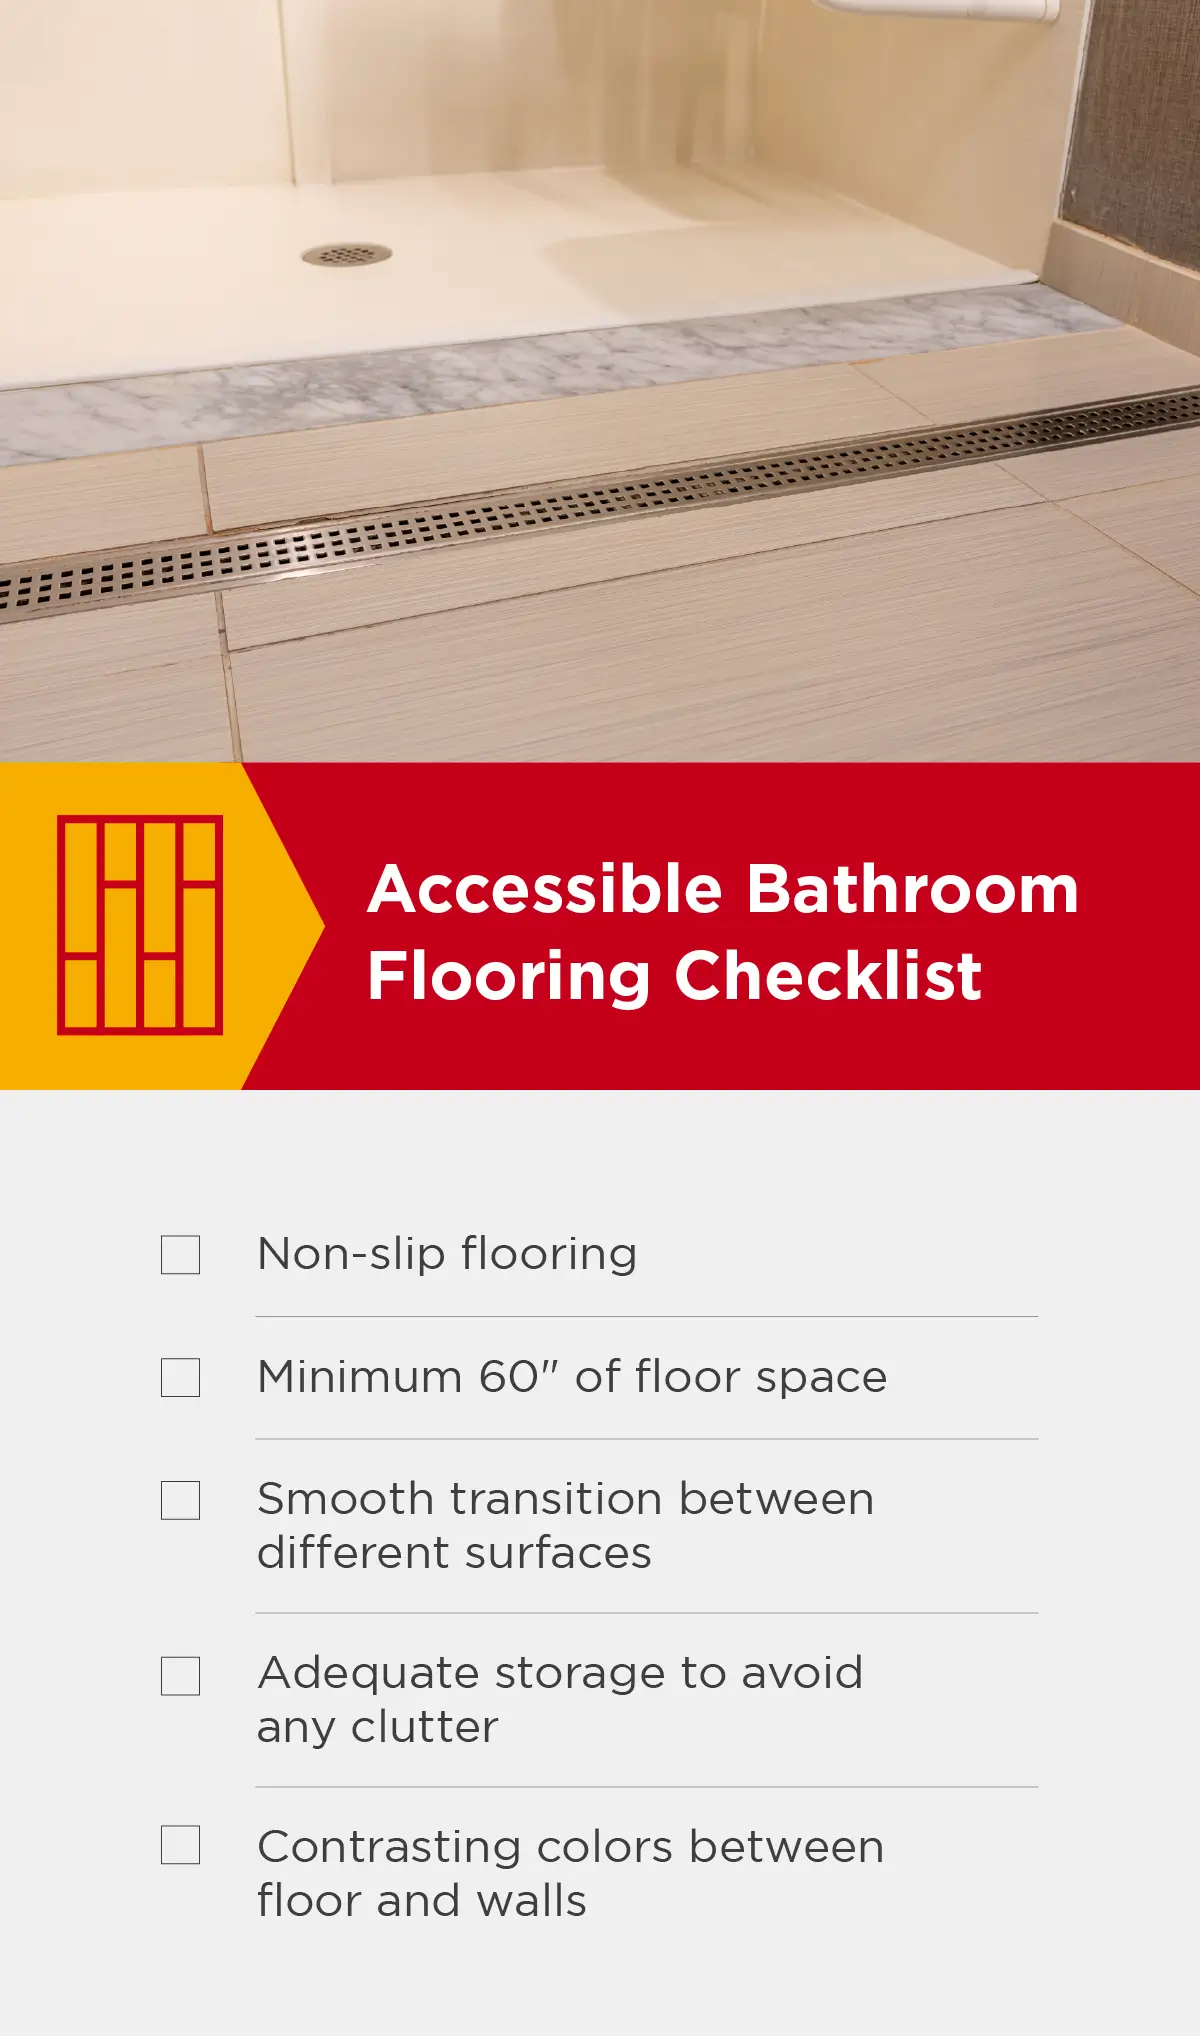
Floors
While the floor may not be the first area, you think of when it comes to your bathroom, ensuring you use the right materials and have enough floor space is important for an easily accessible bathroom. Here are some accessible bathroom floor features to think about:
- Flooring materials: Choose non-slip flooring to enhance safety, especially in wet areas like the shower and around the sink. Textured tile or slatted wood are better options than concrete or smooth tile flooring.
- Floor space: Include enough floor space for wheelchair users to turn at least 180 degrees, which is typically 60 inches.
- Smooth transitions between surfaces: Ensure smooth transitions between different flooring surfaces to facilitate easy movement for wheelchair users and individuals using a mobility device.
- Removal of obstacles: Make sure there’s no clutter on the floor that could create tripping hazards. Have dedicated areas or storage space for bathroom essentials or medical devices.
- Contrasting colors: Use contrasting colors between the floor and walls or between different floor sections to help individuals with visual impairments distinguish between spaces.
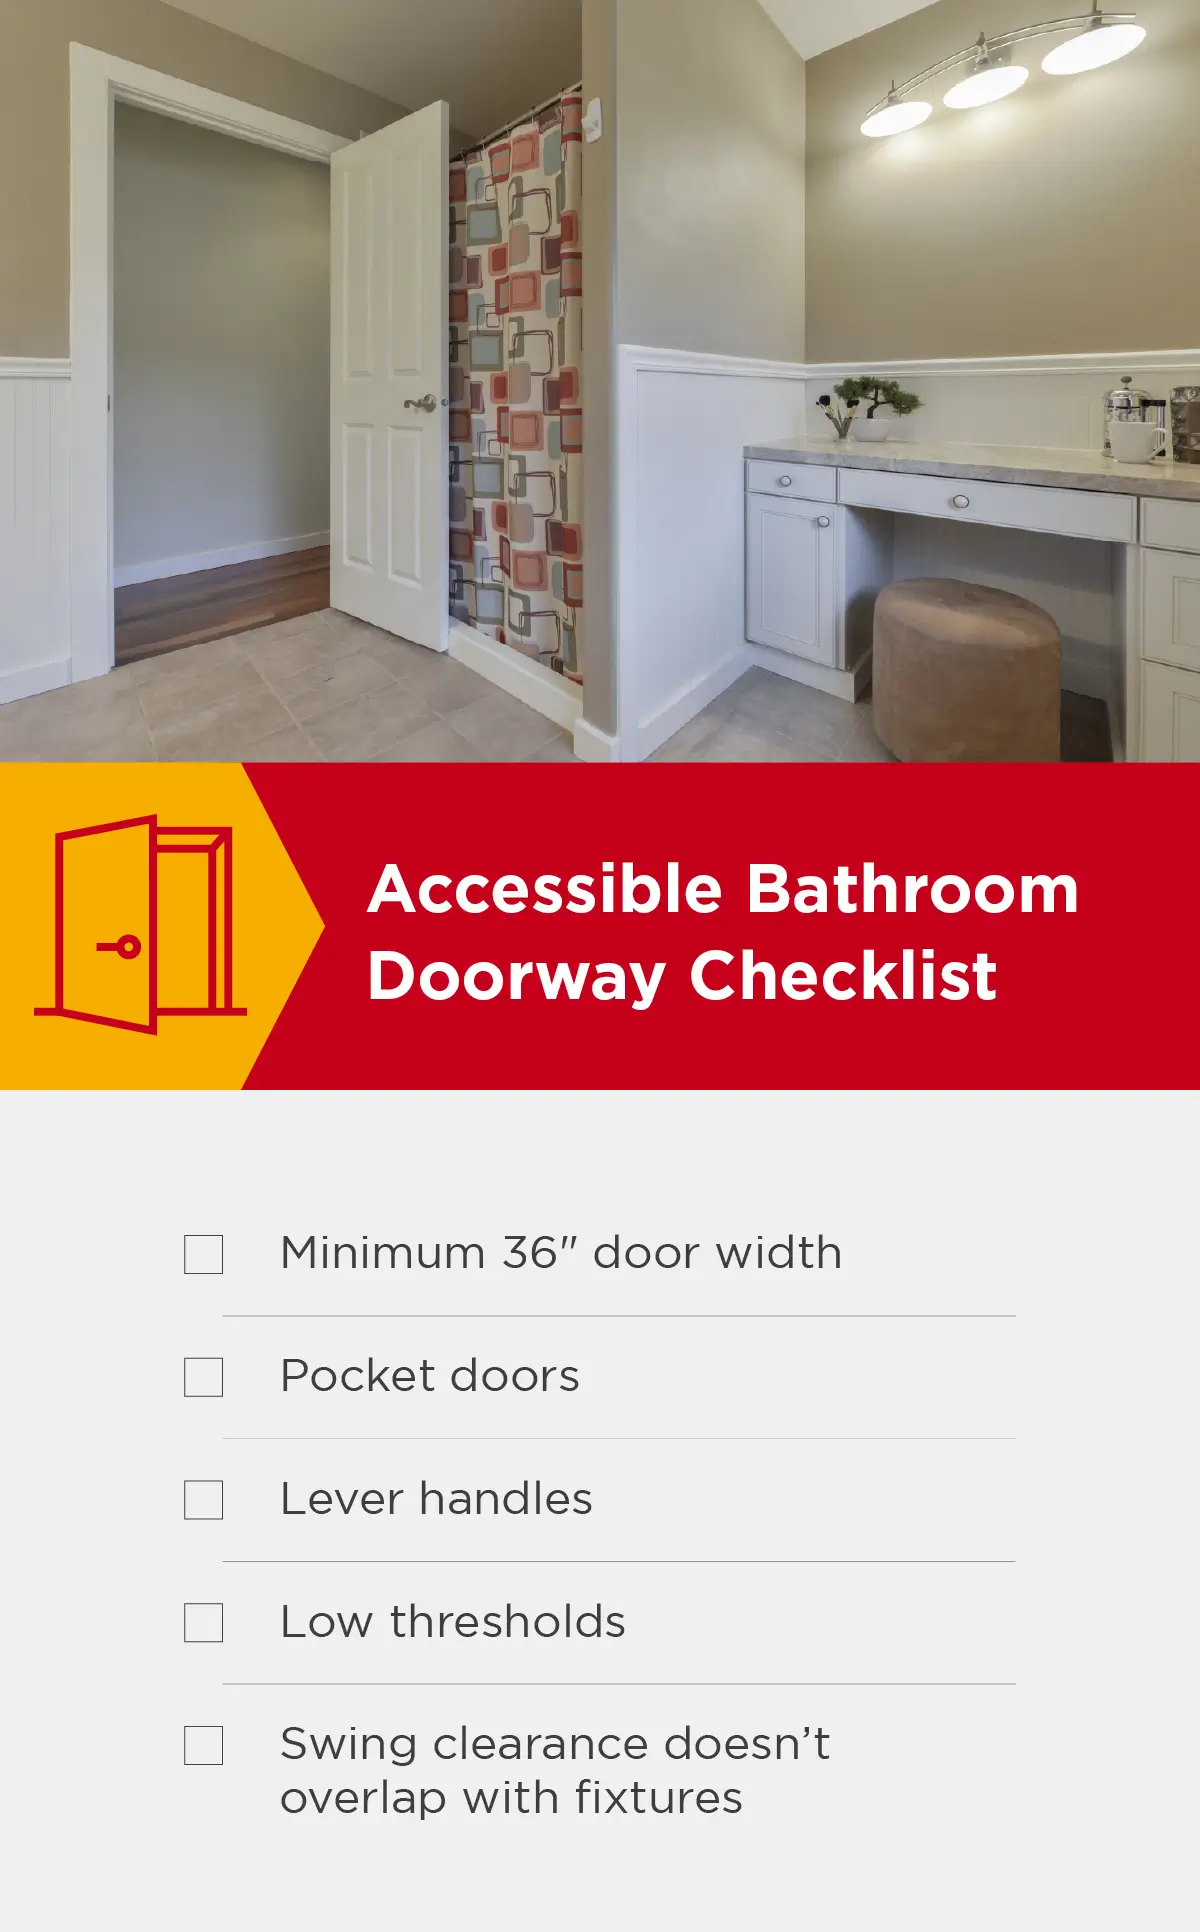
Doorways
The entryway is also an important aspect of an accessible bathroom for easy maneuverability. Check out some of these accessible bathroom doorway features:
- Door width: Ensure the bathroom door has a minimum width of 36 inches to comfortably accommodate wheelchairs and walkers.
- Pocket doors: If space allows, consider using sliding doors that slide into the wall, eliminating the need for swing space and providing a wider entry when the door is open.
- Swing clearance: If using swinging doors, make sure they don’t swing into the clear floor space of fixtures.
- Lever handles: Install lever handles instead of traditional door knobs for easy and comfortable operation. Lever handles are more accessible for people with limited hand strength or dexterity.
- Thresholds: Keep thresholds low or eliminate them altogether to prevent tripping hazards. A smooth transition from the hallway or adjacent room to the bathroom is crucial for wheelchair users.
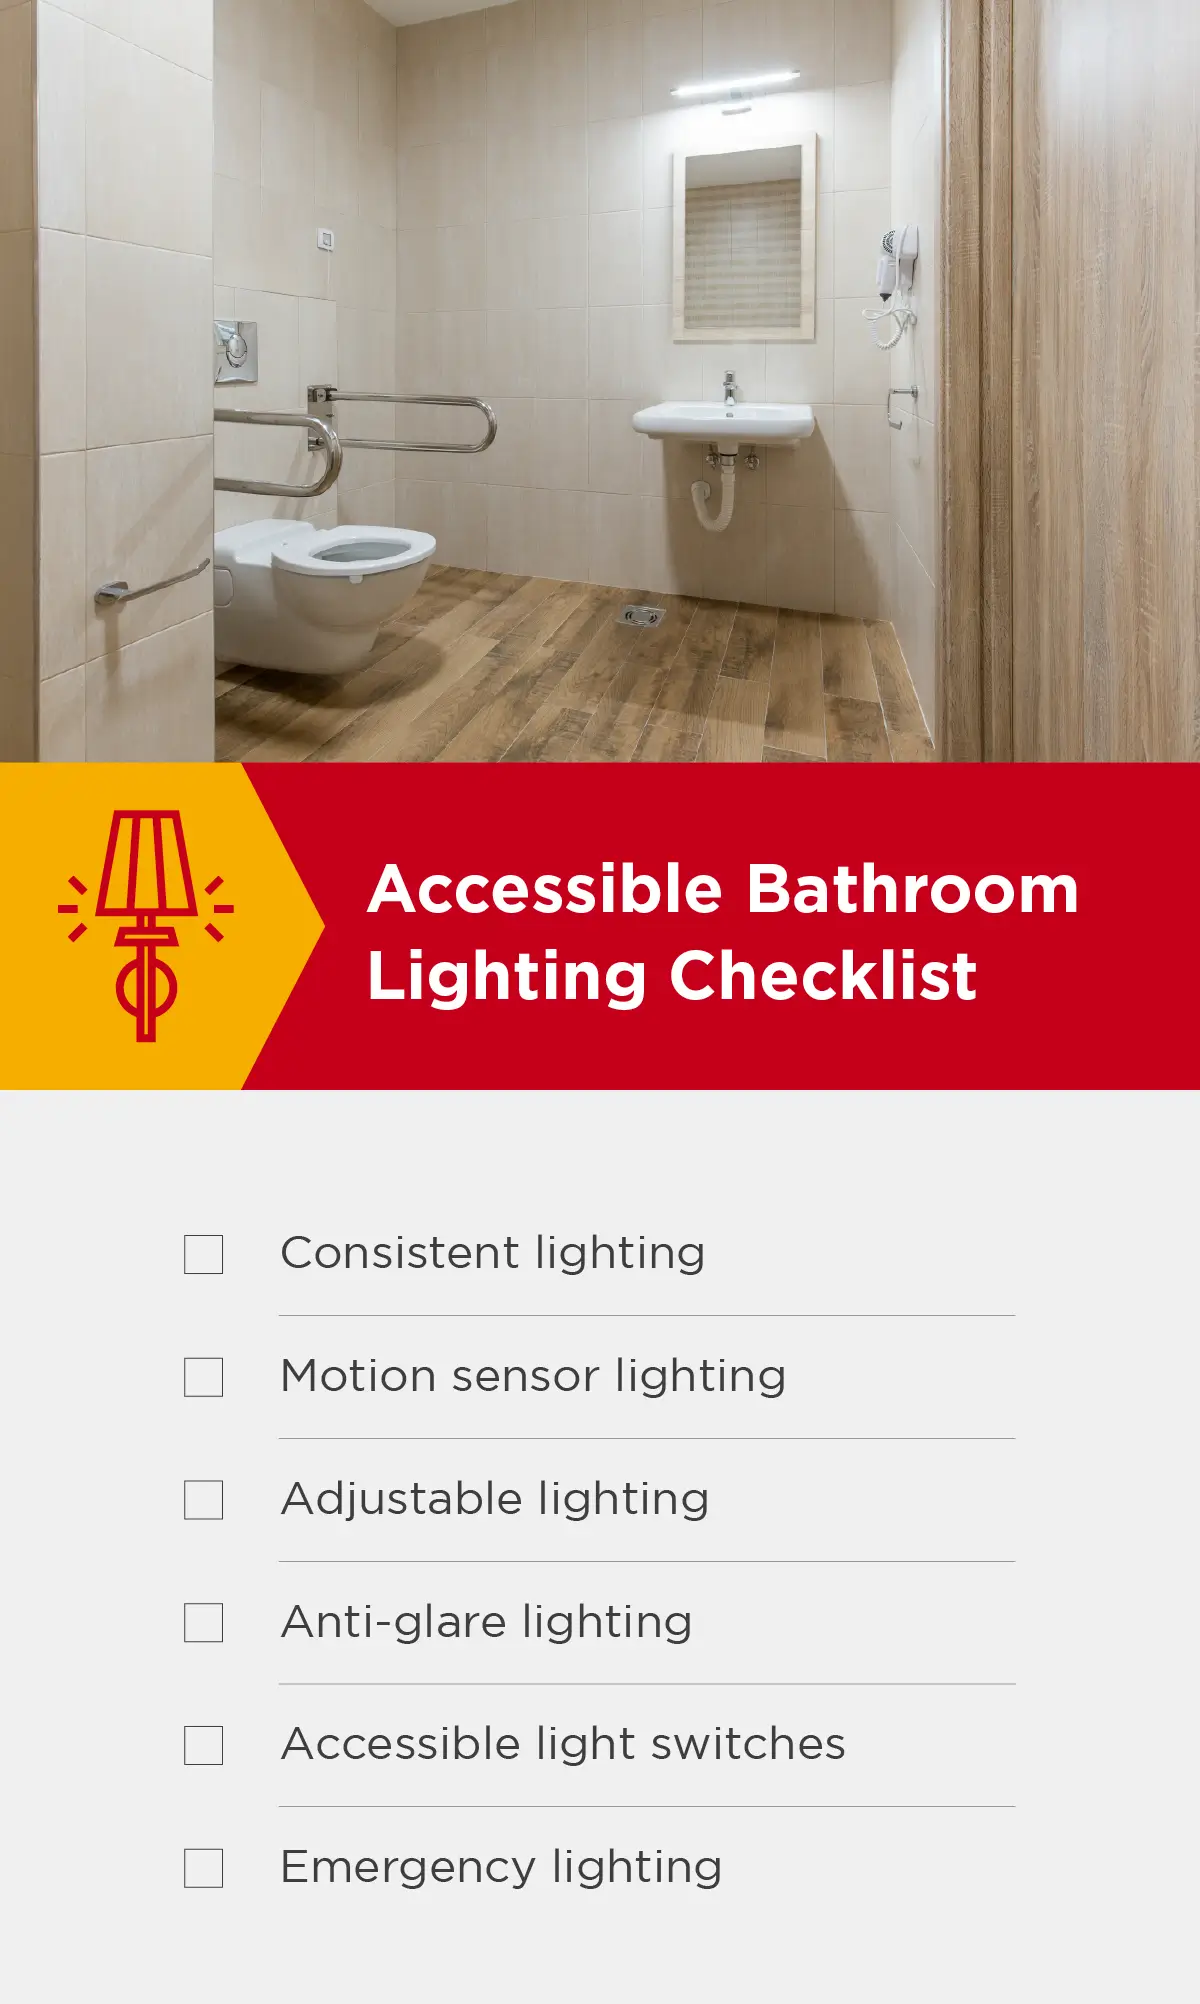
Lighting
It’s important to assess which lighting best suits your needs. While bright and consistent lighting may be best for those with visual impairments, those with sensory sensitivities may prefer adjustable lighting. Here are a few lighting options to consider for your accessible bathroom remodel:
- Natural light: Natural light enhances visibility, so maximize natural light from windows or skylights if possible.
- Consistent lighting: Even lighting throughout a room minimizes shadows, which is particularly important for those with visual impairments.
- Motion sensor lighting: Consider installing motion sensor lights, especially in areas like the entryway or toilet.
- Adjustable lighting: Incorporate dimmer switches to allow for adjustable lighting levels. This can be helpful for individuals with sensory sensitivities or those who prefer varying brightness levels.
- Anti-glare lighting: Choose fixtures that minimize glare to prevent discomfort and enhance visibility. Matte finishes and diffusers can help achieve this effect.
- Accessible light switches: Install light switches at a convenient height, and consider using large, easy-to-operate switches.
- Emergency lighting: Consider emergency lighting or backup lighting to provide illumination in case of power outages.
How Much Does an Accessible Bathroom Remodel Cost?
Bathroom remodel costs can vary widely depending on several factors, including the extent of the modifications, the materials used, and the specific accessibility features included.
Based on estimates by Fixr, renovating your bathroom for accessibility will cost between $6,000 and $36,000. This cost includes various modifications such as:
- Shower/bathtub modifications
- Non-skid tiles
- Raised toilet seats
- Lower light switches
- Accessible sinks
- Grab bar installations
- Shower conversions
- Widened doorways
To get an accurate estimate for your accessible bathroom remodel, consult a professional. They can provide a detailed assessment based on your needs and the unique features of your home.
Choose Mr. Handyman for Bathroom Remodeling Services
By investing in an accessible bathroom remodel, you’re investing in your safety, independence, and daily comfort. While the bathroom is an important space to prioritize mobility, don’t overlook other home modifications for accessibility so you can create a fully inclusive living space.
Whether you want a few simple modifications or a full renovation, request service today and trust our experienced team at Mr. Handyman® to help with your accessible bathroom renovations.
