
- Clean siding gently: Most homes can be cleaned using a garden hose, mild soap or detergent, and a soft-bristle brush.
- Identify the siding material: Vinyl, wood, fiber cement, brick, stucco, stone, and metal each require slightly different cleaning methods.
- Inspect before cleaning: Look for cracks, loose paint, damaged caulking, or mold so you don’t worsen existing issues.
- Prepare the surrounding area: Move furniture and cover plants, outlets, and fixtures to protect them from water or cleaning solutions.
- Apply cleaning solution from bottom to top: This helps prevent streaking and allows even coverage.
- Gently scrub problem spots: Use a soft brush or cloth to remove mildew, algae, or dirt buildup without scratching the surface.
- Use pressure washers cautiously: If used, keep pressure around 1,000–1,500 PSI, spray at a downward angle, and avoid forcing water behind siding panels.
- Clean siding annually: Most homes benefit from washing siding once per year, typically in spring or early summer.
Your house’s siding may not be the first thing that comes to mind when thinking about home maintenance, but it’s important not to let it fall by the wayside. Siding is important for curb appeal and longevity.
However, it’s equally important to clean and maintain your siding correctly to enjoy these benefits and prevent issues like mildew buildup and mold. Improper cleaning — such as using too much pressure when pressure washing — can actually damage your house rather than protect it. Problems like chipped paint, moisture damage, and weakened protective finishes can all arise if you aren’t careful. It can also delay other home improvement projects to inopportune times, such as repainting your exterior, if you need to address these problems before moving ahead with your plans.
Simply put, cleaning your siding isn’t just important to do — it’s important to do it right. Here’s what you need to know to get the job done.
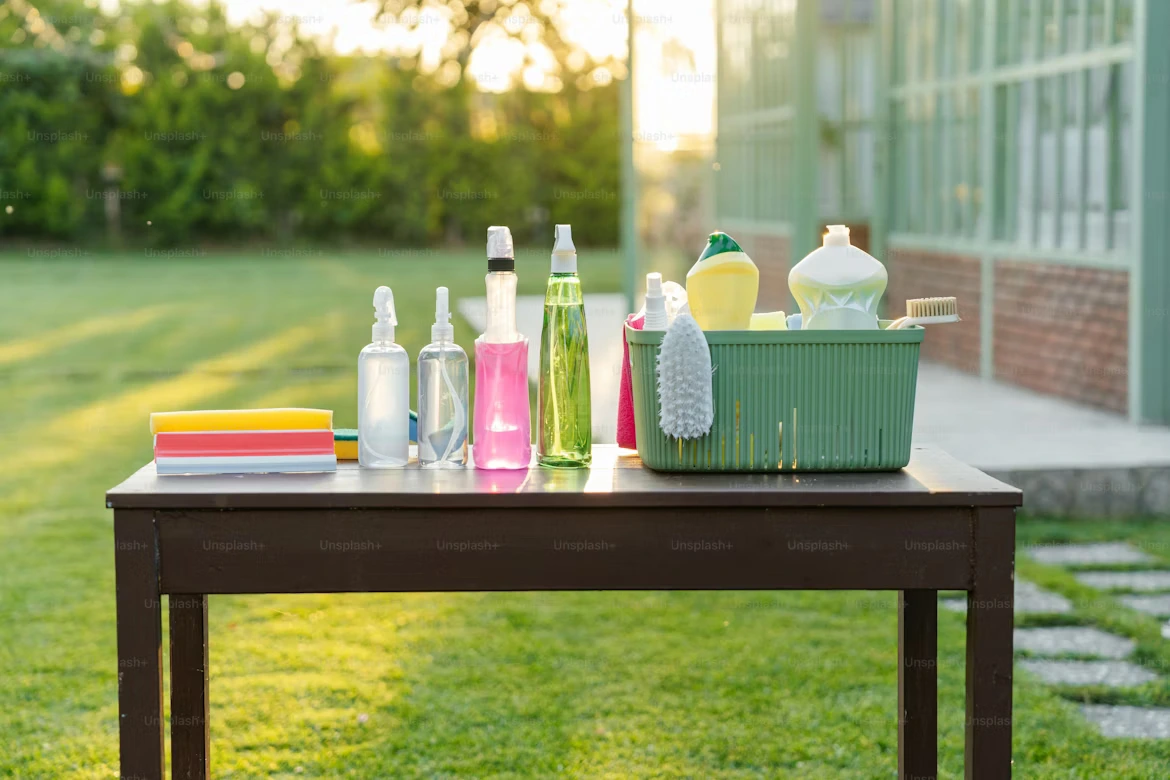
Tools You Need to Clean Your Siding
There are many different tools and supplies you can use to clean siding. Some of the most useful include:
- A garden hose, particularly with an adjustable spray nozzle attachment.
- Multiple siding brushes, and ideally ones with soft bristles and/or long handles for ease of use.
- Multiple buckets.
- Gentle soap (even dish soap), cleaning solution, and/or detergent.
- A pump sprayer or soft washing system.
- Vinegar solutions in case of mildew.
- Store-bought siding cleaners.
- Microfiber cloths, rags, or towels you don’t mind getting dirty.
- Rubber gloves to protect your hands.
- A ladder to reach high, hard-to-reach spots.
Pressure washers can also be a handy, efficient tool for cleaning siding, but you must use them carefully. First off, not all surfaces can be pressure-washed, so it’s vital to make sure your home can withstand pressure washing to begin with. Beyond this, pressure washers can damage siding when used at high settings, potentially causing dents, loosened shingles, and dislodged paint.
Before getting started, it can be helpful to have a variety of options to choose from, so that you can tackle whatever dirt, debris, and grime have built up on your home.
A Step-by-Step Guide to Clean Siding
Here are all of the steps you need to take to properly and safely clean your home’s siding:
Step 1: Identify Your Siding Material
Before anything else, determine your home siding’s material. Different materials require different cleaning approaches. Using the wrong cleaning method for your siding’s material is precisely what can result in damage.
These are among the most common types of siding, and the safest way to clean each one as part of routine maintenance:
- Vinyl: The best way to clean vinyl siding is with water and a mild detergent or dish soap. Use either the nozzle sprayer on a garden hose or scrub gently with a soft-bristle brush.
- Wood: Take a similar approach for wooden siding, particularly if it’s painted. Be extra cautious to avoid introducing too much moisture to the wood, or you may run into issues with mold and mildew later.
- Fiber cement: You can start with a similarly gentle approach for fiber cement. However, for stubborn spots, a low setting on a pressure washer may do the trick.
- Brick: Pressure washers can be a safe option for new or especially sturdy brick. They shouldn’t be used on painted or older brick, though. Avoid wiry or hard-bristle brushes on brick of all kinds.
- Stucco: Go for a garden hose with the spray nozzle attached or a pressure washer on a low setting. If you need to scrub any stains or trouble spots, be careful not to sand down the stucco's texture.
- Stone: For stone, the water-and-mild-soap combination is your best bet. Hard or wiry brushes, as well as harsh cleaners, can be damaging; save them for other projects.
- Metal: A nice rinse with water and a gentle scrub with a mild detergent or soap should be enough to clean metal siding. Avoid using a pressure washer, as it may dent the siding if it’s too strong.
Generally, it’s safest to use water and a mild soap or detergent. You can explore other common household cleaners, such as bleach or vinegar, but proceed with caution.
If you do, or you’d like to test a few solutions, start with a small test area in an inconspicuous location. Give it a good clean and see how it looks afterward. If your chosen method does more harm than good, try something else instead. Further, to prevent staining or scratching, it’s better to start with a gentle cleaning method and only move to something stronger if that doesn’t work.
Step 2: Inspect the Siding
You may have a cleaning plan in place that you’re eager to start on, but before you do, take some time to inspect your siding. Make sure everything is in good working order first. Depending on the siding’s materials, you may need to look for cracks, damaged caulking, loose or splintered paint, or other signs of disrepair. Take the time to make any necessary fixes before you start cleaning so you don’t worsen any existing damage.
Beyond this, check for any spots where mold, mildew, dirt, or other grime has built up. Either make a mental note of them or leave a removable marker on or near these areas. That way, you know which parts of your siding may need special attention, multiple passes, or a heavier-duty scrub while cleaning.
Step 3: Protect Landscaping and Outdoor Fixtures
Just as you’d prep a room for painting, you need to prep the rest of your yard before cleaning your siding. Take some time to move outdoor furniture, decorations, potted plants, and other items away from your home. Doing so will give you more space for cleaning and ensure your belongings don’t accidentally get sprayed with something they shouldn’t.
For things that can’t be moved — like light fixtures, electrical outlets, and landscaped plants in the ground — go ahead and cover them up. This simple step can prevent damage from water and cleaning solutions. Something waterproof or water repellent is ideal, such as a tarp. If you don’t have many covers available, simply move the ones you do have as needed when cleaning different parts of your siding.
Step 4: Apply a Cleaning Solution
With all that taken care of, you’re ready to begin cleaning. Depending on the material you’re cleaning and how long it’s been since it last had a good scrub, you may want to start by dry dusting or by giving it a quick water-only rinse with a garden hose. This can help clear away initial buildup and help address any tricky spots or stains, especially if it’s been a while since you last cleaned your siding.
From there, apply a cleaning solution safe for your home’s siding. You can spray it on with a garden hose or directly from a bottle. Alternatively, you can add your cleaning solution to a bucket, dip your brush in, and brush the solution on manually. You may need to let the solution sit for a few minutes to soak in, but try not to let it dry so it still rinses off easily.
Always start cleaning at the bottom and work your way up. If you start at the top and work down, you’re more likely to run into issues with streaking.
Step 5: Gently Scrub Stubborn Areas
You may need to spend more time working on any trouble spots you flagged during your inspection or discovered while cleaning. For areas with mildew, mold, algae, or dirt buildup, use a soft brush or even a microfiber cloth to scrub until the grime is gone. Use a light touch when scrubbing to prevent scratching or scraping the surface of your siding.
Depending on how stubborn the buildup is, you may need to apply another layer of cleaning solution. In some instances, you may even need to use a specialized or stronger product. If you do end up using multiple products, rinse the affected area thoroughly after each product before introducing a new chemical or solution in the process. It’s dangerous to mix household chemicals, even common ones like bleach and vinegar, which is why it’s so important to wash your siding thoroughly between applications of different products.
Step 6: Pressure Wash Siding Carefully
If you’d prefer to use a pressure washer, make sure you do so as carefully as possible. Pressure washers are powerful tools that can be highly effective for cleaning, but you can likely use them on a low setting and still get the job done. Try staying within the 1,000–1,500 pounds per square inch (PSI) range for most siding materials, and only scale up to a higher PSI if you know your home can safely withstand it.
Luckily, there are a few other things you can do to minimize the chance of damage from a pressure washer:
- Opt for a wide-angle sprayer to distribute pressure evenly across a larger surface area, reducing the risk of breaking or dislodging parts of your siding.
- Spray downward, at a slight angle, so that water doesn’t get forced behind any panels.
- Stand back several feet and spray at a distance so the most powerful part of the spray is farther back from your home.
- Avoid spraying any gaps, windows, outlets, or cracks or areas with existing damage.
It’s important to follow the instructions that come with your specific pressure washer. Always consult any provided directions to keep yourself and your siding safe while washing.
Common Siding Cleaning Mistakes Homeowners Make
Here are some common pitfalls you should take care to avoid when cleaning your siding:
- Using abrasive scrubbers or brushes for problem spots.
- Skipping an inspection of your siding before cleaning to identify existing damage.
- Spraying pressure washer or hose upwards under panels.
- Using a pressure washer on the wrong settings, such as pressure that’s too high or the wrong sprayer nozzle.
- Using cleaning chemicals that are inappropriate for your siding material or are too harsh.
- Ignoring buildup on your exteriors, which can either indicate or lead to long-term damage to your home.
- Going too long without cleaning your siding.
However, armed with the right tools and the know-how to do the job, it’s easy to avoid these common siding cleaning mistakes. This results in a smoother cleaning experience and a better-looking home.
How Often Should You Clean Your Siding?
In general, you only need to clean your siding once per year at a minimum, to every six months maximum. It’s often best to do this during the spring or early summer after the colder months are behind you, especially if you live somewhere like Idaho, where homes may experience weather damage.
Beyond that, you may also choose to clean your siding before hosting an event at your house or before selling. If a bad storm comes through and your home is particularly dirty in its wake, it may make sense to clean up afterward.
Take care not to clean your siding too frequently. Doing so can wear down your siding more quickly, and each time you clean, you introduce the possibility of issues like cracks, water damage, peeling paint, and more. When you do clean, always take care and be gentle to reduce the chance of these kinds of problems while keeping your home in tiptop shape.
When to Hire a Professional for Siding Cleaning
Cleaning your siding is a DIY job for many people, but there may be times when you want or need to call a professional for help with part or even all of the job. Common instances where it makes sense to hire some help include:
- If you have a large home or a home with hard-to-reach areas.
- If your home has delicate, older, or potentially hazardous siding materials.
- If there’s a heavy buildup of dirt, dust, mildew, mold, algae, or other grime.
- If you don’t have the proper equipment to clean and don’t care to invest in it.
- If you’re aging in place or have a health condition that makes cleaning your siding inaccessible to you.
- If you are planning to sell your home and want a professional-grade clean before putting it on the market.
You can always call an expert for help if your house needs a thorough, deep clean, but you aren’t confident in your ability to do it yourself. A professional will be able to avoid common pressure-washing mistakes that can lead to costly damage down the line. No matter the reason, professional pressure washing services are available whenever you may need or want them.
Call Mr. Handyman to Clean Your Home’s Siding!
Between winter snows and springtime storms, it’s tough to keep your home’s siding clean in the Treasure Valley. If you live in Boise, Meridian, Nampa or beyond, call Mr. Handyman to clean your siding! Mr. Handyman is happy to do a customized pressure washing treatment tailored to your home’s needs at any time of the year.
FAQs About Siding Cleaning
Can You Pressure Wash Vinyl Siding?
Yes, you can pressure wash vinyl siding, but it requires careful technique and the correct pressure settings. Most experts recommend using 1,200–1,500 PSI or less, along with a wide spray nozzle to distribute water evenly. Keeping the nozzle several feet away from the siding and spraying at a downward angle helps prevent water from being forced behind the panels, which can cause moisture damage or mold growth.
What Is the Best Cleaner for Siding?
The best cleaner depends on the type of siding and the type of buildup you are trying to remove. For general dirt and grime, a mixture of mild dish soap and warm water is often enough. For algae or mildew, homeowners may use a diluted vinegar solution or a store-bought siding cleaner designed specifically for exterior surfaces. Avoid harsh chemicals because they can damage finishes, paint, or surrounding landscaping.
Is Soft Washing Better Than Pressure Washing?
Soft washing is often safer for delicate siding materials such as wood, stucco, or painted surfaces. This method uses low-pressure water combined with cleaning solutions to remove dirt, mold, and algae without the risk of surface damage. Pressure washing can still be effective for durable materials like vinyl or brick, but using excessive pressure can warp siding, strip paint, or push water behind the exterior panels.
How Do You Remove Mold or Mildew From Siding?
You can remove mold and mildew using a cleaning solution designed for exterior surfaces. Many homeowners use a mixture of water, mild detergent, and vinegar or a specialized siding cleaner to break down biological growth. Apply the solution with a pump sprayer or soft brush, allow it to sit briefly, then rinse thoroughly with a garden hose or low-pressure washer. Addressing mold early helps prevent staining and protects the siding from long-term damage.
How Often Should Siding Be Cleaned?
Most homes benefit from cleaning their siding once a year, often during spring or early summer as part of seasonal maintenance. Homes located in humid climates or near trees may require more frequent cleaning because algae, mildew, and pollen accumulate more quickly. Regular cleaning helps preserve curb appeal and prevents dirt or organic growth from causing long-term damage to the siding.
