Almost any Norfolk homeowner appreciates the elegance surface tile expresses on their humble abode as it provides a regal look alongside boosting their home’s property value. But tile is essentially useless without the plaster that holds it together. Lately, if you’ve noticed your tile’s grout has become scrubby and damaged, ask a Norfolk handyman to perform restoration services before it slowly deteriorates away. Some homeowners become complacent and overlook signing up for a Norfolk grout repair only to find their tile has been chipped or dented due to no proper upkeep. Our professional, licensed and fully insured handyman from Mr. Handyman of Central - Eastern Norfolk County & S. Shore will give your surfaces a facelift in no time.

If you require an accountable service provider, our experienced Norfolk grout repair technicians are available around-the-clock for a no-obligation consultation as they aim to provide the triple whammy of superior products and handyman services, quality craftsmanship, and stellar customer satisfaction. We always do our best to listen to our client’s pain points and conjure up effective and long-lasting solutions. If you’re still indecisive, rest assured that we offer transparent, upfront pricing with detailed cost estimates and a one-year part guarantee, so if you’re not happy with the result, we will return to make the proper adjustments. As a locally owned and operated business, we boast an impressive track record, having served Norfolk for nearly 16 years. Mr. Handyman can handle everything from minor home repairs to grand-scale renovation projects for both residential and commercial properties.

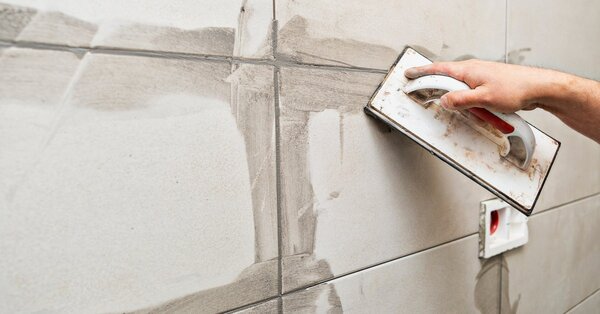
Handyman repairing grout in Norfolk home.

Our Expert Norfolk Grout Repair

Grout is made of cement paste which hardens when combined with water, and for the most part, it’s a similar scenario for grout installation no matter the surface. Eventually, your home’s grout will begin to ebb and fade away from your surface tiles due to being exposed to chemical grout cleaners or moving around large, heavy furniture, which weakens sealant and renders it more susceptible to crack and fractures. Fluctuating temperatures and high moisture levels will also wear out the surface sealant over time and lead to grout damage. Our Norfolk handyman is trained to restore all types of joints with effective Norfolk grout repairs, such as soft and control or expansion joints. For example, a soft joint is a line of glue that is filled with colored silicone or caulk instead of cement and an expansion joint is more of a stabilizer for piecing together tiles as it allows for expansion and creation of tile. Both types of joints are needed for grout repair. Norfolk, MA homeowners should know as soft joints work great for more subtle areas like your kitchen backsplash, while expansion joints are best reserved for flooring surfaces with heavy foot traffic like your bathroom due to extra humidity and moisture. Either way, joints bolster grout protecting it from readily cracking under pressure.

Types of Grout We Repair

  • Sanded Grout: This is made of fine sand particles, so it doesn't shrink as a condensed material and bodes well under high volumes of pressure, so it does well for flooring installations and contraction tile joints.
  • Unsanded Grout: This is more of a supple and textured material which doesn’t scratch too easily, making it best for delicate surfaces, for example marble to porcelain tile surfaces. But it won’t do well with fluctuating pressure, so it’s best reserved for your shower or kitchen backsplash.
  • Epoxy Grout: This is pricier but the most versatile and durable grout material as it doesn’t easily shrink, crack or discolor and bodes well under pressure, and is able to handle abrasive cleaners. Best of all, it’s non-porous, so doesn’t need to be sealed, and is less susceptible to stains, grease, fractures, or even local weather conditions. It does well in moist spaces like your shower. If you want to keep your maintenance duties low, epoxy may be the most worthwhile and cost effective choice down the road.

Warning Signs That Mr. Handyman Can Handle With Norfolk Grout Repair

Some telltale signs your grout is damaged are discoloration from a kaleidoscope of colors, including black, blue, green, and pink in most areas due to mold or mildew growth or if the shade of grout gets darker when it’s been wet. If there are no funky colors then other red flags include loose tiles and crumbling from age or improper installation. Overall, grout lasts you many years, depending on your motivation for routine maintenance including grout cleaning to scrub away grime and dirt. Otherwise, Norfolk grout repair services are inevitable.

From our experience, ceramic tile requires constant maintenance, from tile cleaning to resealing the surface. Besides natural stone, ceramic is one of the most porous materials that need a good choice of sealer for protection. Our Norfolk grout repair technician often finds a lack of sealer, or they have worn out, but the homeowner wasn’t aware of it. That is when dirt particles create that dark color on the surface. Eventually, the lines will dry out and begin to crumble.

Why Mr. Handyman Is The First-Rate Choice For Norfolk Grout Repair

A well-done Norfolk grout installation service will highlight your home’s interior and brighten up your rooms, but only if you depend on your local experts for routine Norfolk grout repairs. Norfolk, OK residents can relax, knowing our trained technicians are well-adept at scraping and replacing any grout-based surface from your countertops and tiled floors as your structures are reinforced once more. Our uniformed technician will show up promptly and adjust to your flexible schedule and of course, we always clean up after ourselves and discard any waste at the proper facilities.

Although we don’t advise you to use abrasive chemical cleaners or pure bleach as this can damage the grout, but use a careful convocation of equal parts vinegar and water or baking soda and bleach. Here are some of the steps you can take to prevent early future grout repairs. Norfolk, MA residents can utilize these tips by cleaning grout surfaces to prevent mold growth:

Home Remedy: White Vinegar

  1. Brew And Blend. Fill a spray bottle halfway with clean water and fill the other half with white vinegar in equal portions. Shake the bottle to mix the solution.
  2. Spray On: Spray the solution in between the lines on the surface from the top down and focus on areas where there is visible mold on the grout indicated by different colors.
  3. Scrub It: Begin removing the grout with a scrub brush and use a circular motion over the mold. For the most part, the mold should slip off easily but for those tricky corners or crevices, we recommend using a toothbrush.
  4. Wash Away: Rinse off the vinegar-based solution using a spray hose or shower head if you are cleaning bathroom tile.
  5. Clean and Dry: Follow up and dry with a cotton towel to absorb any leftover moisture. Make sure to clean your tools as to prevent the spread of mold spores.

Alternative Home Remedy: Baking Soda and Bleach

  1. Concoct: Combine 3/4 cup of baking soda and 1/4 cup of bleach into a thick paste which should be slightly sticky.
  2. Pasting: Apply the paste substance directly and generously onto the grout using a paintbrush you can purchase from any home hardware store. But please note the bleach will fray the bristles of the brush, so you may have to toss it out after use. If the mold is not too extensive, you could use an old toothbrush for the job.
  3. Wrap It Up: Cover the area with plastic wrap and secure it in place using tape. Allow the paste to sit for ten minutes or so until it’s fully settled. This is done, so your cleaning solution fully settles and begins to whiten the grout.
  4. Sponge Off: Remove the plastic tarp and using a damp sponge begin wiping away the paste and dispose of the residue in the garbage as you move along the lines.
  5. Clean And Dry: Using a microfiber or cotton cloth, dry out the lines as much as possible, as the dryer, the better, as it’ll be less readily exposed to mold. And as usual, always clean and disinfect your tools, including the brush and sponge after cleaning.

If you follow the above steps, there is little chance you will need a Norfolk grout repair professional anytime soon. Other tips or tricks you can do to prevent mold in your grout lines are to stop any leaks in moisture-prone areas like your bathroom, for example in your shower head. It’s also a good idea to reseal your grout every few years to plug up any pores to prevent mold from cropping up. Sealants are applied directly to the grout itself and should be allowed to dry for a few hours before you use plumbing fixtures like your shower or bath again. Another general rule of thumb is to keep more humid areas of your home, especially your bathroom, ventilated. You could turn on the bathroom fan after a hot and steamy shower as this will reduce the amount of humidity, preventing any bacterial growth. Even minor habits like opening up your shower curtain or shower door can provide better fresh air circulation.

Some people often get the two different applications mixed up as they serve very similar purposes. Sometimes, caulk can be used to grout, but grout can never be used to caulk. Grout is specifically reserved for professional tile installations and can only be used to fill in joints between tiles, while the caulk is an all-in-one solution and can be used in many spots. Caulk has many applications, from baseboards and crown molding; it’s used on windows to stop air leaks or drafts and around plumbing fixtures like your bathroom faucet, including the faucet’s basin or standing tailpiece to secure them in place and prevent water damage.

Without grout, your tiles will readily become dislodged, and your surfaces will be more exposed to damage. Grout installation serves other purposes apart from being an adhesive or for cleanliness, like preventing water damage too.

Yes–this is doable if the damage is not too extensive. First, scrape away the crumbing or loose parts using a carbide tip tool, clean the area with a brush and vacuum and refill it with the matching grout color.

Although this depends on the amount of damaged grout, generally you should aim to remove about an eighth of an inch to 3/16’ below the topmost edge of the tile. This will give enough space for the grout’s joints to be refilled. It’s not ideal to completely remove the old grout’s joints as they serve as a standing base and bonding surface for the new grout to attach to.

Your Home Will Be Gleaming With A Mr. Handyman’s Norfolk Grout Repair!

It’s about time you relied on a trustworthy contractor from Mr. Handyman to illuminate your home’s spaces. Whether you’re in Norfolk or nearby areas of DuxburyWestwood, or Quincy, reach out to your courteous customer service representatives to learn more about our diverse palette of home improvement services from flooring repair and installation, ceiling repair, and window repair and more. We eagerly await your response!

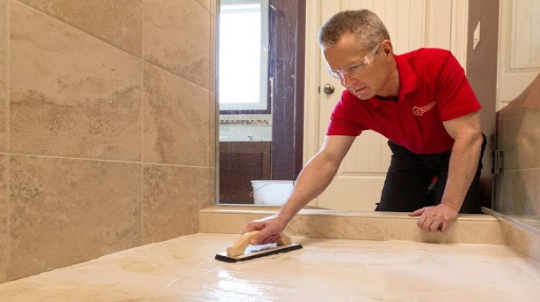
Mr. Handyman technician repairing grout in Norfolk shower.