You need new flooring, and there are two things that immediately come to mind. The first is to find out what the current flooring trends are. Flooring lasts a long time, so you want to make sure you get something that gives your house an updated look.
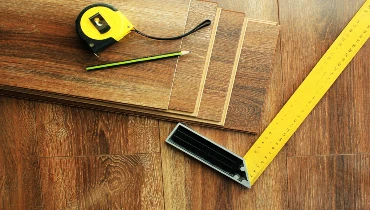
The second question is whether you are going to do it yourself or have the flooring installation handled by a professional. Two things to consider when making that decision is the time it takes to complete installation and whether you have the tools to handle the job properly.
We are going to fill you in on everything you need to know when deciding whether to do it yourself or use a professional Southwest Dallas County installer while planning your new floor project.
Select Your Flooring
According to Floor Covering News, 2019 flooring sales were over $23.07 billion. Carpet and rugs comprise 52.9% of the industry volume. When making your new flooring selection, ensure that it’s appropriate for the room it is going into.
One thing to consider is that flooring in bathrooms and kitchens require different considerations than other rooms in the home. Flooring must be able to withstand getting wet in those rooms.
Carpet
Carpet feels plush and cozy beneath bare feet. The wide range of colors allows you to select from bright, bold colors to something with a natural or earthy tone. With carpeting making a comeback in 2020 you are sure to find something you like.
You can even install carpeting over hardwood flooring. Old carpeting, padding, tack strips, nails or staples would all have to be cleared out.
Use shank nails to repair squeaks. Fill cracks or depressions with a latex patching compound. And, remove floor registers for the installation.
The carpeting can butt to your base molding, but shoe molding needs to be removed for the installation. You can then reuse the shoe molding to cover any gaps along the edges of the carpeting after install.
Carpet requires a professional installer. To complete the job properly you need a knee kicker. If the carpet is not properly stretched it may buckle and crease rather than lie flat.
Vinyl
Vinyl flooring is 100% synthetic and comes in sheets or tiles. It is constructed with a base layer of fiberglass with a PVC vinyl and plasticizer coating.
The sheet of vinyl is then printed and embossed with a pattern on the surface. Wear layers cover the print layer for protection, along with a layer of polyurethane. Vinyl flooring is waterproof, which makes it an excellent choice for bathrooms, kitchens, basements, and laundry rooms.
Make sure your subfloor is in good condition, flat and smooth. If planning to do it yourself, keep in mind that sheet vinyl is large and heavy. It is tricky to make the appropriate cut-outs for doorways, around cabinetry, etc.
You can also purchase luxury vinyl, which is built using planks or tiles. These lay side by side using tongue and groove as a floating floor. For that reason, luxury vinyl is easier to install on your own.
Laminate
Laminate is a synthetic product constructed from fiberboard with a photo of material, such as brick, stone, or wood glued to it. There is a protective layer on the top. Laminate is inexpensive, durable, and resists staining, scratching, and fading.
Laminate can resemble plastic in both appearance and feel. It has a tendency to become slippery when wet, so it is not recommended for bathrooms or laundry rooms.
This material is susceptible to moisture and dents easily if something drops on it. In a room that has a lot of humidity, the flooring may shift and develop small cracks between the boards.
You can install laminate over most flooring materials that are level and in good condition. The only exception is carpeting.
From a do-it-yourself aspect, laying a laminate floor using a floating system is very user-friendly. The planks are tongue-and-groove method so there is no nailing or gluing required.
You, however, do need to have patience and handyman skills to work around doorways and corners.
Ceramic Tile
Ceramic or porcelain tile is an excellent choice for high traffic areas. It is also good in places that experience water on the floor such as laundry and bathroom areas. This product will work in any room.
Because tile is cold to walk on, it is not recommended for bedrooms or children’s play areas. It does come in a wide range of colors and materials and is an excellent choice for outdoor living areas. It is easy to clean and lasts for years.
The difference between ceramic and porcelain is minor. Porcelain is denser and more resistant to moisture so it handles heavy loads easier. The color of the tile is continuous all the way through so cracks or chips will not show as easily.
This is one of the most difficult floorings to install. Installing ceramic tile requires a dry, clean subfloor with a cement-based tile backer board on top.
You must use a waterproof underlayment in a bathroom to ensure a waterproof seal. Installation is done using mortar and grout. From a do-it-yourself aspect, you will need to have moderate to high levels of DIY experience.
If you plan to tackle this job make sure you follow step-by-step instructions carefully. Success requires understanding how to properly start a tile floor and how to notch around obstacles.
Hardwood Floor
You can’t go wrong with wood flooring. It is natural, eco-friendly, durable, and naturally renewable. There are a lot of options to choose from when making a selection of flooring that will last several years.
This material is milled from solid wood and is available in both finished and unfinished options. Wood is not waterproof and is not recommended for laundry rooms, bathrooms, or below-grade basements. In the rest of the home, it gives a rich, welcoming feel.
Wood flooring must be installed over a clean, dry, wood subfloor. Manufacturers recommend allowing the material to acclimate to the room for 4-5 days prior to installation. This means removing the flooring from the boxes and placing it into small piles in the room.
If you are reusing an existing subfloor you must remove anything from the prior flooring. Make sure the old floor does not show signs of moisture, mold, warping, or crumbling.
The subfloor needs to be smooth and level. Remove any old staples, nails, or other materials that secured your old floorcovering to the subfloor.
You must remove all trim, including case molding and baseboards before installation. The installation is tricky. One of the biggest challenges is keeping the rows straight. You must also handle boards that are warping.
Methods of Hardwood Floor Installation
When installing a wooden floor you need to determine the best method of installation.
Nailing is a popular method for installing wood floors. A wood flooring nailer and mallet secure wood strips to the subfloor using 2" cleats.
Stapling is another popular method. A pneumatic staple gun drives a 1-1/2” to 2” staple into the flooring and subfloor together. This method is not recommended by all manufacturers. A professional installer will know if this is a recommended method and what staple gun and staples to use.
Gluing is done using either mastic or adhesive using a specifically sized trowel to spread it. This method is not suitable for hardwood floors but is acceptable for engineered wood flooring. It is important to use the adhesive and trowel size recommended by the flooring manufacturer or you may void your warranty.
Floating the floor on a bed of padding means the floor is not attached to the subfloor. A thin pad is laid between the subfloor and wood flooring. The pad protects against moisture, reduces noise, and adds “R” value.
Wood glue is spread on the tongue and groove of the planks. This holds the planks together as they float above the subfloor.
Engineered Wood Flooring
This product gives you the look of wood with the benefit of being able to use it in any room. It is not affected by humidity. Just like hardwood, it is not recommended for bathrooms and laundry rooms where water may spill.
Engineered wood planks are made of real hardwood combined with a medium-density fiberboard core. The core makes this material more stable than solid hardwood, so you can use it anywhere in the home, including the basement.
Installation can be done using the glue-down or floating floor system. If you can keep the rows straight, installation is user-friendly.
Installation Times
If you are thinking of installing your new flooring on your own, read all instructions and make sure you purchase or rent all necessary tools. Make sure you have the correct subfloor for the type of flooring you select. Here is an estimate on the time it takes a professional to complete installations:
- Tile Floor (bathroom): 2-3 days on a prepped and clean floor
- Laminate Tongue and Groove: 1-2 days in a large room
- Hardwood Floor: 2-3 days
- Peel and Stick Flooring: ½ day depending on room size
- Carpet: 2-3 hours for an average size room
If you do not usually perform installations, it may take you longer to complete the job. A professional can get the job handled quickly and efficiently. When hiring a handyman to do the job, make sure you check their references.
Flooring Installation Preparation
When having flooring installed, you need to have the area ready to install when they arrive. To make sure there are no misunderstandings, the installation order needs to list who will be moving furniture and appliances. Here is a quick checklist:
- Remove Breakables – glass frames, paintings from walls, empty curio cabinets
- Remove drapes and blinds that could be contacted by installers
- Remove items from closets and storage areas
- Determine who is moving furniture and appliances
- Determine who is removing old flooring and subfloor
- Check to see if the floor height will prevent your doors from operating freely
- Verify recommended installation temperature for flooring
- Clean subfloors prior to installer arriving
If you have any questions about what is required, you should contact your installer prior to that day so there are no misunderstandings on the day they arrive.
Installing Over Old Floor
Be aware that new flooring will raise the level of your floor about 3/8.” Flooring manufacturers have transition thresholds that will allow for the adjustment of different floor heights between rooms.
New flooring height may also interfere with the swing of doors. If you have floor-length blinds or draperies they may touch the new floor. If installing on top of an existing kitchen floor, make sure your appliances will fit with the new floor height.
Beware of the Risks
Flooring installation produces dust and waste. An installer will collect the debris and leave it at your trash receptacle. While installing, the installation area will be messy.
Flooring installation tools are hazardous. Make sure children and pets stay out of the work area during the install. Be home on the day the flooring is installed in case there are questions. This helps ensure that the correct flooring is installed into the proper room.
When considering the mistakes that can be made when cutting, trimming, and installing expensive flooring, it makes sense to use a company that provides a “Neighborly Done Right Promise.” If there is any problem with their workmanship or products they sold, they will make it right.
Get the Job Done Right
Flooring installation is a complicated, time-consuming process. Mr. Handyman installers have an average of 10 years of experience and are fully insured. For your comfort and security, they arrive in a van that is clearly marked wearing a Mr. Handyman uniform.
If you want your flooring installed by a company that provides a “Neighborly Done Right Promise” and has 5-star reviews, you need Mr. Handyman of Southwest Dallas County. Contact us today or call us today for all your handyman needs in the Southwest Dallas county area.
