Do you have a nasty-looking water stain on your ceiling due to water leaks? Or maybe you have cracks caused by the natural settling of a new building? If you’ve found yourself in need of a guide on how to patch up drywall ceiling damage, you’ve come to the right place. Learn exactly what tools and supplies you’ll need for common types of drywall damage and ceiling repairs, as well as a step-by-step manual for making a seamless ceiling patch, from this guide by your experienced local handyman team.
Materials And Tools Needed For The Job
Before starting on your ceiling patch, make sure you have all the tools and materials you’ll need ready to go. No matter what type of damage you have, you’ll need these following tools and supplies:
- Joint compound (also known as drywall mud) or Spackle. If the area of damage is very small, you may be able to use Spackle. Otherwise, we recommend sticking with joint compound.
- Putty knife.
- Drywall knife.
- Utility knife.
- Sanding sponge.
- Sturdy step ladder.
For water-damaged areas, you’ll need to cut out the affected area rather than simply applying a patch over top of it. In this case, you’ll also need:
- A new piece of drywall.
- Tape measure or framing square.
- Pen, pencil or marker.
- Drywall saw.
- Drywall tape (also known as joint tape).
- Drywall screws.
- Power drill.
If your water-damaged area is small, you may be able to get away with only needing:
- A mesh drywall patch, or
- A drywall repair kit
How To Patch Up A Hole In The Ceiling, Step-By-Step
Patching ceilings follows many of the same steps as those required for patching a hole in drywall. Though you may not have holes in your ceiling, in cases of water damage, you’ll have to remove the damaged portion, thereby creating drywall holes. Regardless of the repair size, you’ll want to follow these steps for a great result:
Step 1: Remove Damaged Drywall
Using your fingers, press against your damaged ceiling. With a writing utensil, mark the boundaries between the areas with a bit of give to them and the sturdy areas.
Cut out a small piece of drywall in the center of this area and, using your tape measure, measure the ceiling's thickness. Most ceilings are 0.5 inches thick, but make sure you verify this before purchasing a new sheet of drywall.
Using your tape measure again, measure out the length and width of the area of the damaged ceiling you want to remove. Transfer these dimensions to your new piece of drywall and cut out a square drywall patch. It’s much easier to work with square and rectangular patches rather than cutting out the shape of the damaged area.
Step 2: Attach Drywall Patch
While holding your drywall patch against your ceiling, trace its outline and cut out the damaged area using this guideline using a drywall saw.
With the water-stained area of your ceiling removed, ceiling joists will be exposed. Around the perimeter of this hole, mark where these joists are. Insert your patch into the hole and attach it to the joists with drywall screws and a power drill.
Step 3: Apply Joint Compound
Before applying a layer of compound, you’ll need to add extra support to the border of your patch. Though mesh tape does work for this, we recommend using paper drywall tape, as it is more flexible and easier to use.
Spread some joint compound on either side of the seams and press joint tape against it to hold it in place. Apply a layer of joint compound over top of this tape, taking care to feather the mud out towards the edges.
Once dry, add a second coat over top of the tape. It generally works best if you do two parallel sides of your patch at a time, and wait for these to dry before moving on to the next joints. That way, you won’t damage any feathering you’ve done around the corners of your square patch.
Apply a final third coat across your entire patch. Use your judgment to determine how many coats you need, taking care not to apply any layers too thickly.
Step 4: Sand And Paint
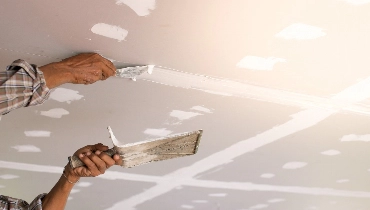
Once the patch is looking seamless, you can sand its surface down. Clean up the resulting drywall dust with a vacuum and a rag. Once clean, you can top off your repair with some primer and a fresh coat of paint. For ceilings, you may also need to reapply texture, such as in the image below.

Repairing Cracks
If you have cracks in ceiling drywall in your newly built home, chances are good that these cracks are simply the result of your home settling. Wait for the cracks to stop spreading before making any repairs.
If the cracks are thin, all you need to do is apply a couple of layers of joint compound with a putty knife, sand and paint. For larger cracks, add joint tape first, and then follow steps 3 and 4.
For Professional Drywall Ceiling Patching, Contact Mr. Handyman
Now that you know how to patch up drywall ceiling damage, you may be unsure about whether you feel confident doing this alone, or whether you need professional ceiling repair services. If you’d rather leave this and other home improvement projects, such as drywall installation, to professionals who have done this kind of work before, Mr. Handyman of Dallas has you covered.
Unlike some independent drywall repair contractors, our team backs our customers with accurate assessments, a workmanship guarantee and competitive pricing. Our handyman experts have an average of 10 years of experience in the handyman and home improvement industry, so you can rest assured that they have the knowledge and expertise to do your ceiling repair. With our help, you won’t have to worry about knowing how to patch up drywall ceiling damage!
To book a service appointment or discuss your project needs in more detail, feel free to reach out to our Dallas handyman team today and one of our office staff will be happy to help you out.
