Wondering if hiring a professional Dallas handyman or contractor for your kitchen tile installation is worth it? Considering the costs of the projects, and all the things that could go wrong with DIY. We think it’s more than worth it. But don’t take our word for it, read on to learn more.
Did you know homeowners are likely to see a 54 to 77 percent return on investment when renovating an outdated kitchen. Recoups are greater when people spend on luxury, long-life features like a statement faucet or quartz tiles. But that’s if everything is done correctly.
With people spending anywhere from $64,000 to $126,000 on a kitchen re-do, it’s not surprising to see why you might be considering how to cut costs. DIYing it on things like kitchen tile installation can make all the difference to your bottom line, but the risks are much higher.
Whether you’re remodeling to sell soon, renovating a newly purchased fixer upper, or improving your family home, read on for the DIY kitchen tile help you need before you get started.
1. Buying the Wrong Tiles for the Location
Three areas in a kitchen are most often tiled: the backsplash, the floors, and the countertops. The range of tile materials is endless: ceramic and porcelain, stone, glass, concrete, even a wood-look.
Prices reflect the quality of the material and the finish. Be prepared to spend anywhere between $2 to $100 per square foot, depending on what you select.
With kitchen wall or floor tiles, you want to go with tiles that are easy to clean and durable. Because natural stone tile is porous, you need to refinish it every few years to keep it looking good. Though tough, a professional will need to install porcelain tiles for you.
If you want to DIY your kitchen floor, you can’t go wrong with ceramic tile. It’s available in a huge range of colors, textures, sizes, and patterns.
Countertops and backsplashes take up less area in your kitchen, make more of a design statement, and take less of a beating compared to your floors. This means you can afford to splash out on glass, stone, or porcelain tiles, or even create a unique mixture of tile types.
Make sure you buy the right number of tiles. You don’t want to start tiling only to run out of tiles three-quarters of the way through the job. Though it’s possible, it’s not recommended to stop and start a tiling project.
2. It’s What’s Under the Tiles that Matters Most
You might well think that it’s the exterior aesthetics that matter most when it comes to kitchen tiles. But laying tiles on an ill-prepared surface is arguably one of the most important kitchen tile mistakes to avoid.
In the kitchen, it’s common to install a backsplash directly over drywall or plaster. The key to a beautifully tiled wall is to make sure the wall surface below the tiles are perfectly smooth, clean, and dry.
If your wall has seen better days, or you’ve yet to install drywall altogether, it’s worth it to hire a trusted repair person. They can whip that wall into shape before you lay even a single tile.
Whether you’re tiling the floor or walls, make sure the surface is smooth, clean, and free of dust and debris. If you removed old tiles, laminate, or linoleum, there could be anything from old grout to chunks of adhesive stuck to the surface. You can chisel or grind away the hardened material or remove it using a soy or solvent-based solution.
If you’re installing tiles in a wet area, such as a dedicated backsplash directly behind the kitchen sink, you may want to consider first laying down a backer board. This will create a waterproof membrane underneath your tiles, preventing damaging mold and mildew from growing.
For floors, the right underlayment or subfloor can make the difference between tiles that lay flat and those that buckle over time.
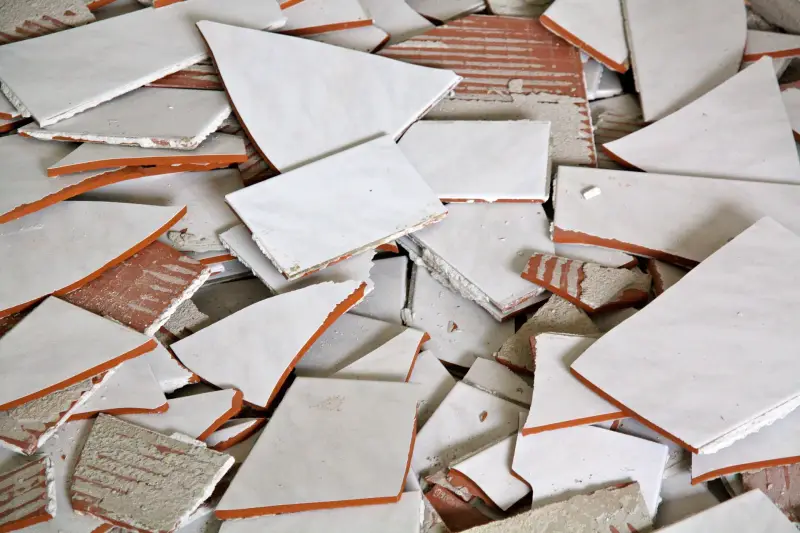
3. Cracks, Dings, and Scratches
You’ve selected your tiles, brought them home with you (or had them delivered), and your work surface is perfectly prepared.
Before you even get started on your DIY kitchen tile job, inspect your new tiles. Take each one out of the packaging it comes in and look over it carefully for scratches, chips, breaks, and blemishes.
If you see anything wrong with a tile, contact your provider to source a new one. If you’re not using them immediately, store your tiles in a cool, dry place away from foot traffic. Keep them wrapped in the paper or other protective material they came in.
Also, tiles are likely to get damaged during installation—especially, when you are cutting the tiles to size to fit into corners. Avoid this by measuring and scribing tile cuts and using a wet saw with a diamond blade.
A few broken tiles are expected in a DIY job, but it’s expensive to replace too many.
What if you crack or chip a tile after installation? It’s possible to repair a broken tile using adhesives or epoxies. While you will restore the strength of the wall or floor, the final look will still be sub-par.
If it’s in a more hidden corner of the kitchen, it won’t matter. If it’s in an exposed area, it will look unsightly. It’s best to avoid using chipped or broken tiles and stomach the cost of new ones to replace any you have damaged.
4. Imprecise Layout: Kitchen Tile Installation
There’s nothing that screams “I need DIY kitchen tile help” more than a wonky line of tiles in a backsplash.
Creating a symmetrical layout will ensure your tiles look like they were laid by a professional. If you’re setting tiles around an object, such as a kitchen sink, use tiles of the same size. If you need to cut tiles to fit where they meet an edge, such as a wall or cupboard, mimic the cut on the opposite side.
By planning, the goal is to minimize (or eliminate) the need to cut tiles altogether.
Before undertaking your kitchen tile installation, mock up a rough draft either digitally or on paper. There are a plethora of tile calculator apps available for download, which make working out how many tiles you need for your space simple. This is particularly useful if you’re planning to use tiles that are oddly shaped or custom cut (e.g. hexagons, subway tiles, or circles).
5. Misunderstanding Tile Science
Expansion and contraction are two processes you’ll need to get to know intimately if you’re planning on DIYing your kitchen tiles.
Warm and cool air affects your tiles, the materials they are joined to, and the adhesives that hold them in place. In hot weather, these substances expand and in cold weather, they contract. These movements are minute, but they can cause improperly laid tiles to buckle or even crack.
Freezing, prolonged sun exposure, under-floor heating, and moisture, can also influence the structural integrity of your tiling work.
To counteract these physical effects, professional tilers build movement or expansion joints into the tile pattern. They leave half an inch or so between each tile and its adjoining surface–either the wall or floor–and fill it with a flexible material (such as cork underlayment).
Expansion joints are especially important when tiling large sections of the floor, which you can compare to a large pane of glass. For wall tiles, good surface preparation and quality mortar and grout will be enough.
6. Underestimating the Stick You Need
If you’re tiling a section of wall in your kitchen, you’ll likely need one of three types of adhesives: thin-set adhesive, organic mastic, or mortar.
Used for centuries to tile everything from temples to homes, mortar is a tried-and-tested classic. Organic mastics are a petroleum or latex-based product that is ready to use from the container. Thin-set adhesives come in powder form and must be mixed with a liquid before use.
Thin-set is increasingly preferred by professionals and DIYers alike because it bonds stronger and bears weight better than its counterparts.
Most importantly, consider the environment your tiles will be used in. You’ll need to fix tiles around the kitchen sink with a waterproof adhesive while those placed behind a fireplace will need a heat-resistant bonding material.
Large-format tiles, which the Tile Council of North America (TCNA) defines as anything with an edge larger than 12 inches, need special treatment. Just before each tile is placed, you should apply a thin coating of adhesive to the back of the tile using the flat side of your trowel. This is called back-buttering.
Back-buttering ensures the tiles stay in place, especially in the case of tiles crafted from heavy materials like natural stone. In this way, the tiles are less susceptible to fracture or buckling.
7. Incorrect Grout and Caulk Selection
Though grout and caulk both work to fill the gaps between our tiles, they function differently once dry.
Grout is a masonry material that you buy as a dry powder. Mix it with water and it becomes sticky and spreadable. Once applied and allowed to set, it will dry as hard as a rock, securing your tiles neatly together.
Caulk, on the other hand, is a soft paste that comes in an easy-to-use tube or container. Crafted from plastic (such as acrylic, latex, or silicon), it stays flexible even after curing. It’s ideal for use in situations where building movement or climatic conditions might influence the stability of the tiled surface.
All DIY tile installers need to know is when to use which product.
Grout is inexpensive and perfect for most tiling situations. It fills the gaps between the tiles that have been glued to the wall or floor, stopping them from shifting and chipping.
Caulk is better used in situations where you need a waterproof barrier between the tiles and the surface they’re fixed to. If you’re having trouble with grout not sticking to a wall or floor underlayment, choose caulk instead. Its glue-like structure means it bonds to a wide range of materials.
8. You’re Not Careful With the Clean Up
You’ve worked for hours: preparing your pattern, cleaning the wall, back-buttering each tile, and carefully filling the gaps with grout. You stand back to admire your handiwork. But wait, what’s that?
The tiles you worked so hard to create are dusted in a fine white powder. This grout haze is made up of the minerals from the grout material. As the water evaporates out of the concrete and mineral mix, the fine particles rise to the surface and spread across your tiles.
You’ll need to live with this grout haze a little longer. You have to wait until the grout has completely dried before you can clean it away. In the meantime, you can prepare your cleaning materials.
Water won’t cut it when it comes to tile cleaning. If you’ve installed ceramic, porcelain, or glass tiles, you can use an acidic-based cleaner like vinegar. For natural stone tiles, you should purchase an appropriate grout cleaner. Epoxy-based caulk is harder to clean off and will also require a trip to the hardware store.
Be warned. Don’t wait more than ten days to remove the grout haze or it will be extremely difficult, if not impossible, to remove.
Get a Little More Than You Need
There’s a great rule of thumb in the construction industry: always get 10 percent more than you might need. We know, it seems like you’re throwing money away! By buying just a little more than your kitchen tile installation job requires, you’re guaranteed to finish the job rather than getting stuck just before the end and wasting everything.
If you’re not certain that you can get the right materials for the job (or indeed, even be able to complete the job), then consider hiring a general contractor. From updating your old-fashioned kitchen backsplash to replacing crumbling grout, an expert technician has the right tools to give you the kitchen tile help you need.
If you’re looking to hire home renovation professionals in Dallas, Texas, look no further than Mr. Handyman. Visit our website and request service today.
