Wall damage is more common than you might think, and Dallas homes are certainly not free from the common causes of damage. Maybe your friend was demonstrating an epic amateur karate move. Maybe your dog got worried that you were never coming back and decided to dig a hole in the wall to check. Maybe you have no idea what caused that problem. Regardless of the circumstances, something (or someone) happened to your drywall and now you need to know how to fix a wall hole.
If we're talking about a small hole, you've got this. Your repair job will be pretty simple and you can probably take care of it on your own. It gets a little more complicated for holes that are as large as four inches in diameter, and a lot more complicated for holes that are even larger than that, but we'll cover the steps on how to fix a wall hole of any size with basic drywall repair methods.
Not sure you're up to the task, don't have the time to learn how to fix a wall hole or just don't want the hassle? That's completely understandable. A Dallas handyman can fix your wall for you! Get that repair taken care of quickly and efficiently with the team of service professionals at Mr. Handyman of Dallas. We have many years of experience with fixing wall holes in Dallas and the surrounding area, so we know exactly what to do to fix your wall and restore it to perfect condition with an invisible patch.
What is Drywall?
Drywall, which is also referred to as Sheetrock and gypsum board, is a panel of a soft sulfate mineral called gypsum sandwiched between layers of thick backer and facer paper. It typically contains additives that reduce flammability, mildew growth and moisture absorption. Drywall is used in residential and commercial buildings around the world as a finishing layer on walls and ceilings. Although it has many benefits, it’s not indestructible, which is why so many people often need sheetrock repair.
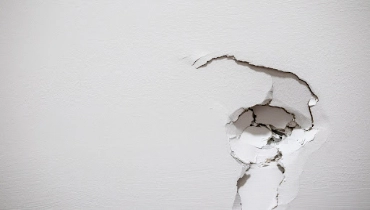
What Caused the Wall Hole?
Often you know exactly what caused a problem with your drywall because you watched it happen right before your eyes—or the guilty party confessed later on. But sometimes what caused your damage is more of a mystery. Wall damage doesn't form spontaneously, but factors like moisture incursion can weaken your drywall to a point where you can practically poke a hole in it with your finger.
Before you learn how to fix a wall hole in Dallas, it can be helpful to understand common potential causes of damage. It may have been a one-off situation, but if it was caused or aggravated by an ongoing issue, it makes sense to get that resolved before you get into repairs.
Here are some possible causes of drywall damage that our Dallas handyman team has seen in the Metroplex area:
- Worsening wear and tear over time
- Holes from nails, screws and drywall anchors used to support shelves, wall-mounted televisions and framed paintings
- Building shifting or settling and causing cracks, loose joint tape and popping drywall screws
- Pets scratching your wall
- Water damage from a leaking roof, pipe or fixture
- Moisture that was let inside your wall via damaged siding or deteriorated caulking around windows
- Repeated exposure to condensing steam in a poorly ventilated bathroom
- Damage that is created or expanded by insect and rodent pests
Step-by-Step Guide on How to Fix a Wall Hole in Dallas
Whether you are a Dallas homeowner or business owner who wants to keep your property in excellent condition or you're a house or apartment renter who is determined to do everything possible to reclaim your damage deposit, knowing how to fix a wall hole is a useful skill that you will probably have occasion to use more than once. Want to know more about drywall finishing? Check out our complete guide to drywall finishing levels and more.
The instructions on how to fix a wall hole vary a bit based on the size of the holes in drywall you are dealing with. This guide explains the steps to fixing tiny nail or screw holes, small holes that are less than four inches in diameter, and larger holes that are more than four inches across. Based on which size you are repairing, you'll need some or all of the following items and materials:
- Pencil
- Utility knife
- Drywall compound (also called plaster, spackle, or joint compound)
- Drywall patch
- Drywall saw
- Drywall scrap piece or panel
- Scrap lumber or a piece of plywood
- Screws and screwdriver
- Sandpaper
- Fiberglass drywall tape
- Moist sponge or damp cloth
- Wall texture spray
- Paint that matches the existing color on your wall
- Paintbrush
- Stud finder
- Drop cloth or plastic sheet to catch loose debris and drywall dust during sanding
For small holes, you may be able to purchase a drywall repair kit that comes with the tools you'll need as well as an adhesive drywall patch, which is helpful if you don't already have tools on hand. Keep in mind that you are going to need to paint the exact color already on that wall. If you don't have any leftover, you can take a little chip of paint to a hardware store as a sample and have them mix up a matching color. Also remember that some steps will require you to wait for the compound to dry, which can take as long as 24 hours for a large hole, so if you're dealing with anything more than a nail hole, this is probably going to be a multi-day project.
If you're not confident that you can (or want to) handle the task of fixing a wall hole in your home or commercial business, don't stress about it! Call Mr. Handyman to get help from a local Dallas drywall repairman who will take care of the entire process quickly and efficiently, and make sure the repair is completely invisible. We'll even clean up after ourselves before we leave—and as you're about to discover, drywall repair is a messy task.
Nail or Screw Holes
Okay, let's get down to the nitty-gritty of how to fix a wall hole. This method is pretty simple and will work for a screw or nail puncture, or any other tiny hole, dent or crack of a similar size.
-
Take your lightweight spackle, which typically comes pre-mixed, and use a putty knife or even just your finger to completely fill your damaged area with spackle.
-
Try to make it as level and even as possible with the rest of your wall surface.
-
Let your compound dry completely, which may only take about 30 minutes for a small amount (check manufacturer's directions for recommended dry time).
-
When it's totally dry, use fine-grit sandpaper to sand down compound and remove any rough edges, leaving your repaired part level with the rest of your wall.
-
Wipe repair spot with lightly dampened cloth to get rid of any excess dust.
-
Use a small paintbrush to touch up patched areas with paint.
Small Holes
Need to know how to fix a wall hole that is substantially larger than a nail puncture? For damage that is larger than what we described above, but less than four inches in diameter, you will need an adhesive drywall patch. Here's what to do.
-
Gently cut away any loose or dangling remnants of drywall from around the edges of hole.
-
Place a self-adhesive mesh patch over hole.
-
Use a drywall knife to spread lightweight joint compound over top of patch. Use a generous amount and apply in a crisscross pattern, feathering with your knife at edges to help blend it into your wall surface.
-
Let your compound completely dry for as long as the manufacturer recommends, which could be up to 24 hours.
-
If it's needed to totally cover and fill the area over the patch, apply another coat of compound and let it dry.
-
Sand repair area until it is smooth and even with your wall.
-
At this point, you may want to apply texture spray. The smooth, sanded compound over your patch is not the same texture as the rest of your drywall, which has a very lightly stippled texture. Maybe that doesn't bother you, or your patch isn't in a very noticeable area. But if it does and it is, put a coat of texture spray over your patched area and let it dry.
-
Cover repaired spot with paint. Depending on the location of the patch and how long it has been since your wall was originally painted, you may need to paint your entire wall to make your repair disappear.
Large Holes
If you are looking for info on how to fix a wall hole that is more than 4 inches across, you should know that this process is going to be considerably more involved and difficult than it is for smaller spots of damage, because you'll need to patch the drywall with another piece of drywall.
For this level, you should be using protective eyewear and a mask, especially for the sanding part, because you don't want to risk inhaling drywall dust or taking a flying chunk of gypsum to the eye. You'll need to cut into the wall for this, so be completely sure that you aren't at risk of cutting through any electrical wiring inside the wall. If you're not sure, don't cut until you are.
-
Grab a pencil and mark lines about two inches above and below the hole.
-
Use a stud finder to locate wall studs on either side of the hole and mark their location with your pencil.
-
With your protective eyewear and mask on, use your drywall saw to cut along those horizontal lines you marked until you get to your wall studs.
-
From the edge of your stud, measure three-quarters of an inch in and mark that spot.
-
Carefully score those lines with a utility knife and continue cutting your drywall along the center of the stud with your utility knife (you'll need to do several passes).
-
Remove damaged piece of drywall. At this point, you should have a rectangular hole with half of a stud showing on either side.
-
Cut a piece of scrap lumber or plywood so it is around three inches longer than the height of your hole.
-
Install your support piece vertically inside hole, right in the middle between studs (it doesn't have to cover the entire opening, you just need a vertical strip to help support your patch) and screw it into place, sinking your screw heads a little bit below the surface of your drywall.
-
Using your utility knife, cut a piece of drywall into a rectangle the same size as the hole.
-
Place your patch into the hole. It should fit as snugly as possible, but you shouldn't have to force it in. If it's a little too big, just shave some excess off the side and try again.
-
Secure your patch by screwing it on to the wall studs and the support piece you put in the center, but make sure your screws are at least an inch away from the edge of your drywall. Remember to slightly sink the screwheads into your drywall surface.
-
Place strips of fiberglass drywall tape over top of the seams around the patch.
-
Use a drywall knife to generously spread joint compound over the tape, smoothing it out and feathering the edges so they blend into the wall surface as much as possible.
-
Fill in recesses above the screwheads you used to secure the patch and smooth them out.
-
Let the compound dry completely, according to the suggested time frame in the manufacturer's instructions.
-
Sand your dried compound until it's smooth and even with the wall.
-
Add a second coat of compound, let it dry and sand it down.
-
Wipe down the area with a slightly damp cloth or sponge.
-
Apply texture spray to the areas with compound—if you are concerned about the texture difference.
-
Paint over the patched area with a paintbrush or paint roller. You may find it necessary to paint the entire wall so it blends in better.
Need Help with How to Fix a Wall Hole? Skip the Hassle and Call Your Dallas Handyman!
If you've read the instructions on how to fix a wall hole in your Dallas home or business and it sounds time-consuming and difficult to get right on the first try—well, that's an accurate assessment. Whether you are in Dallas or a nearby community such as Mesquite or Rowlett, when you call Mr. Handyman of Dallas, you get peace of mind knowing that the job will be done right the first time and the repair will be completely unnoticeable.
Give us a call today to book a service appointment, or find out more about all the ways we can make your Dallas property more comfortable, appealing and livable.
