Whether it's part of a bathroom remodel or a kitchen upgrade—or another part of your home such as a laundry room—a tile backsplash is the perfect wall covering for any space that needs extra durability, moisture resistance and style on the walls. There are so many options available for factors such as color, size, shape, pattern and material, so a tile backsplash can really turn a drab space into the most stand-out room in your house.
But once the actual tile has been installed, your job's not done yet—it needs grout. When you've gotten past this last hurdle, your installation will be complete and you can enjoy your room again. Not sure how to do that? We're here to help! This guide explains the entire process of how to grout a tile backsplash from start to finish, including selecting the right option for your particular installation.
If you read these steps and decide you don't really have the time or inclination for a grouting project after all, no problem—count on your local handyman. The experienced team of tile and grout professionals at your local Mr. Handyman can get the job done right. All you have to do is sit back and admire your new backsplash.
Choosing the Right Grout for Your Tile Backsplash
Your first step, which is also one of the most important, is making the correct choice to suit your installation. Some people tend to assume that all grout is the same—it looks pretty similar, if we even notice it enough to take a good look at it. But there are a few different varieties available, and your choice will have a big impact on the success of your project. It's also important to consider which color will work best with the tile you've chosen.
Type of Material
It's a common misconception that you should choose which type of grout to use based on the room or whether it's on the wall or floor—your choice of grout types should actually be primarily based on joint size, meaning the width of joints between tile pieces. That confusion is understandable though, since different joint sizes are typically used for walls versus floors and so on. The right size for grout lines also has a lot to do with the size of the pieces, as large pieces generally call for heftier joints. Here are the general categories available:
- Unsanded: When it comes to vertical surfaces such as a backsplash, joints tend to be smaller. If they're really small like less than one-eighth of an inch wide, unsanded or non-sanded grout is your best option. It uses very fine sand powder instead of sand granules, so it's very smooth and doesn't have a gritty appearance or texture.
- Finely Sanded: For typical, medium-sized grout joints that range from about one-eighth to three-eighths of an inch wide, finely sanded is the standard choice. As the name suggests, it contains fine grains of sand that make it less prone to shrinkage and more durable over all.
- Quarry Type: This variety uses a heavier grit of sand and works best in installations with larger or irregularly-shaped joints that are in the three-eighths to half-an-inch range. That size is more common with large quarry, slate or terracotta that isn't typically used in a backsplash.
- Epoxy Grout: This option includes epoxy resin and hardener. Unlike other varieties, it's not porous which makes it more stain and moisture-resistant. It's most commonly used in showers or other areas that will be frequently exposed to a lot of water. The problem is that it's a lot more difficult to work with—because it dries so quickly, it requires a practiced hand. If you need to use epoxy, this job may be better left to a professional handyman.
Color
We see grout all the time, every day, but we rarely notice it. That makes sense—it's supposed to blend into the background and let tile be the star of the show. People often assume it only comes in a few neutral colors because those are often the most popular choice, but there are a few options available for colored grout too. That being said, it's usually best to stick with something that will enhance the look of your installation rather than compete with it.
Grout colors that are much lighter or darker than your pieces will make each one of the individual tiles stand out in an attractive way. Or, your personal preference may be for a monochromatic look, like white grout paired with a white tile backsplash. Remember that this material is somewhat porous and not that good at holding its color, so let the tile shine.
A Word of Warning for Natural Stone
If you've chosen a natural stone backsplash tile such as marble, travertine or slate tiles, there's an important step that needs to take place between when the pieces are installed and joint filling is applied. Before you even look at grout, you need to apply a sealer to your stones. It should be applied at least three hours before you start, but drying times may vary so refer to manufacturer's instructions on its package.
The reason why it's so important to apply sealant is because natural stone is vulnerable to staining, and its beautiful color can actually be affected by your joint filler if your stone isn't protected with a layer of sealant first. Natural stone finishings are an investment, so make sure to protect them so your backsplash doesn't suffer damage before it's even completely installed.
How to Grout a Tile Backsplash: 10 Steps
Whether you're working on a glass backsplash tile installation or other materials and formats like ceramic tile or mosaic tile, this simple guide will explain how to grout a tile backsplash on your kitchen or bathroom walls.
1. Gather Your Materials
Once tile is installed (and sealed, if necessary), the first step of your grouting process is gathering up materials and tools you'll need to have on hand. These items can be purchased at tile stores, but you can likely also find them at your local hardware store.
Here's what you need to grout a tile backsplash:
- Plastic sheeting
- Painters' tape
- Grout float
- Putty knife
- Two buckets
- Sponge
- Soft cloths made of cotton or microfiber
- Caulk gun
- Grout
- Latex caulk
- Grout sealer, if you plan to use it
2. Protect Your Area
When you've got everything together, give yourself a clean surface in your working space by removing everything from the countertops and ensuring that all loose items are safely stowed away or out of the room. If there is power going to electrical outlets or switches that are in or adjacent to your backsplash, cut power to them by flipping the appropriate breaker on your circuit breaker panel.
Then, cover countertops, cabinet edges, and anything else that is right next to your backsplash with your plastic drop cloth and fix it in place with painters tape to avoid getting grout anywhere it doesn't belong—it's a real pain to discover a lump or smear of dried-on grout stuck to your countertop, upper cabinets or window sill.
3. Divide Your Project Into Sections
Unless you're only doing a small area, it's best to divide your project into a few sections. A key reason for this is that grout is a cement-based product that hardens in a pretty short amount of time, so if you try to fill in joints for your entire project first and then go back to remove excess grout and smooth it out, it'll already be too hard to work with. You should be able to comfortably complete a section within about 30 minutes. By working in a smaller section, then removing excess before going on to your next section, you can make your project a lot less frustrating and stressful.
4. Prepare Your Joint Filler
Wipe down your tiles with a damp cloth and remove tile spacers, if they were used in the installation. Use one of your buckets and your putty knife to mix up a small amount until it is the consistency of peanut butter, following the instructions on the package from the manufacturer. Remember to only mix up about enough for one of your sections, because if you mix it all up at once it can harden in the bucket before you get to the finish line.
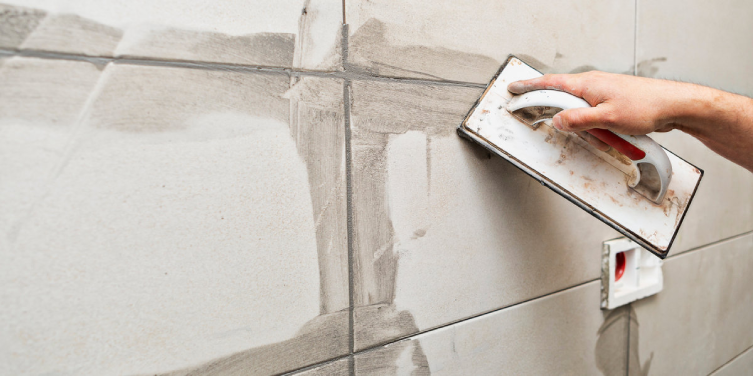
5. Apply Grout
Now it's time for the main event: actually putting joint filler on your wall. Use your rubber float to spread it diagonally across tiles at a 45-degree angle, ensuring that gaps between pieces are completely filled. Then use the edge of your float at a 90-degree angle to wipe off overfill.
6. Remove Excess
When you've applied filler to the section you're working on, moisten your sponge with warm water and use your damp grout sponge in a circular motion to clean excess off the surface of your tile and shape joints so they're level with the edges of your tiles. You will need to rinse off your sponge and go back over the same areas several times but it's important not to let the sponge get too wet and actually wash away or water down the filler.
7. Let It Dry
Next, you need to give your lines time to completely dry. That will probably take a few hours, but drying times can vary, so give them ample time according to recommendations on the package. As it dries, you'll notice that there's still a hazy, filmy layer over your tiles that's making them look dim and dingy. Don't worry, that's normal—and once the joints are completely dry, you can take care of it to get your tiles looking perfect again.
8. Remove Haze
After your application has dried out, fill up your other bucket with water and use a damp sponge to wash the grout film off, leaving behind a shiny, clean tile surface. It may take some elbow grease to get the last remnants polished off the surfaces of your walls, but it's worth it for how great your wall will look when you're done.
9. Apply Sealant and Caulk
If you plan to apply grout sealer, wait until at least 24 hours have passed from when you did the grouting. Sealer over top of the grout isn't strictly necessary for most tile backsplashes, but it can provide some advantages like making the lines easier to clean and more water resistant.
At this point, you should also apply a bead of caulk to the points where your backsplash meets another surface such as drywall, and in the 90-degree angle where the backsplash meets the countertop. It will prevent dirt and moisture from getting into tiny cracks or getting underneath the pieces of tile and causing water damage issues. Apply the caulk in a smooth, even bead and give it ample cure time according to the package instructions.
10. Finishing Touches
Now that everything has been installed, grouted, sealed and caulked, you're pretty much done with your tile job and you know all about how to grout a tile backsplash. Replace switch plates and cover plates for electrical outlets, and flip the breaker for that area back on at your electrical panel. Now you're ready to move your small items back into the room and voila—the perfect backdrop for your kitchen or bathroom is complete!
Need Help With How to Grout a Tile Backsplash? Call the Experts at Mr. Handyman!
If you've read through the steps above on how to grout a tile backsplash and it seems like a lot of work and effort—well, that's because it is. If you'd prefer to spend your time elsewhere and leave that work to the pros, count on the team of service professionals at your local Mr. Handyman to get the job done right!
Call today to get professional tile installation and grouting service, and a wide range of related services, such as grout repair, caulking, and tile repair, for everywhere from your kitchen to the tile shower in your bathroom.
