The transition from winter to warmer weather demands more from your home's exterior than any other seasonal change. Months of freeze-thaw cycles, ice accumulation, and moisture infiltration leave behind damage that warmer temperatures reveal but don't repair. Homes across Martinsburg, Charles Town, and Montgomery County face predictable spring challenges rooted in the region's climate patterns—clay soils that shift with moisture changes, temperature swings that stress building materials, and older housing stock built before modern weatherproofing standards. Preparing your exterior for warmer weather isn't about aesthetics; it's about preventing small winter damage from becoming expensive summer problems.
The work breaks into distinct categories that address different building systems and materials. Each area requires specific attention because failure in one system often cascades into problems elsewhere. A clogged gutter creates foundation moisture. Failed caulk allows water into wall cavities. Damaged siding exposes sheathing to rot. Understanding these connections helps homeowners prioritize preparation tasks and recognize why certain steps matter more than others.
Inspect and Clean Your Roof System
Start exterior preparation at the highest point—your roof. Winter leaves debris in valleys, behind chimneys, and along roof-to-wall transitions where water concentrates during runoff. This debris traps moisture against roofing materials and accelerates deterioration. Use binoculars to inspect from the ground if you're not comfortable on ladders, looking for missing or damaged shingles, lifted edges, and accumulations of granules in gutters that indicate shingle wear.
Check flashing around chimneys, vents, and skylights. These metal components expand and contract at different rates than surrounding materials, creating gaps where sealants have failed. Water entering through compromised flashing often travels along framing before appearing as interior stains, making the actual entry point difficult to identify. Spring inspection while the roof is dry allows you to spot problems before rain tests your roof system.
Attic ventilation deserves attention during exterior preparation. Ridge vents, soffit vents, and gable vents work together to move air through attic spaces, controlling temperature and moisture. Check that soffit vents aren't blocked by insulation pushed against them. Verify that ridge vents remain clear of debris. Inadequate ventilation causes heat buildup that ages shingles prematurely and creates moisture conditions that rot roof decking. Many homes in the region have ventilation systems that were barely adequate when installed and have become insufficient as insulation levels increased over the years.
Roof-mounted equipment—satellite dishes, antennas, and solar panels—needs inspection where it penetrates or attaches to roofing. Mounting hardware works loose over winter, creating leak points. Check that all penetrations remain sealed and that attachments are secure. Equipment that shifts in wind can damage surrounding shingles and create water entry points that worsen with each rainstorm.
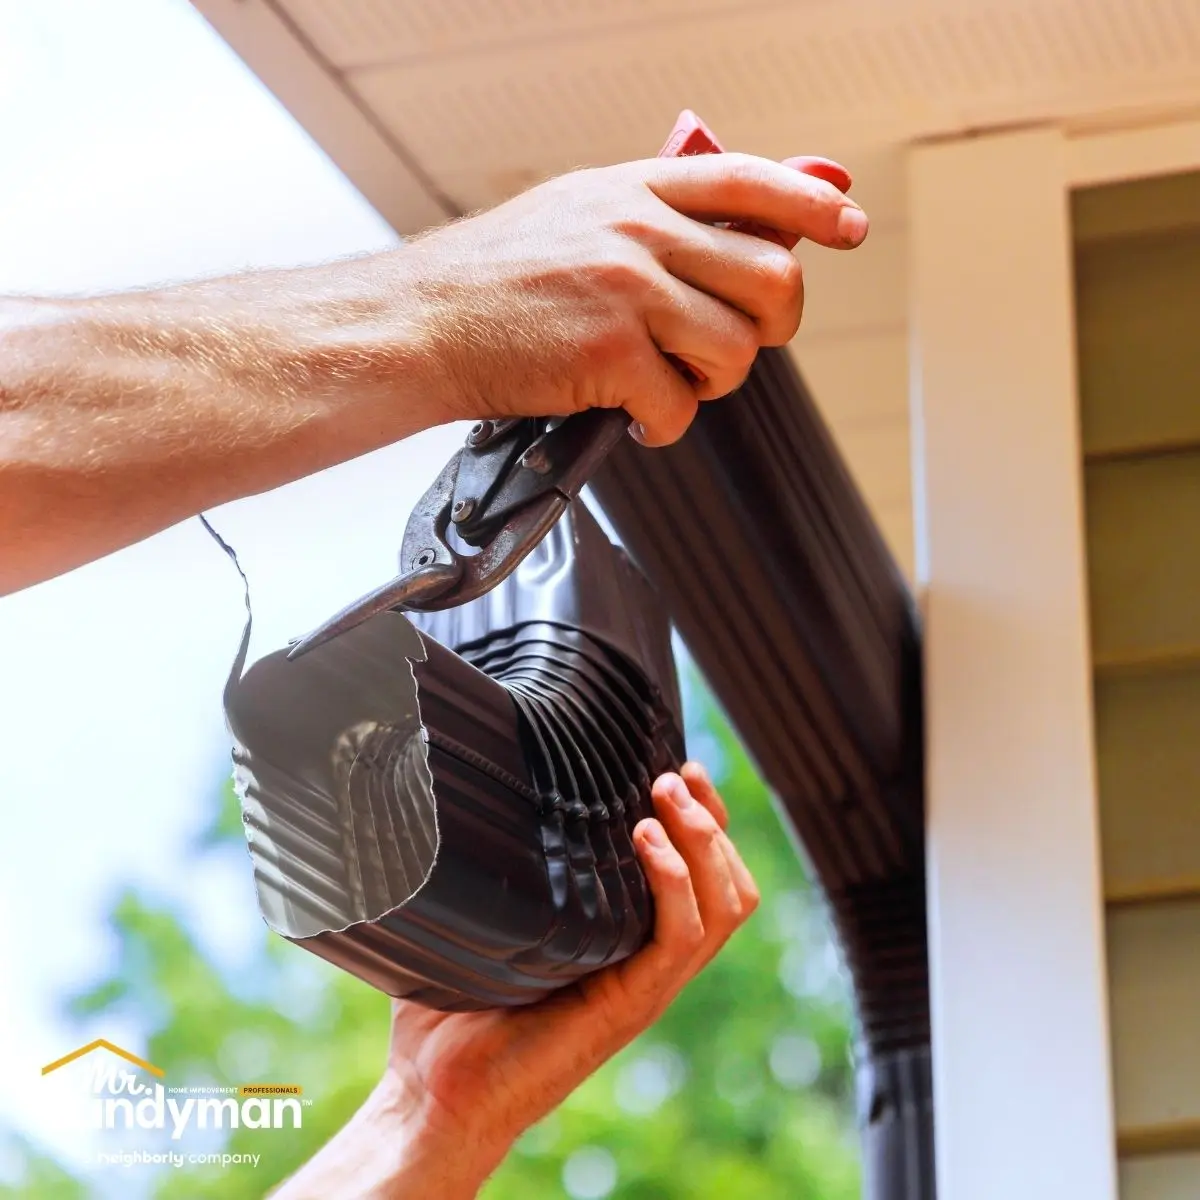
Clean and Repair Gutters and Downspouts
Gutters clogged with winter debris can't handle spring rains or summer thunderstorms. Remove all leaves, twigs, and sediment from gutters and flush them with a hose to verify proper flow. Watch where water exits downspouts—it should discharge at least six feet from your foundation through extensions or splash blocks. Water dumping close to foundations creates the basement moisture and foundation settlement problems common in older Mid-Atlantic homes.
Inspect gutter hangers and brackets. Ice weight during winter pulls hangers loose, creating sagging sections where water pools instead of flowing. Standing water in gutters breeds mosquitoes and adds weight that worsens sagging. Tighten or replace loose hangers before the problem progresses. Check end caps and seams for leaks—even small leaks allow water to pour down siding and rot fascia boards behind gutters.
Downspouts require individual attention. Verify that all sections connect securely from roofline to ground. Check elbows where downspouts turn—these joints separate easily and dump water against foundations instead of carrying it away. Many older homes have downspouts that discharge into underground drain lines; these often clog with roots or collapse from age. Test them by running water through and watching for backups or slow drainage.
Fascia boards behind gutters show damage from overflowing or leaking gutters. Press against fascia with your hand to check for soft spots that indicate rot. Rotted fascia can't support gutter weight, leading to complete gutter detachment during heavy rain or snow. Replacing damaged fascia while addressing gutter problems prevents recurring issues that cost more to fix with each cycle.
Examine Siding and Trim
Walk your home's perimeter examining every siding panel and trim board. Look for loose pieces, cracks, warping, or sections that have pulled away from the house. Wood siding shows winter damage through paint failures, rot at board ends, and splitting along grain lines. Vinyl siding cracks when brittle from cold weather, while aluminum dents easily and holds moisture behind damaged areas. Each siding type has characteristic failure modes that winter weather exploits.
Check caulk at every joint where different materials meet—where siding meets trim, around windows and doors, where brick meets wood, and at inside and outside corners. Caulk fails from UV exposure and temperature cycling; gaps that appear minor allow water into wall cavities where it rots sheathing and framing before you see interior damage. Recaulking these joints costs little but prevents expensive wall assembly repairs later.
Trim boards around windows, doors, eaves, and corners take concentrated weather exposure. They shed water repeatedly, maintaining moisture contact that promotes rot. Press against trim to identify soft spots. Check for peeling paint that indicates moisture is getting into wood. Many older homes have trim that was installed without back-priming—paint only on visible surfaces while bare wood faces the wall. These installations rot from behind while looking acceptable from the front.
Inspect foundation vents if you have a crawlspace. Verify that screens remain intact to exclude pests while allowing ventilation. Check that vents open and close properly if they're operable types designed to close in winter. Foundation vents that remain blocked reduce air circulation and trap moisture that encourages mold growth and wood rot in crawlspace framing.
Check Windows and Doors
Examine every window from outside, looking for deteriorated glazing putty, cracked glass, damaged screens, and failed weatherstripping. The glazing compound that holds glass in older wood windows becomes brittle and falls away after years of weather exposure. Missing glazing allows water behind glass where it rots sash and frame components. Reglazing windows is meticulous work but prevents wholesale window replacement costs.
Window sills take more water exposure than any other exterior wood component. They're designed to shed water, but once paint fails or wood cracks, water sits on sills and works into the wood grain. Check sills for soft spots, peeling paint, or cracks. Pay special attention to the underside of sills where you can reach them—many are rotted underneath while the top surface still looks acceptable.
Storm windows and screens need attention before warm weather arrives. Clean glass and screens, check for damaged frames, and verify proper operation. Storm windows that won't open create problems when you need natural ventilation. Damaged screens allow insects inside. Many older homes have original aluminum storm windows with worn tracks and degraded weatherstripping—these units reduce the energy efficiency of even good primary windows.
Door weatherstripping compresses and cracks over time. Check that doors seal completely when closed—light visible around door edges or drafts you can feel indicate failed weatherstripping. Test door sweeps at the bottom of exterior doors; these wear out from foot traffic and weather exposure. A gap under an exterior door seems minor but wastes considerable energy and allows water intrusion during driving rain.
Inspect Foundation and Grade
Walk your foundation perimeter looking for new cracks or widening of existing cracks. Any crack wider than a quarter-inch deserves professional evaluation. Check for signs of water entry—efflorescence (white powdery deposits), staining, or damp spots on foundation walls indicate water is moving through masonry. These problems worsen progressively once established; early intervention prevents expensive foundation and basement repairs.
Verify that soil slopes away from your foundation at all points. Many properties have settled over decades, creating negative grades where water pools against foundation walls. This is especially common in areas with clay soils that expand when wet and shrink when dry, creating ongoing movement. Mark areas where water pools during rain and plan grading corrections before summer storms test your foundation.
Check basement window wells for debris accumulation and proper drainage. Window wells that fill with water during rain allow moisture against basement walls and create entry points for water intrusion. Verify that window well covers are intact if you have them—missing covers allow debris accumulation and create safety hazards.
Prepare Decks, Porches, and Outdoor Structures
Decks require thorough spring preparation after winter's moisture and freeze-thaw damage. Start by sweeping away all debris, then inspect every board by walking the deck and pressing down on boards to test for soft spots or excessive bounce. Rotted or damaged boards should be replaced before warm weather brings outdoor entertaining. Check underneath the deck where moisture and lack of sunlight create ideal rot conditions. Look at joist hangers for rust, examine posts where they meet footings, and verify that ledger boards remain securely attached to the house.
Test deck railings by grabbing them firmly and pulling in different directions. Any movement indicates loose connections that create safety hazards. Balusters should be tight at both top and bottom attachments. Many older decks have railings that have loosened over years of use and weathering—tightening hardware now prevents injuries later. Check that railing height meets current safety standards, especially if you have young children or grandchildren who visit.
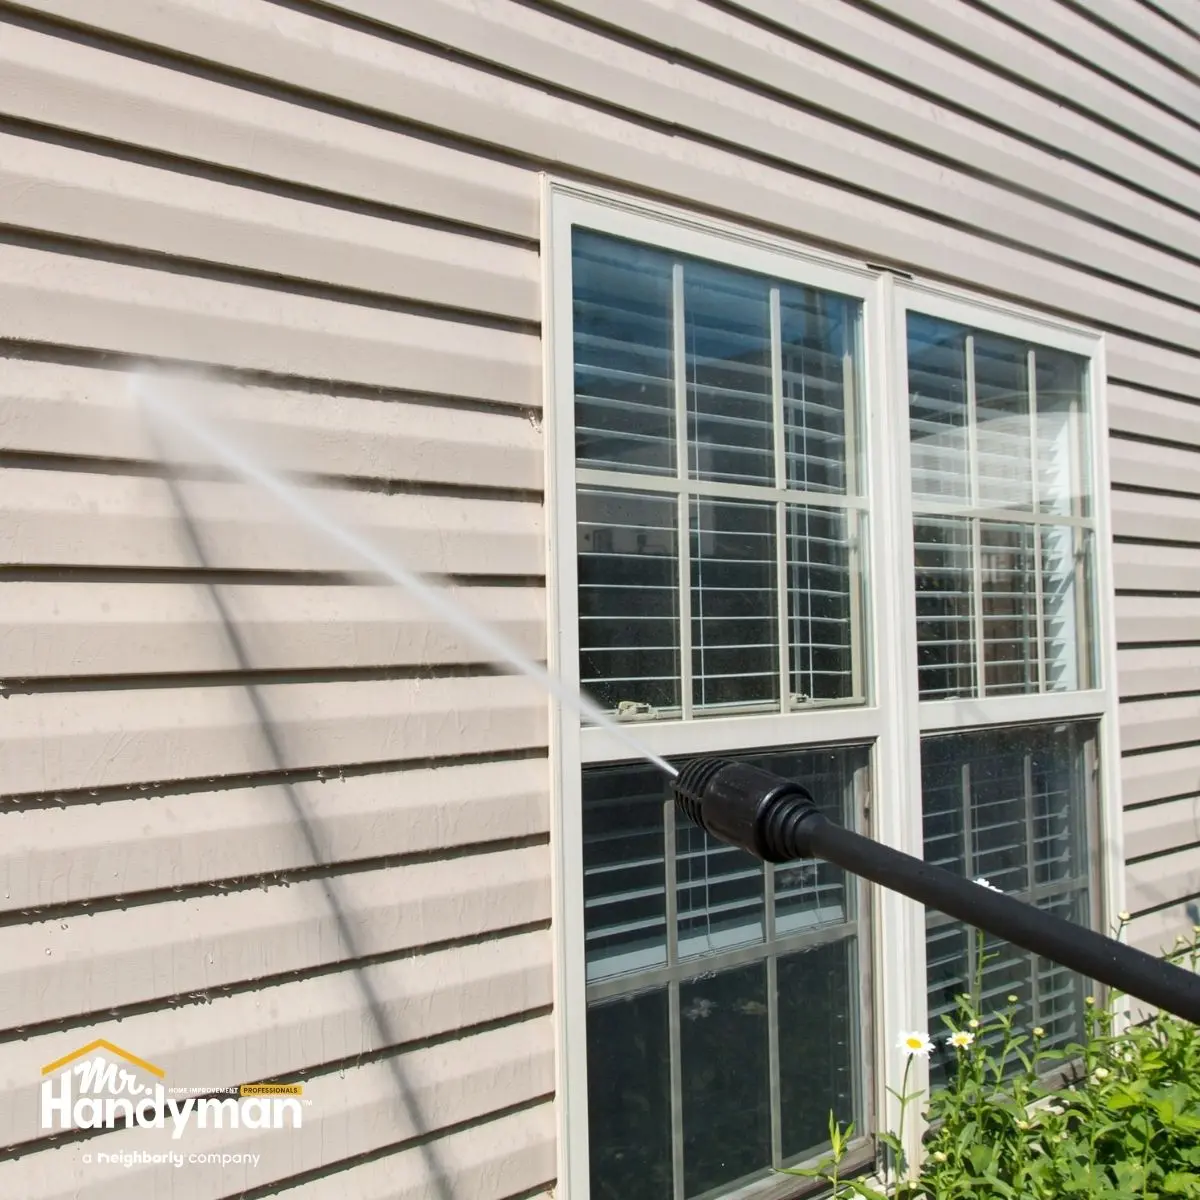
Clean deck surfaces thoroughly before applying any treatments. Power washing removes dirt, mildew, and failed finish, but use appropriate pressure settings to avoid damaging wood fibers. Too much pressure splinters softwood decking and raises grain. After cleaning, allow the deck to dry completely—typically three to five days depending on weather—before applying stain or sealer. Wood must be dry for products to penetrate properly; sealing damp wood traps moisture that promotes rot.
Porches face similar preparation needs. Inspect painted porch floors for peeling or failed paint. Water that enters through paint cracks sits between paint and wood, causing rot from underneath. If paint is failing extensively, plan to strip the floor completely, address any rot, and repaint rather than attempting to patch over failures. Porch ceilings often have water damage from roof leaks above; check for staining, soft spots, or missing sections that indicate ongoing moisture problems.
Examine pergolas, arbors, and gazebos for winter damage. These structures face full weather exposure without the protection that roof overhangs provide for house components. Check posts for rot at ground contact points, verify that overhead beams remain securely attached, and look for loose or damaged lattice. Many older outdoor structures were built with inadequate fasteners or have fasteners that have corroded—reinforce connections before weight loads from climbing plants or summer storms stress weakened joints.
Service Outdoor Mechanical Systems
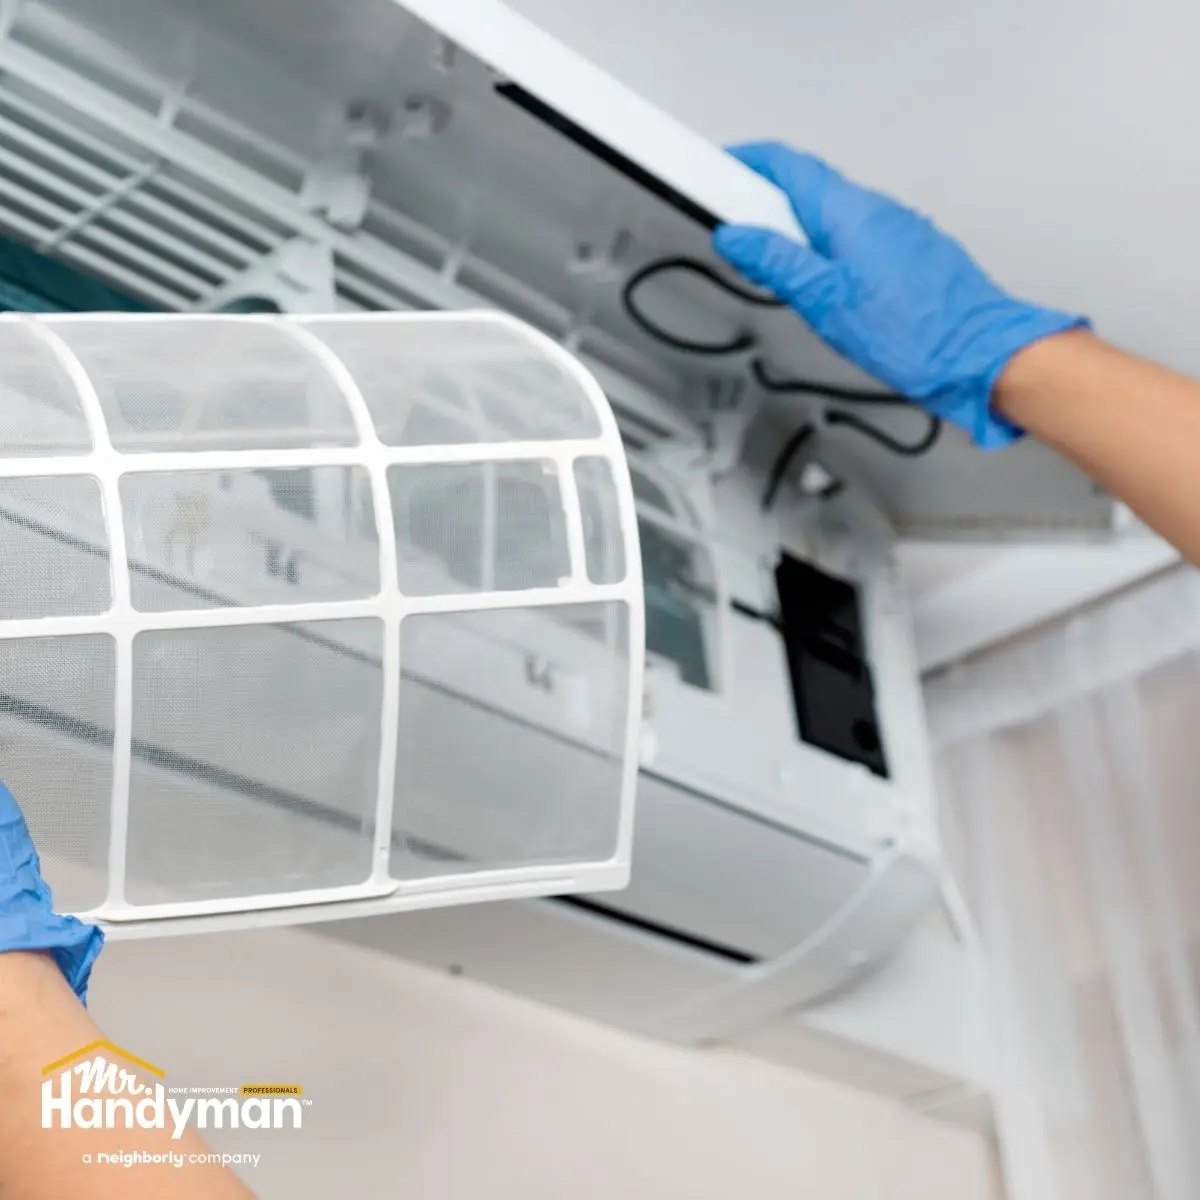
Air conditioning condensers sat unused all winter and need preparation before cooling season. Remove the protective cover if you installed one, then clear all debris from around and inside the unit. Leaves, seeds, and dirt accumulate in condenser coils and reduce efficiency. Straighten any bent fins using a fin comb—damaged fins restrict airflow and make the system work harder. Verify that the unit sits level; settling soil tilts condensers over time, affecting refrigerant flow and compressor operation.
Clear vegetation from around condensers. Plants and shrubs restrict airflow and reduce system efficiency. Maintain at least two feet of clearance on all sides. Trim back any branches overhanging the unit—falling leaves and debris cause ongoing maintenance problems. Check the concrete pad beneath the condenser for cracks or settling that might worsen and require releveling or replacement.
Pool equipment needs thorough spring preparation if you have an in-ground or above-ground pool. Inspect pumps, filters, and heaters for winter damage. Check for cracked housings, leaking seals, or corroded electrical connections. Verify that plumbing connections remain tight and that no pipes cracked from freezing. Many pool owners in the region don't properly winterize systems, leading to expensive spring repairs that could have been prevented with basic fall maintenance.
Irrigation systems require activation and testing before regular use begins. Turn on each zone individually and walk the entire circuit looking for broken sprinkler heads, leaking connections, and coverage gaps. Winter frost heaves push heads up while settling pushes them down—neither position provides proper coverage. Check the controller programming and replace the backup battery if it hasn't been changed in the past year. Adjust spray patterns and timing as needed based on landscape changes or updated watering requirements.
Exterior lighting fixtures accumulate moisture during winter that corrodes sockets and connections. Remove light covers, clean fixtures thoroughly, and check for corrosion or water damage. Replace any cracked lenses or damaged gaskets that allow moisture entry. Test all bulbs and replace burned-out ones. Low-voltage landscape lighting systems often have multiple failures after winter—check transformers, buried wire connections, and individual fixture operation throughout the system.
Prepare Landscaping Areas
Spring preparation of planting beds and lawn areas protects your home's foundation and prevents moisture problems. Pull mulch back from foundation walls and siding—mulch should never contact wood components. Maintaining a gap prevents moisture transfer that rots siding and trim. Check that mulch depth doesn't exceed three inches; excessive mulch creates overly moist conditions that encourage fungal growth and insect activity.
Verify that landscape edging directs water away from foundations. Many properties have decorative edging that actually creates dams, preventing water from draining away from houses. Remove or modify edging that traps water against foundations. Establish clear drainage paths that carry water toward swales, storm drains, or lower areas of the property.
Trim shrubs and trees away from houses. Branches touching siding create moisture problems and provide pest access to structures. Maintain at least eighteen inches of clearance between vegetation and siding. Remove any vines growing on houses—while attractive, they trap moisture, damage siding, and create entry points for insects and rodents. Tree branches overhanging roofs drop debris into gutters and provide squirrel access to attics; trim them back to maintain several feet of clearance.
Inspect lawn areas near foundations for settling or erosion that creates negative grades. Fill settled areas and establish proper drainage slopes before planting grass seed. Spring is ideal for lawn renovation work—temperatures support seed germination and natural rainfall reduces watering requirements. Address drainage and grading issues now rather than fighting recurring water problems throughout the season.
Frequently Asked Questions
How early in spring can I start exterior preparation work?
Begin exterior preparation whenever daytime temperatures consistently reach the fifties. Many tasks like debris removal, inspection, and cleaning proceed at any temperature. Projects involving paint, stain, caulk, or sealants require checking product labels for minimum application temperatures—typically fifty degrees, though some products specify higher minimums. Late March through April offers ideal conditions for most preparation work in the Mid-Atlantic region.
Should I hire professionals for exterior preparation or handle it myself?
Simple tasks like gutter cleaning, debris removal, and basic inspection are manageable for most homeowners. Projects requiring roof access, structural repairs, significant caulking work, or specialized equipment benefit from professional service. Professionals spot problems homeowners miss and complete work correctly the first time. Consider your comfort level with heights, available time, and tool access when deciding which tasks to hire out.
What exterior preparation tasks are most important for older homes?
Older homes in our region require special attention to water management—gutters, downspouts, foundation drainage, and grading. Check siding and trim carefully for rot, especially around windows and doors. Verify that basement and crawlspace areas remain dry. Many older homes lack adequate foundation drainage and have settled over decades, creating water problems that worsen each year without intervention. Address moisture issues before they cause structural damage.
How do I know if exterior damage requires immediate repair or can wait?
Active water intrusion, structural concerns, and safety hazards require immediate attention. Missing shingles allowing water entry, foundation cracks leaking into basements, loose railings, and rotted steps can't wait. Cosmetic issues like minor paint failures, small caulk gaps, or surface damage to driveways can be scheduled for later repair without risking significant additional damage. When uncertain, have a professional evaluate the situation.
What's involved in preparing a home that's been vacant through winter?
Vacant homes need thorough inspection of all systems before seasonal preparation begins. Check for freeze damage to plumbing, verify that the roof remained intact, inspect for pest intrusion, and assess foundation and crawlspace conditions. Vacant homes often experience problems that occupied homes avoid because no one notices issues as they develop. Budget extra time and potentially extra money for repairs that may have gone undetected during vacancy.
Can spring preparation prevent the same problems from recurring next winter?
Many recurring problems stem from inadequate systems rather than normal wear. Gutters that overflow every winter are undersized or improperly pitched. Foundation cracks that reopen annually indicate ongoing structural movement or drainage problems. Identify root causes during spring preparation and address them rather than repeatedly repairing symptoms. Proper fixes cost more initially but eliminate recurring repair cycles.
Preparing your home's exterior for warmer weather protects your investment and prevents minor winter damage from escalating into major problems. Systematic attention to each building system ensures your home enters the active season in optimal condition.
Mr. Handyman of Martinsburg and Charles Town
