In August 2019, NerdWallet found that 61% of homeowners surveyed had already completed a remodeling project by March 2020. At the same time, only 37% took on the improvement themselves.
We’re sure there are various remodeling projects you want/need to tackle, but you’re currently focused on updating your bathroom with simple touches like new tile. If you’re a perpetual do-it-yourselfer, you’re probably already aware this isn’t a particularly challenging DIY project, but it can be very nuanced.
You can’t just use any old grout or tiling tools you find at your local home improvement store. Cutting corners won’t get you the magazine-worthy space you’re hoping for. Instead, you’ll end up with some common bathroom tile installation problems.
Fortunately, Mr. Handyman of Memphis is here to help you avoid the mistakes below and show you how to hide tiling mistakes if you’ve already made them.
1. Not Preparing the Wall
Planning is important for any home improvement project you want to start. If you’re not properly preparing to do the job right, why do it at all? Many forget to prepare the walls before tiling, which can lead to leveling issues and the adhesive and tiles not adhering to the wall correctly. You should always use a gentle wall cleaner to wipe away grease, dirt, and dust to ensure a clean surface that works with you and not against you.
2. Haphazardly Applying Caulking
We know it’s easy to try to speed through the process of tiling. After all, it can be time-consuming, and we understand that you have other projects and household tasks that you need to handle. However, a common tile installation mistake we see often is messy caulking.
Once your grout dries and everything looks perfect, the last step is to caulk the corners and tiny gaps above sinks, tubs, or shower floors. You’ll want to ensure you have a tight seal that will stave off mold growth between the tiles and wall. Before you start caulking, clean the area to remove old caulk (if you’re re-caulking). Apply the new caulk, wet your finger, and smooth out the caulking material starting from the corner.
3. Skipping a Backer Board
Every single step in the tiling process is vital. Skipping steps can compromise the quality and longevity of your tiles. A common mistake you can avoid when tiling yourself is to use a backer board, especially for tile in areas with a lot of moisture. A backer board keeps everything sturdy and prevents water from seeping into tiny cracks, penetrating and weakening drywall, or causing mold growth.
4. Laying Out Tile Incorrectly
We consider tiling to be an art form. When you arrange tiles in a specific way or create a unique layout, the finished product can be stunning and eye-catching. On the other hand, bad tile layouts can make your bathroom the talk of the town, and not in a good way. Herringbone, step ladder, chevron, and diagonal designs are some of the hardest to achieve without the proper installation technique and direction. Still, precision and patience will always help you attain the pattern you want and avoid common tile installation problems.
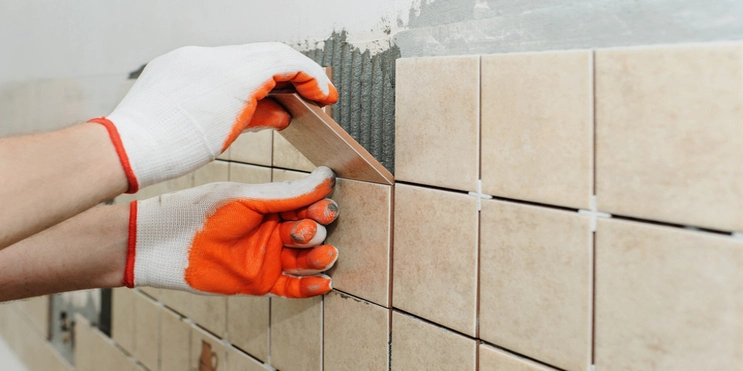
5. Using Improper Tools
The wrong tools can enhance bad tile layout and design, forcing you to redo all your hard work. For instance, using the wrong power tools to cut your tile can cause cracks and expensive damage. We recommend investing in high-quality tools to do the job right the first time.
Some tools you’ll need for the job include:
- Cleaning rags
- Diamond wet saw
- Face mask
- Rubber grout float
- Safety glasses
- Sponges
- Tile cleaner
- Tile trowels
- Wet and dry vacuum
- Work gloves
Purchasing the correct equipment will protect the durability of your tiles and workmanship.
6. Skimping On Quality Grout
The beauty of your tile design can be completely overshadowed when you try to save money on cheap grout material and poor installation. Additionally, clean grout lines (like immaculate caulking) will improve your overall design.
7. Creating Grout Haze
Can you imagine being completely finished with your bathroom tile installation, excited about the finished look, only to discover strange, glossy streaks on the tile’s surface? We call this phenomenon grout haze, which happens when tile grout residue dries on the tiles because of improper cleaning and polishing. However, porous tile materials like marble, slate, and travertine are infamous for grout haze.
Before grouting, consider your tile’s texture and porosity and purchase a grout release product that creates a protective coating over the tile to prevent grout haze. If you’ve already noticed grout haze forming, you’ll need to repair and regrout the tile.
How Do You Avoid Bathroom Tile Mistakes? Hire Mr. Handyman of Memphis!
Installing tile anywhere in your home can be tedious and requires several hours to complete. You can’t rush through the process and expect stunning and lasting results. Hire Mr. Handyman of Memphis to arrive with the proper tools, equipment, and material to complete the job quickly and efficiently. By the end, you’ll have a revitalized bathroom that matches your style (sans all the common tile installation problems).
Call us to speak with a professional handyman in Memphis or schedule service today.
