A grab bar that pulls out of the wall under load is worse than no grab bar at all. It creates a false sense of security and removes the instinct to find a steadier handhold at the moment it's needed most. Grab bar installation done correctly means anchoring into wall studs or blocking, placing bars where the body actually transitions between positions, and selecting hardware rated to support real-world weight loads. At Mr. Handyman serving Palm Harbor, Clearwater, and Largo, our team handles grab bar installation and replacement throughout Pinellas County. Here's what this guide covers:
- Why the bathroom is the highest-risk room in the home for fall injuries
- Where grab bars should be placed for each bathroom location
- Why anchoring into studs or blocking is non-negotiable
- What to do when there's no stud in the right location
- How professional installation differs from a DIY bar kit
Why Bathroom Grab Bars Matter More Than Most Homeowners Realize
The bathroom is the most hazardous room in the home for fall-related injuries across all age groups, not just older adults. A CDC analysis of nationally representative emergency department data found that an estimated 234,094 nonfatal bathroom injuries were treated in U.S. emergency rooms in a single year, with falls accounting for more than 80% of those injuries. Only 19% of U.S. homes had grab bars installed. The tub and shower area generated the highest injury rates, followed by the toilet. These are exactly the locations where grab bars provide the most meaningful protection.
For older adults in Palm Harbor, Clearwater, and Largo, communities with a significant and growing population of adults 65 and older, the stakes are higher. Falls that result in hip fractures or head injuries frequently lead to hospitalizations, rehabilitation stays, and in some cases permanent changes in living situation. A properly installed grab bar system in the bathroom is one of the most direct and cost-effective interventions available for keeping people safely at home.
5 Grab Bar Placement Locations That Actually Prevent Falls
Bar placement follows the body's movement through the bathroom, not a general sense of where bars "look right." Each position serves a different mechanical function and needs to be placed at the height and angle that supports the specific transition it's designed for.
1. Inside the Tub or Shower
A horizontal bar mounted on the wall at approximately 33–36 inches from the floor, running the length of the tub or shower, provides a steady handhold during bathing. This bar supports balance while standing, reaching, and repositioning. A second angled or vertical bar at the entry point of the tub or shower, positioned for gripping while stepping over the threshold, addresses the transition moment when fall risk is highest.
- Horizontal bar height: 33–36 inches from floor, following ADA guidance for accessible design
- Entry bar position: Vertical or 45-degree angled, at the point of step-over or threshold crossing
- Length: Minimum 24 inches for horizontal bars to allow grip adjustment
2. Outside the Tub or Shower Entry
A vertical or angled bar on the wall adjacent to the tub or shower entry provides support for the step-in and step-out movement, which is the moment most associated with fall injuries. This bar is distinct from the bar inside the tub. It addresses the transition from the bathroom floor surface to the tub or shower floor, where both footing and balance are unstable simultaneously.
- Position: On the wall immediately beside the entry point, at grip height for the user
- Height: Typically 32–38 inches from the floor for most adults
- Reach: Within comfortable reach before the foot has fully committed to the step
3. Along the Toilet
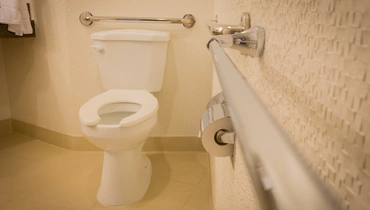
Grab bars beside the toilet support the lowering and rising movement, one of the highest-injury activities in the bathroom for adults over 65. A bar on the adjacent wall at 33–36 inches from the floor and positioned 6–8 inches from the front of the toilet seat supports independent rising without forward momentum or upper-body compensation.
- Side wall bar: 33–36 inches height, 42 inches minimum length
- Rear wall bar: 33–36 inches height, 36 inches minimum length if space allows
- Bilateral bars: When both side walls are accessible, bars on both sides provide the most stable support for users with weakness on one side
4. In the Shower Stall
Walk-in showers and tiled shower stalls benefit from an L-shaped bar configuration: horizontal grab bars along one wall for balance while standing and bathing, and a vertical bar at the entry for the step-in transition. In larger walk-in showers, a horizontal bar on the back wall provides an additional handhold while the user is positioned away from the entry, making it the ideal location for a third bar in a full system.
- Horizontal bar: 33–36 inches, minimum 36 inches long on the primary wall
- Back wall bar: 33–36 inches, minimum 36 inches long for users bathing away from the entry
- Vertical entry bar: 16–18 inches long, positioned at the shower threshold
- L-shaped configuration: Provides both directional and positional support in a single installation
5. Near the Vanity or Sink
Less commonly installed but highly relevant for users who experience dizziness, fatigue, or balance challenges while standing at the sink. A horizontal bar along the side wall adjacent to the vanity provides support during grooming tasks and while moving between the sink and other bathroom areas.
- Height: 33–36 inches, consistent with other bathroom grab bars
- Length: 18–24 inches
- Placement: On the wall to the side of the vanity, not on the vanity cabinet itself
Why Anchoring Is the Part That Can't Be Compromised
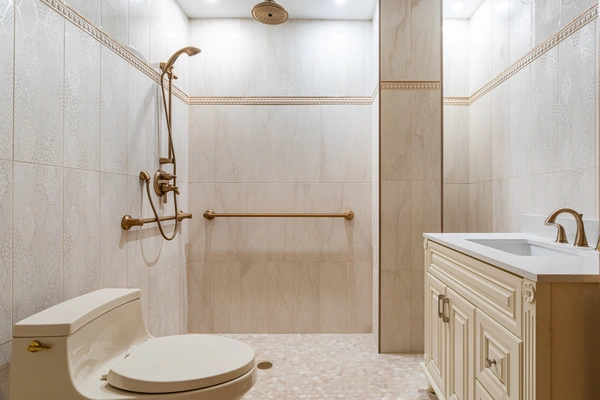
A grab bar is only as strong as what it's anchored into. Most bathroom walls are finished with tile over cement board or drywall, neither of which can support a person's weight on its own. Bars that are screwed into tile and drywall alone will pull free under dynamic load, which is precisely when a person has lost balance and is applying sudden, directional force.
The correct anchoring approaches are:
Into wall studs: The most reliable method. Studs are typically located 16 or 24 inches on center in residential construction. When the desired bar location aligns with studs, stainless steel screws driven through the mounting plate into solid framing provide the secure, corrosion-resistant connection needed to support real-world load. Drilling pilot holes through the tile and into the framing before driving screws prevents tile cracking and ensures proper alignment.
Into blocking: When studs are not in the right location, which is common in bathrooms where tile layout and grab bar placement don't align with framing, blocking is installed behind the wall. This requires opening the wall on the other side, cutting a horizontal piece of 2x6 or 2x8 lumber between studs at the correct height, securing it to the framing, and closing the wall before tiling and bar installation. Done correctly, blocking provides a continuous anchoring surface that allows bars to be placed exactly where they're needed.
Into specialty anchors: When studs and blocking are both unavailable, heavy-duty toggle bolts or specialized anchors rated for the specific wall assembly are the correct solution. Standard drywall anchors are not adequate for grab bar installation. Heavy-duty toggle bolts expand behind the wall surface to distribute load, and when specified for the actual wall assembly, they outperform standard anchors significantly. They're acceptable for supplemental bars in lower-load applications when installed correctly.
In wet areas, silicone caulk applied around mounting flanges after installation prevents water from working behind the tile and into the wall assembly, protecting the anchor points from moisture damage over time.
Suction-cup or clamp-on bars are temporary aids, not permanent safety solutions. They're not rated to support full body weight and are not a substitute for properly installed permanent hardware.
What Professional Grab Bar Installation Includes
| Step | What Happens |
|---|---|
| Assessment | Bar locations are determined based on user height, movement patterns, and bathroom layout |
| Stud location | Wall framing is mapped to identify anchor options at each proposed bar location |
| Blocking installation | Where studs don't align, blocking is added behind the wall before bar installation |
| Tile drilling | Tile is drilled cleanly with a diamond or carbide bit to avoid cracking the surrounding field |
| Mounting | Bars are set level, fastened with corrosion-resistant hardware, and tested to confirm secure connection |
| Load testing | Every installed bar is load-tested before the job is considered complete |
We're proud to serve homeowners in Clearwater, FL, and nearby communities including Palm Harbor, Largo, Dunedin, Tarpon Springs, Safety Harbor, and beyond with grab bar installation and aging in place modifications.
Frequently Asked Questions About Grab Bar Installation
Palm Harbor, Clearwater, and Largo homeowners ask these questions most often when they're planning a grab bar installation for themselves or a family member.
How much weight do grab bars need to support?
ADA standards require grab bars to support a 250-pound static load and a 250-pound vertical load. A person catching a fall applies force significantly above their body weight due to momentum, so bars anchored only into drywall or tile, regardless of how solid they feel when tested by hand, are not adequate for real-world fall prevention.
Can grab bars be installed without damaging tile?
Yes. Drilling through tile requires a diamond or carbide drill bit, a hammer drill set to a low, steady speed, and careful pressure to avoid cracking. Drilling pilot holes through the tile surface before driving anchors or screws gives the fastener a clean path and prevents tile fracture from misaligned force. An experienced installer drills through the tile cleanly, keeps the drill bit cool with water during drilling tile on harder surfaces like porcelain, and seals around the mounting plate with silicone caulk to prevent water intrusion behind the wall. The alternative of placing bars only where grout lines fall limits placement options and often means the bar isn't in its ideal location.
Do I need blocking if my wall already has studs in the right location?
No. When studs align with the needed bar location, blocking is unnecessary. The challenge is that stud locations are fixed at 16 or 24 inches on center, and the ideal grab bar position is determined by the user's height and the bathroom's specific layout. Those two sets of constraints often don't line up, and blocking solves that gap by creating a dedicated anchoring surface exactly where the bar needs to go.
Should grab bars match bathroom fixtures?
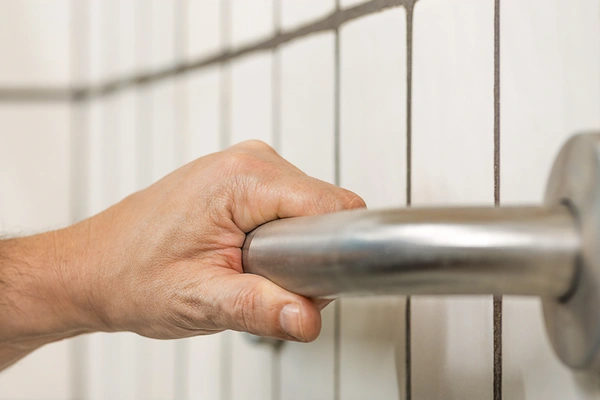
Grab bars are available in finishes that match standard bathroom fixtures, including brushed nickel, polished chrome, oil-rubbed bronze, and matte black are all common. Matching finish is a reasonable aesthetic preference and doesn't affect function. More important than finish is bar diameter: ADA-compliant bars have a 1.25–1.5 inch diameter, which allows a secure grip without the hand fully closing around the bar.
Schedule Your Grab Bar Installation
A bathroom without properly anchored grab bars carries real fall risk for every member of the household, not just older adults. Mr. Handyman serving Palm Harbor, Clearwater, and Largo installs grab bars to ADA placement standards with proper anchoring into studs, blocking, or rated anchors for every installation. Every job is backed by the Neighborly Done Right Promise.
Schedule your grab bar installation today and get your bathroom set up to actually prevent falls.